range Pi User Manual Copyright reserved by Shenzhen Xunlong Software Co., Ltd
46
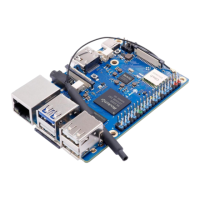
11) Then start burning the Linux image to the SSD
a. First, connect the development board to the Windows computer through the
USB2.0 male-to-male data cable. The position of the USB2.0 programming
interface of the development board is shown in the figure below
b. Make sure that the development board is not connected to the power supply and
inserted into the TF card and eMMC
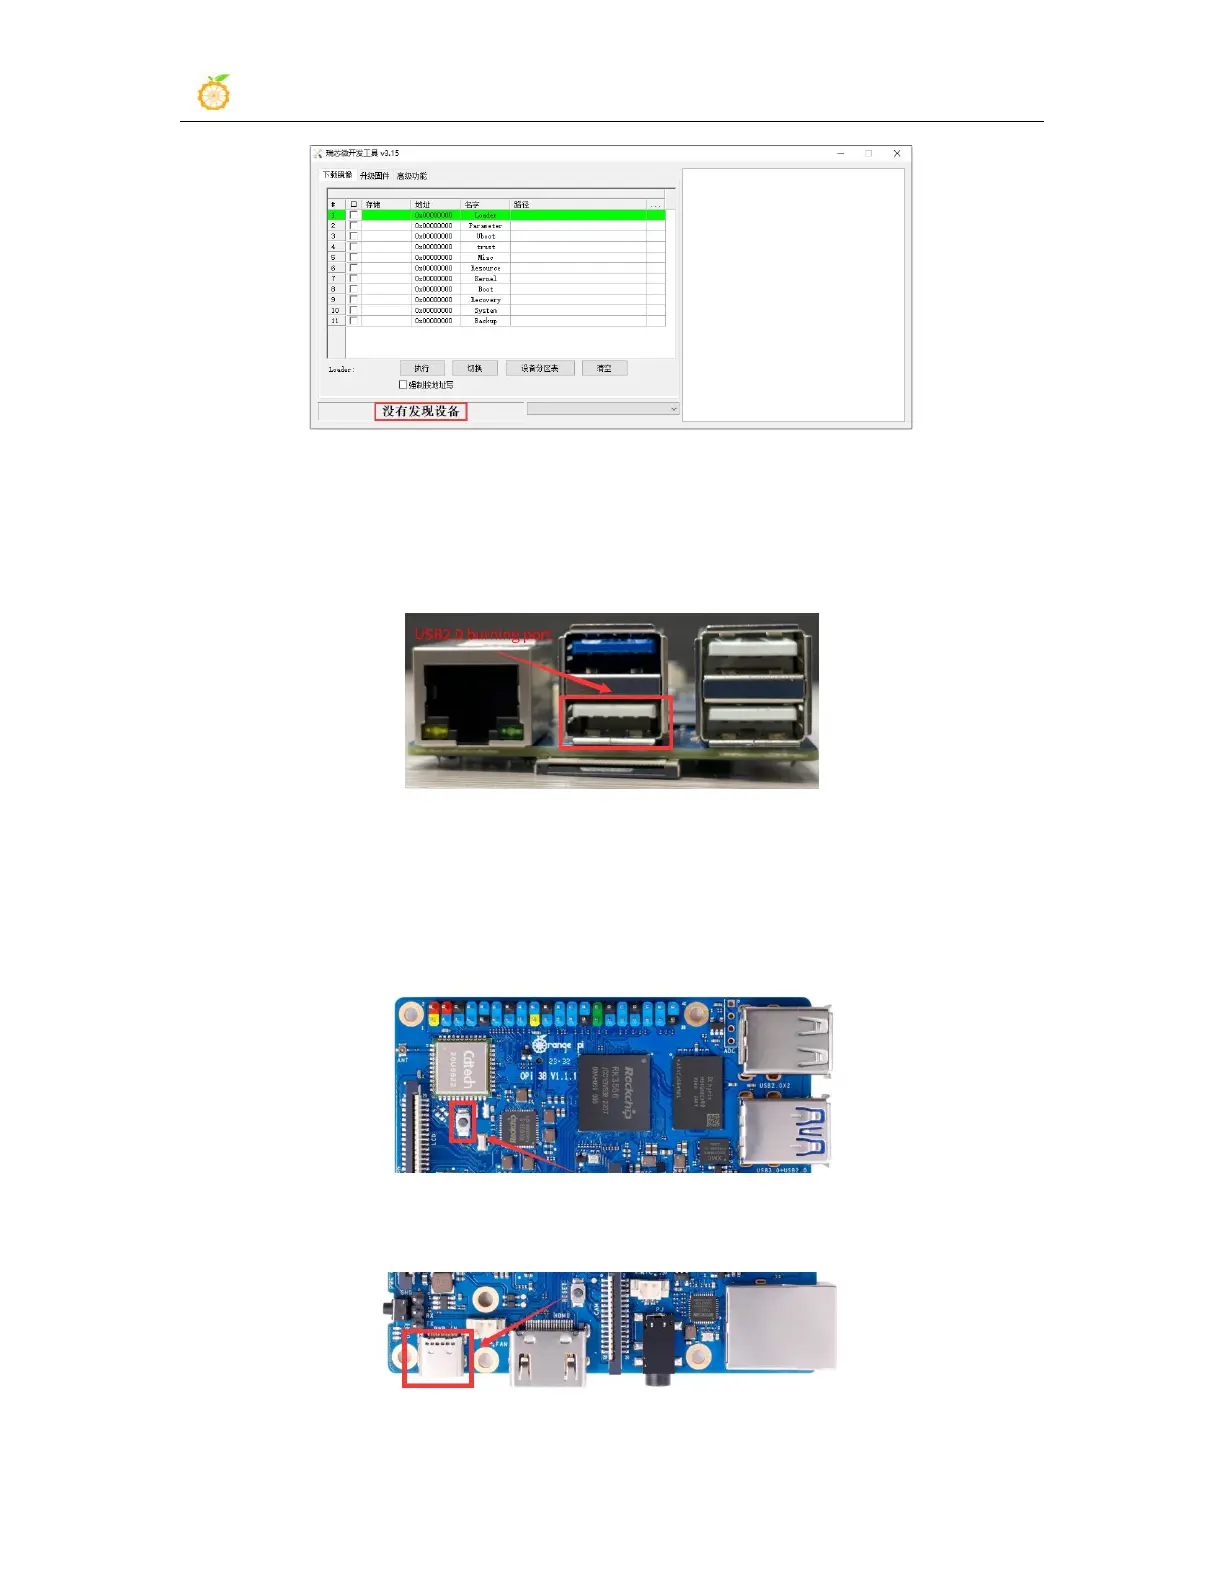
c. Then press and hold the MaskROM button on the development board, the
position of the MaskROM button on the development board is shown in the
figure below:
d. Then connect the power supply of the Type-C interface to the development board,
and power on, and then release the MaskROM button
e. If the previous steps are successful, the development board will enter the
 Loading...