User’s Manual
14
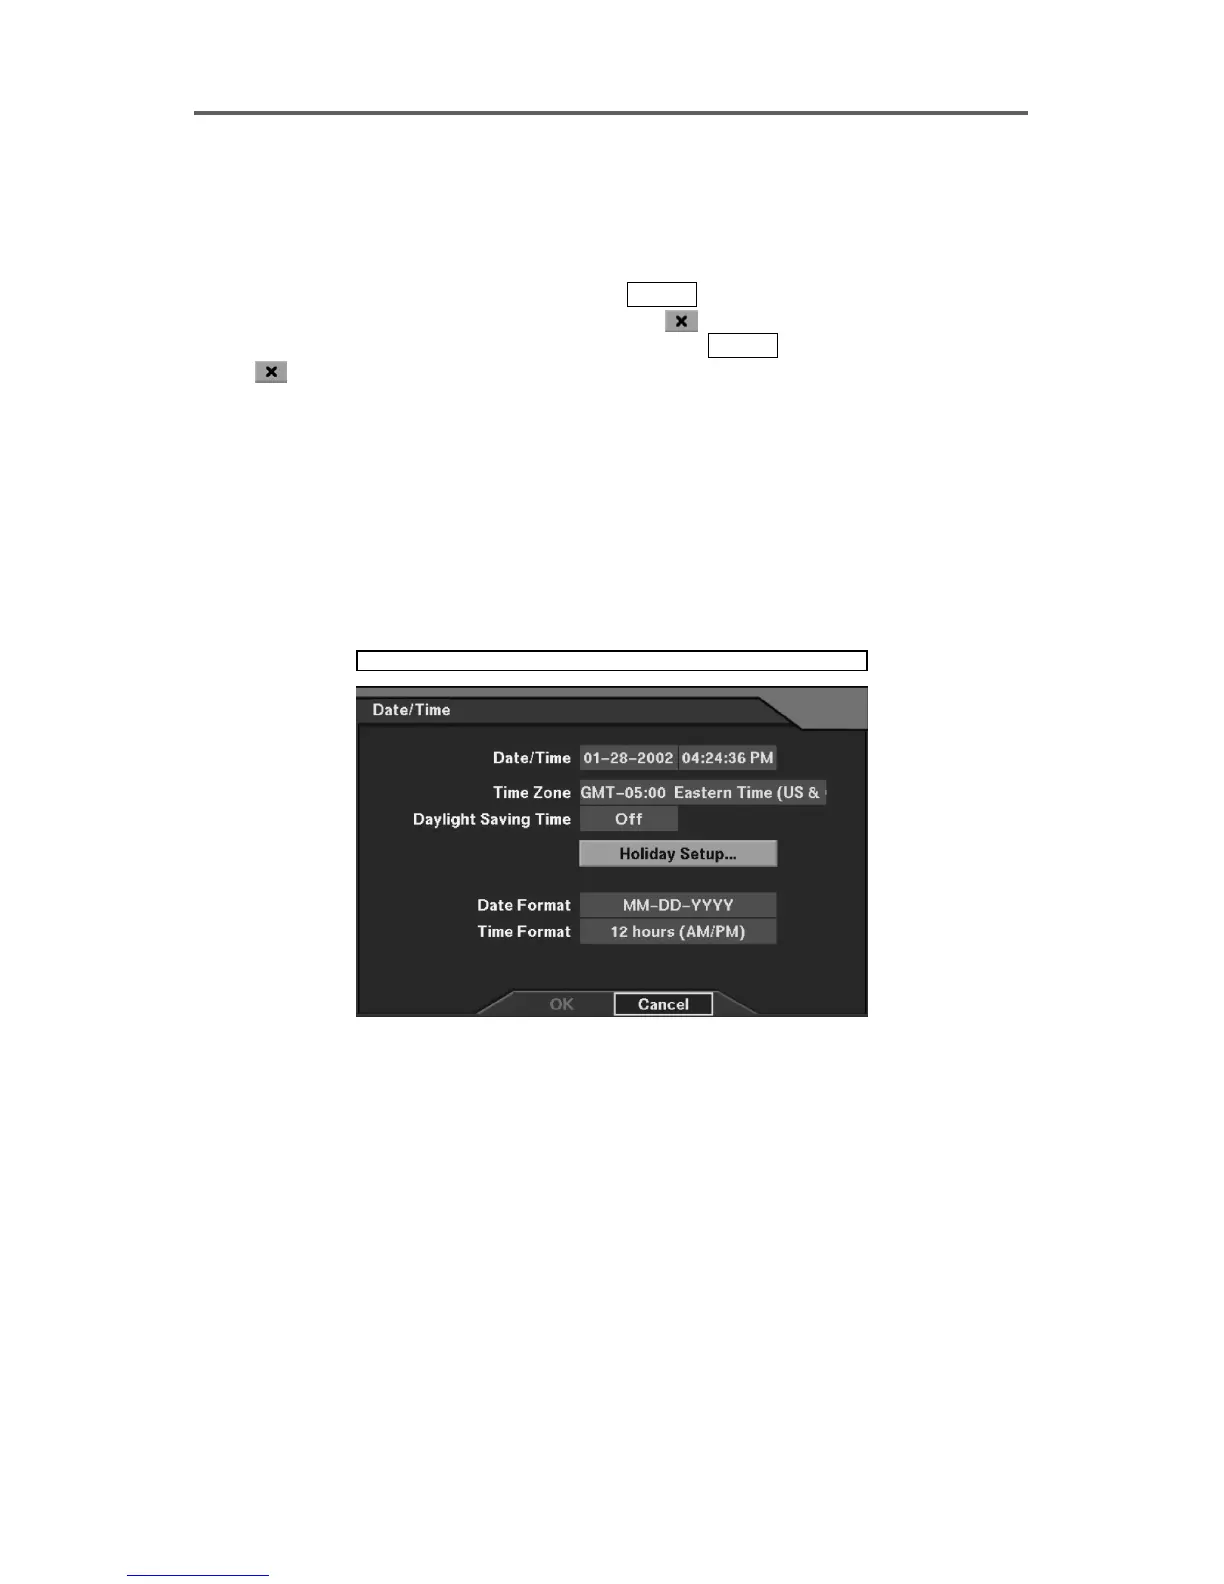
NOTE: The system time and daylight saving time settings cannot be changed at the
same time. Set the use of daylight saving time first, and then change the system time.
The DVR will restart twice in order to change both the system time and the daylight
saving time settings.
4. Move to the Holiday Setup button, and press
ENTER to display the Holiday Setup dialog
box. Set up the holiday schedule using Add and
buttons. To add holidays, press
the Add button, and set the date then add it by pressing
ENTER. To delete holidays, press
the
button next to the target date.
NOTE: Update the holiday(s) every year when the holiday information has been
changed for the current year.
5. Move to the Date Format field to select the date format (MM-DD-YYYY, DD-MM-YYYY,
YYYY-MM-DD, MM/DD/YYYY, DD/MM/YYYY, or YYYY/MM/DD).
6. Move to the Time Format field to select the time format (24 Hours/12 Hours (AM/PM)).
CAUTION: If you change the time to the past, recorded images dated later than the
new date/time are deleted immediately.
System ► Date/Time
Figure 6 Date/Time Setup Dialog