7.3
FINAL DRIVE
7
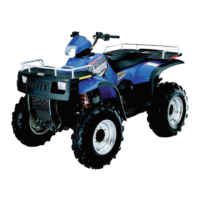
2. From the back side, tap on the outer bearing race with a drift
punch in the reliefs as shown.
NOTE: Drive bearing out evenly by tapping on outer
race only. Once bearing is at bottom of casting,
support casting on outer edges so bearing can be
removed.
3. Inspect the bearing.
NOTE: Due to extremely close tolerances and
minimal wear, the bearings must be inspected
visually, and by feel. While rotating bearings by
hand, inspect for rough spots, discoloration, or
corrosion. The bearings should turn smoothly and
quietly, with no detectable up and down movement
and minimal movement sideways between inner and
outer race.
4. Inspect bearing housing for scratches, wear or damage.
Replace housing if damaged.
Assembly
1. Support bottom of hubstrut housing.
2. Start bearing in housing.
3. Press bearing into place until outer race bottoms on
housing.
4. Install snap ring into groove.
NOTE: Follow steps 2-6 for wheel/hub installation in
‘Front Drive Shaft (CV) Service / Installation’
FRONT DRIVE SHAFT (CV) SERVICE
Removal
1. Set the ATV in park. Remove hub dust cap.
2. Remove cotter pin.
3. Loosen the hub retaining nut.
4. Loosen - but do not remove - the wheel nuts.
5. Safely lift and support the front of the ATV.
6. Remove wheel.
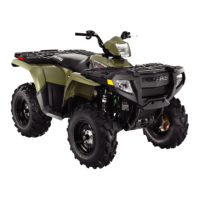
7. Remove the two brake caliper attaching bolts.
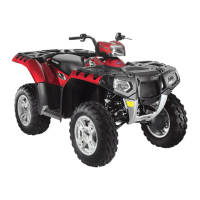
8. Remove hub.
CAUTION
When using an arbor press be sure to press only on
the outer race to avoid bearing damage.
CAUTION
Serious injury could occur if machine tips or falls.
CAUTION
Do not hang the caliper by the brake line. Use wire
to hang the caliper to prevent possible damage to
the brake line.

 Loading...