7.31
FINAL DRIVE
7
Service
NOTE: The following procedure applies to BOTH
inner and outer CV joints.
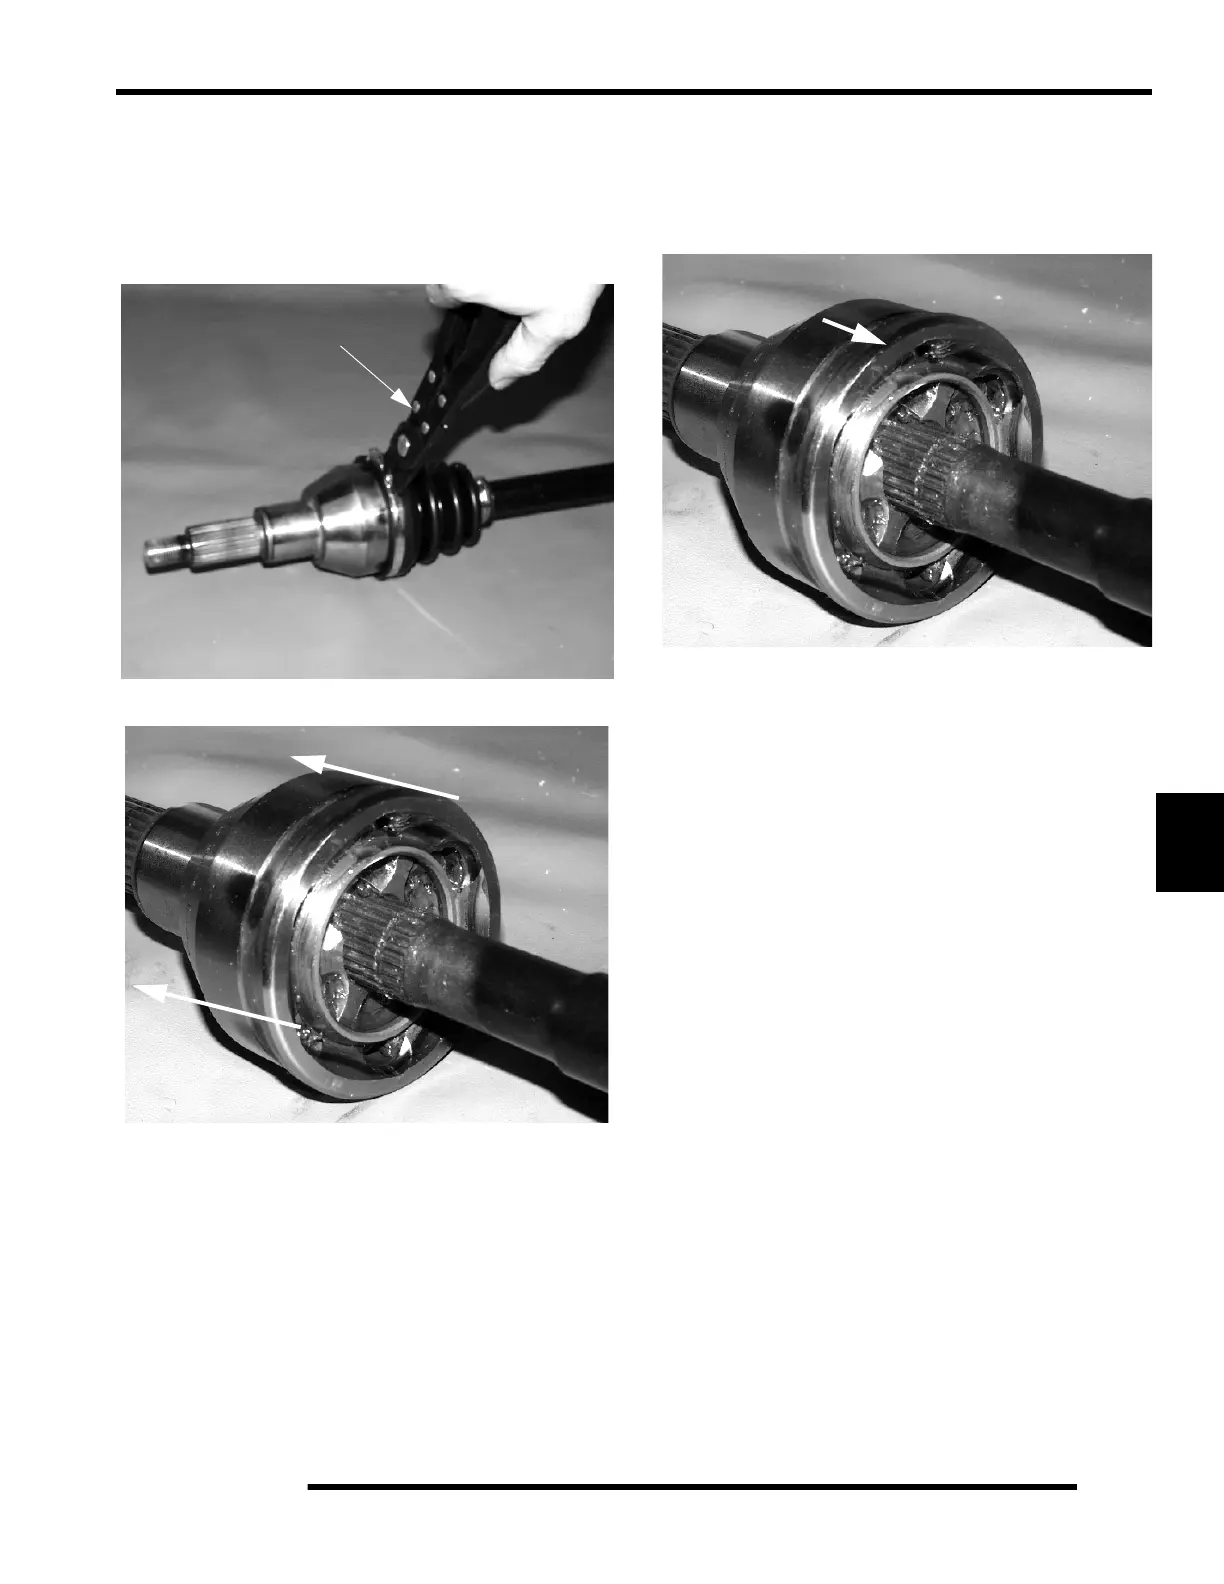
1. Remove clamps from rubber boot(s) using a CV Boot
Clamp Pliers (A) and slide back boot.
2. Tap CV housing off shaft with a soft-faced hammer.
3. Place a new compression ring in the groove of the CV shaft.
4. Refit CV joint on interconnecting shaft by tapping with a
soft-faced hammer on the joint housing. Take care not to
damage threads on the outboard CV joint. The joint is fully
assembled when the compression ring is seated in the
groove on the CV joint.
5. Remove excess grease from the CV joint's external surfaces
and position the large boot joint over the CV housing,
making sure boot is seated in groove. Position clamp over
boot end and make sure clamp tabs are located in slots.
6. Install and tighten large boot clamp with boot clamp pliers.
7. Remove excess grease from the CV shaft’s external
surfaces and position the small boot joint over the CV shaft,
making sure boot is seated in the shaft groove. While
pulling out on the CV shaft, fully extend the CV joint and
slide a straight O-ring pick or a small slotted screw driver
between the small end of the boot and the shaft. This will
allow the air pressure to equalize in the CV boot in the
position that the joint will spend most of its life. Position
the small clamp over boot end and make sure clamp tabs
are located in slots.
NOTE: Release any air pressure which may have
built up inside the boot has been released. The air
should be released after the joint has been centered
properly.
8. Tighten small boot clamp using boot clamp pliers.
A
Tap CV housing off shaft
Tap joint onto shaft
 Loading...