10.4
ELECTRICAL
4. High/Low Battery Voltage
• This warning usually indicates that the ATV is being
operated at an RPM too low to keep the battery
charged. A low battery warning may also occur under
normal operation if the machine is at idle and high
electrical load (lights, cooling fan, accessories) is
applied. Driving at a higher RPM or connecting a
battery charger will usually clear the warning. This
indicator may also turn in the event of an overcharging
situation, such as a faulty voltage regulator.
5. Engine Hour Display Indicator
• Displays number of hours of engine operation.
6. AWD Indicator
• Illuminates when the electrical portion of the AWD
system is enabled.
7. Gear Indicator
• Specifies what position the shift lever and transmission
are in. This area is blank if a fault occurs.
8. Mode Indicator
• Indicates which modes are being utilized.
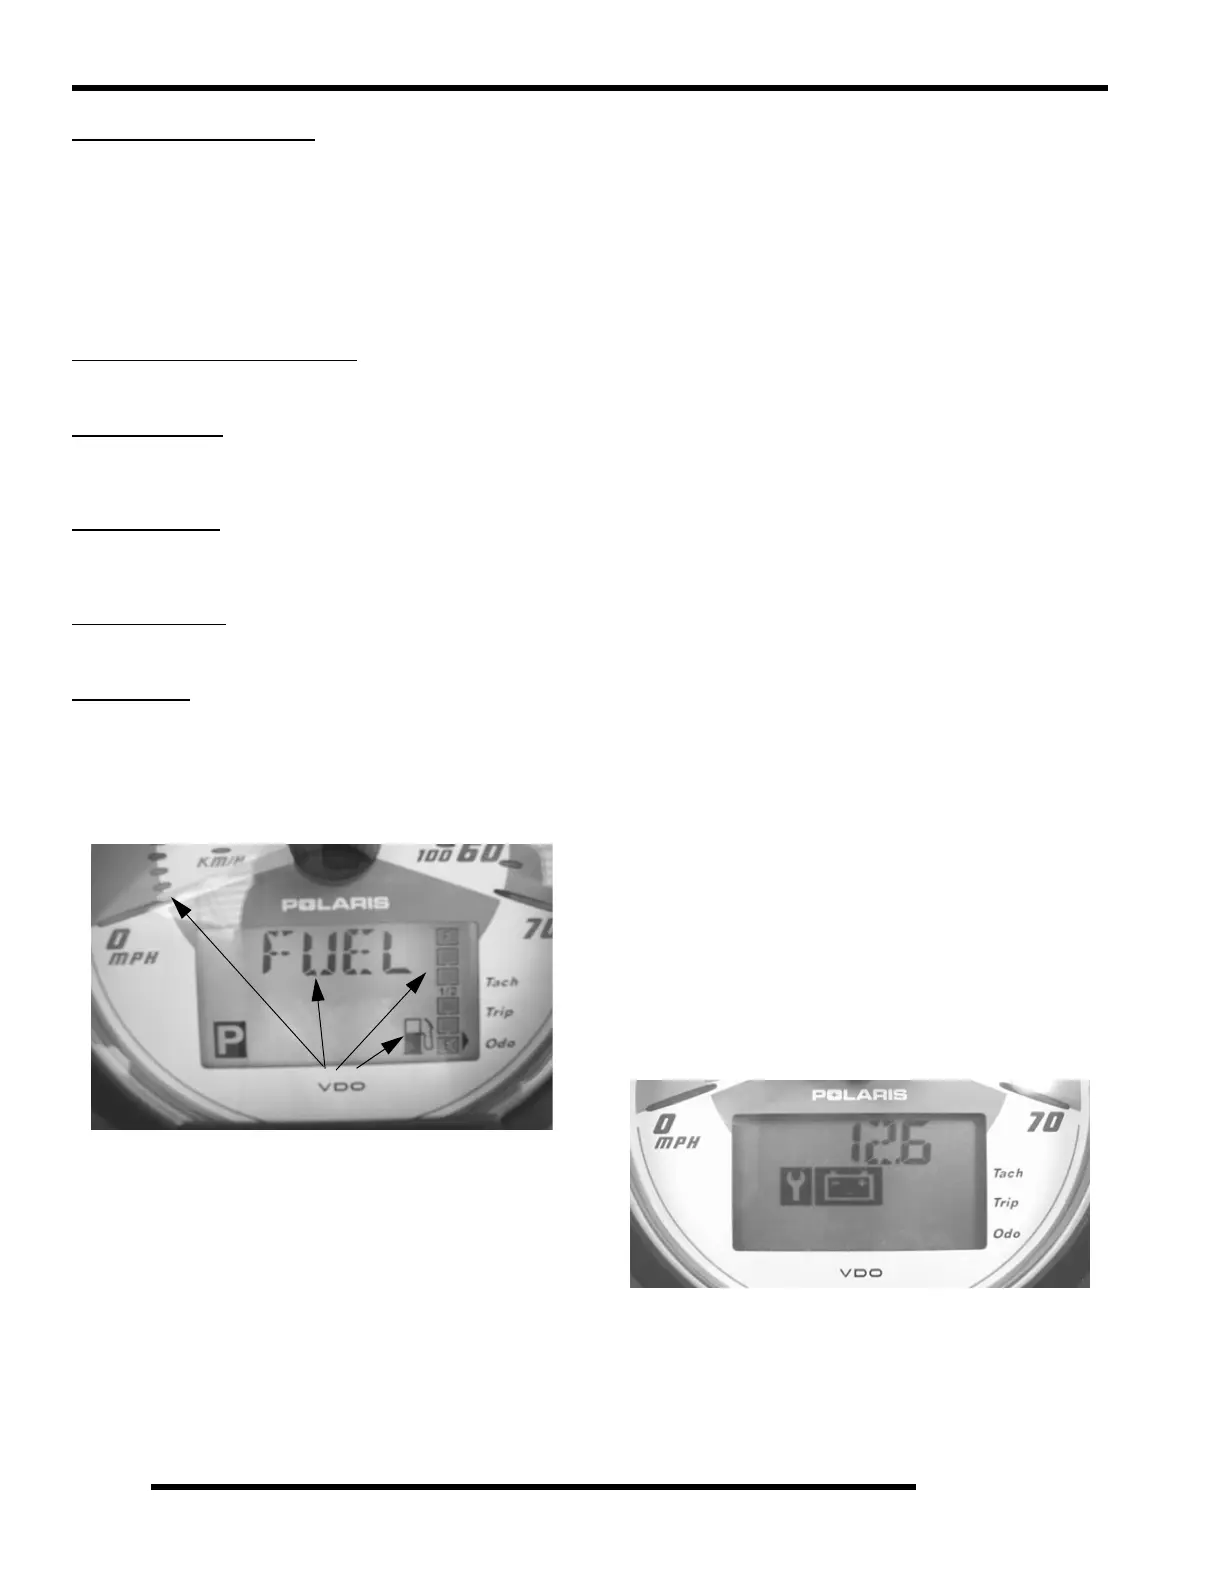
9. Fuel Gauge
• The segments of the fuel gauge indicate the level of fuel
in the fuel tank. When the last segment clears, a low
fuel warning is activated. All related icons will flash,
“FUEL” will display in the LCD, and the speedometer
needle will blink. If riding, be sure to refuel
immediately.
Instrument Cluster Diagnostic Mode
NOTE: This gauge features auto shut-off protection
if the voltage on the DC bus is excessive. This is
usually the result of an open battery condition, and
the gauge is designed to survive such an event.
NOTE: If the gauge will not indicate what gear it is in
and will not allow AWD operation, AWD can still be
enabled by holding in the mode/override button.
1. Turn the key switch off and wait 10 seconds.
2. Set the park brake and shift the transmission to neutral.
3. Hold the mode/reverse override button as you turn the key
switch on.
4. Release the switch as soon as the display is activated.
Use the mode/reverse override button to toggle through the
diagnostic screens.
NOTE: The initial screen display refers to the
software version installed on your ATV. This
information is only displayed briefly.
Screen 1 - Clock: This screen allows for setting the time of day.
To reset the clock:
1. Enter the diagnostic mode.
2. Toggle to the clock screen.
3. Press and hold the mode button until the hour display
flashes. Release the button.
4. Press and release the mode button once to advance the
setting by one hour. Press and hold the mode button to
advance the hours quickly.
5. When the desired hour is displayed, wait approximately
four seconds, until the minute display flashes.
6. When the display stops flashing, the mode has been set.
7. Use the same procedure to reset the minutes.
Screen 2 - Battery: This screen indicates battery voltage. Refer
to Ill. 2.
Blink When Low On Fuel
Ill. 2
 Loading...