4.19
ELECTRONIC FUEL INJECTION
4
Fuel Injector Replacement
1. Be sure the engine has cooled enough to work on.
2. Remove the seats and rear service panel (see chapter 5).
3. Remove the rear cargo box (see chapter 5).
4. Place a suitable container below the quick connect plug at
the end of the fuel rail. Hold a shop rag over the plug and
remove it to depressurize the fuel system.
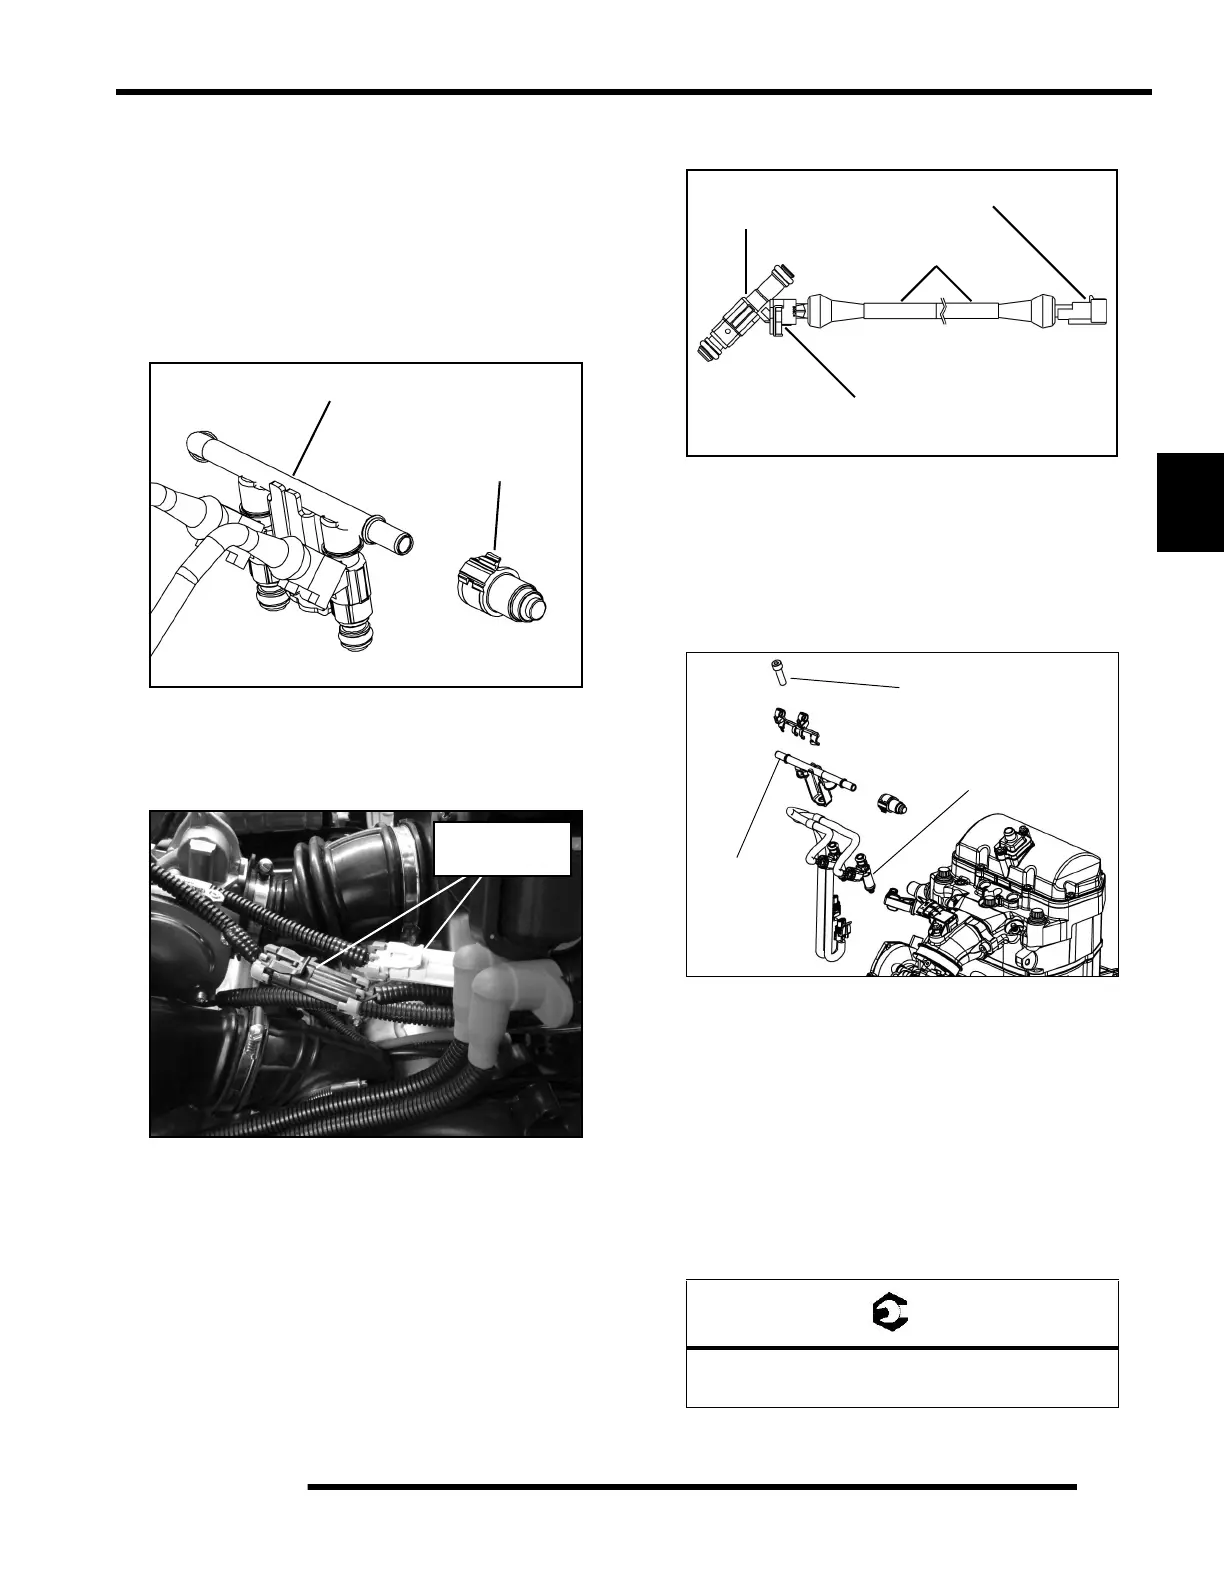
5. Disconnect the harness for the fuel injector(s) located next
to the ignition coil. Cut the plastic tie strap and push the
harness for the fuel injector(s) up over the air box to allow
fuel injector removal.
NOTE: The harness connector and locking spring is
bonded to the fuel injectors with an epoxy. DO NOT
attempt to disconnect the Bosch connector from the
fuel injectors. Damage will occur to the injector and/
or harness if attempting to separate at that location.
Separate the fuel injector from the vehicle harness
as shown in the illustration below.
6. Thoroughly clean the area around the fuel injectors
including the throttle body manifold.
7. Using a 6 mm hex wrench, loosen the fuel rail mounting
screw from the cylinder head. Carefully pull the rail away
from the injectors and remove the injector(s) from the
cylinder head along with the harness.
8. Reverse the previous procedures to install the new
injector(s) and reassemble.
IMPORTANT: Be sure to mark / note the color of the
fuel injector connectors. For proper engine function,
the fuel injectors must be connected correctly. Make
note of PTO and MAG side injectors before
disconnecting them. PTO = GRAY, MAG = BLACK.
9. Lubricate O-rings lightly with oil to aid installation. Torque
the fuel rail mounting screw to specification.
Fuel Rail
Quick Connect
Plug
Fuel Rail Mounting Screw
216 +/- 24 in. lbs. (24 Nm)
Disconnect Here
DO NOT
Disconnect Here
Fuel
Injector
Harness
Fuel Injectors
Fuel Rail
Mounting
Screw
 Loading...