7.25
FINAL DRIVE
7
Bearing Installation
5. Thoroughly clean the rear bearing carrier housing and the
outer race on the new bearing. Be sure that all oil residue
has been removed from each surface.
6. Support the bottom of the bearing carrier housing.
7. Apply Loctite® 603™
retaining compound to the outer
circumference of the new bearing race and carefully press
the new bearing into the bearing carrier housing.
NOTE: Use care to not allow any of the Loctite®
compound to get in the bearing.
8. Wipe the housing clean of any excess compound and install
the snap ring.
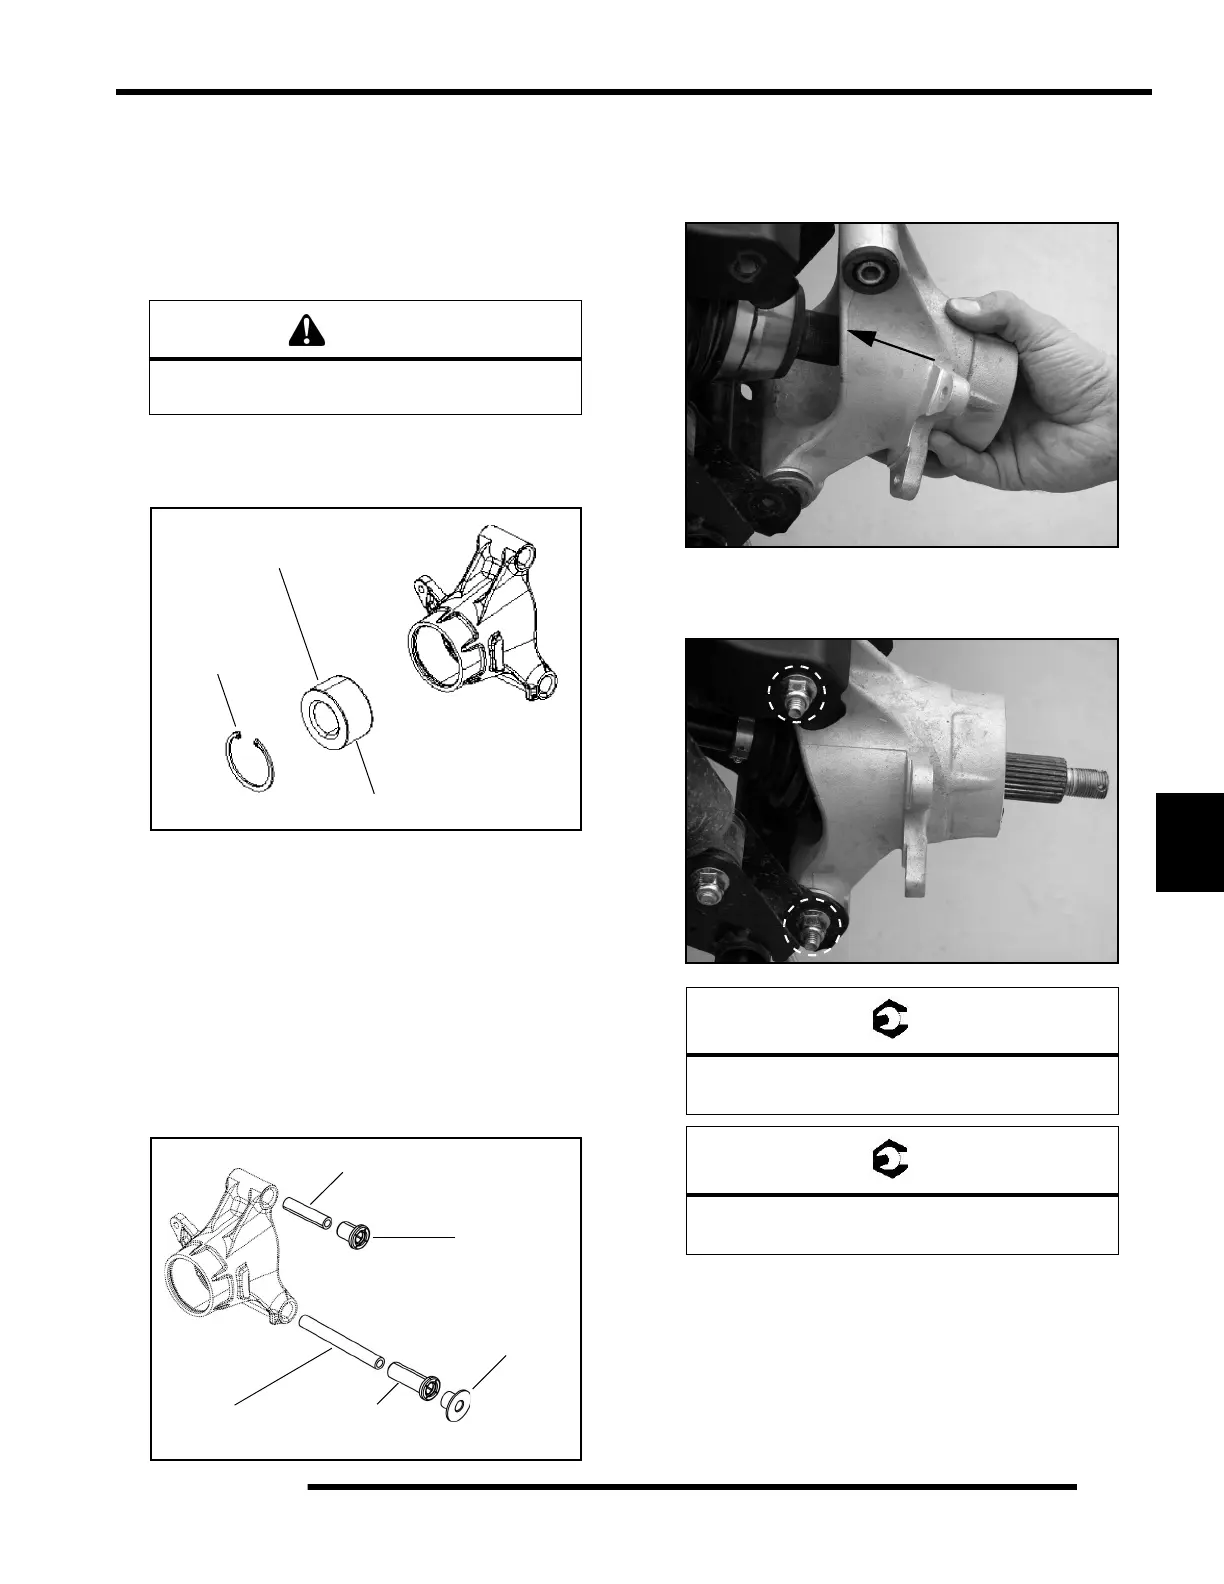
Bearing Carrier Bushing Replacement
Check bearing carrier bushings and pivot tubes for excessive
wear or damage. If replacement is required, slide pivot tubes out
and remove bushings with a drift punch. Install new bushings by
pressing them into the bearing carrier.
Bearing Carrier Installation
1. Install drive shaft axle through the backside of the bearing
carrier. Be sure bushings and pivot tubes are installed.
2. Install the fasteners that attach the rear bearing carrier to the
upper and lower A-arms. Torque bolts to specification.
3. Apply grease to drive shaft axle splines.
Use an arbor and press only on the outer race,
otherwise bearing damage may occur.
Apply
Loctite® 603™
Bearing
Snap Ring
Pivot Tube
Pivot
Control Arm
Bushing
Control Arm
Bushing
Bushing
Pivot Tube
Upper Rear Bearing Carrier Bolts:
40 ft. lbs. (54 Nm)
Lower Rear Bearing Carrier Bolts:
40 ft. lbs. (54 Nm)
 Loading...