5.19
BODY / STEERING / SUSPENSION
5
Installation
1. Place the A-arm in the correct position for ball joint
installation. Face the A-arm end flat on top of the driver.
Carefully drive the ball joint into place until the ball joint
is properly seated.
2. After the new ball joint is installed into the A-arm, install
a NEW retaining ring.
3. Reinstall the A-arm (see “FRONT A-ARMS - Removal /
Replacement”).
4. Repeat the ball joint service procedure for any additional
A-arm ball joint replacements.
REAR A-ARMS
Removal
The following procedure details upper and lower A-arm
removal and replacement on one side of the vehicle. Repeat the
following steps to remove the A-arm(s) from the opposite side.
NOTE: Use the exploded view in this section as a
reference during the procedure (see page 5.41).
1. Elevate and safely support the rear of the vehicle off the
ground.
2. Remove the wheel nuts, and rear wheel.
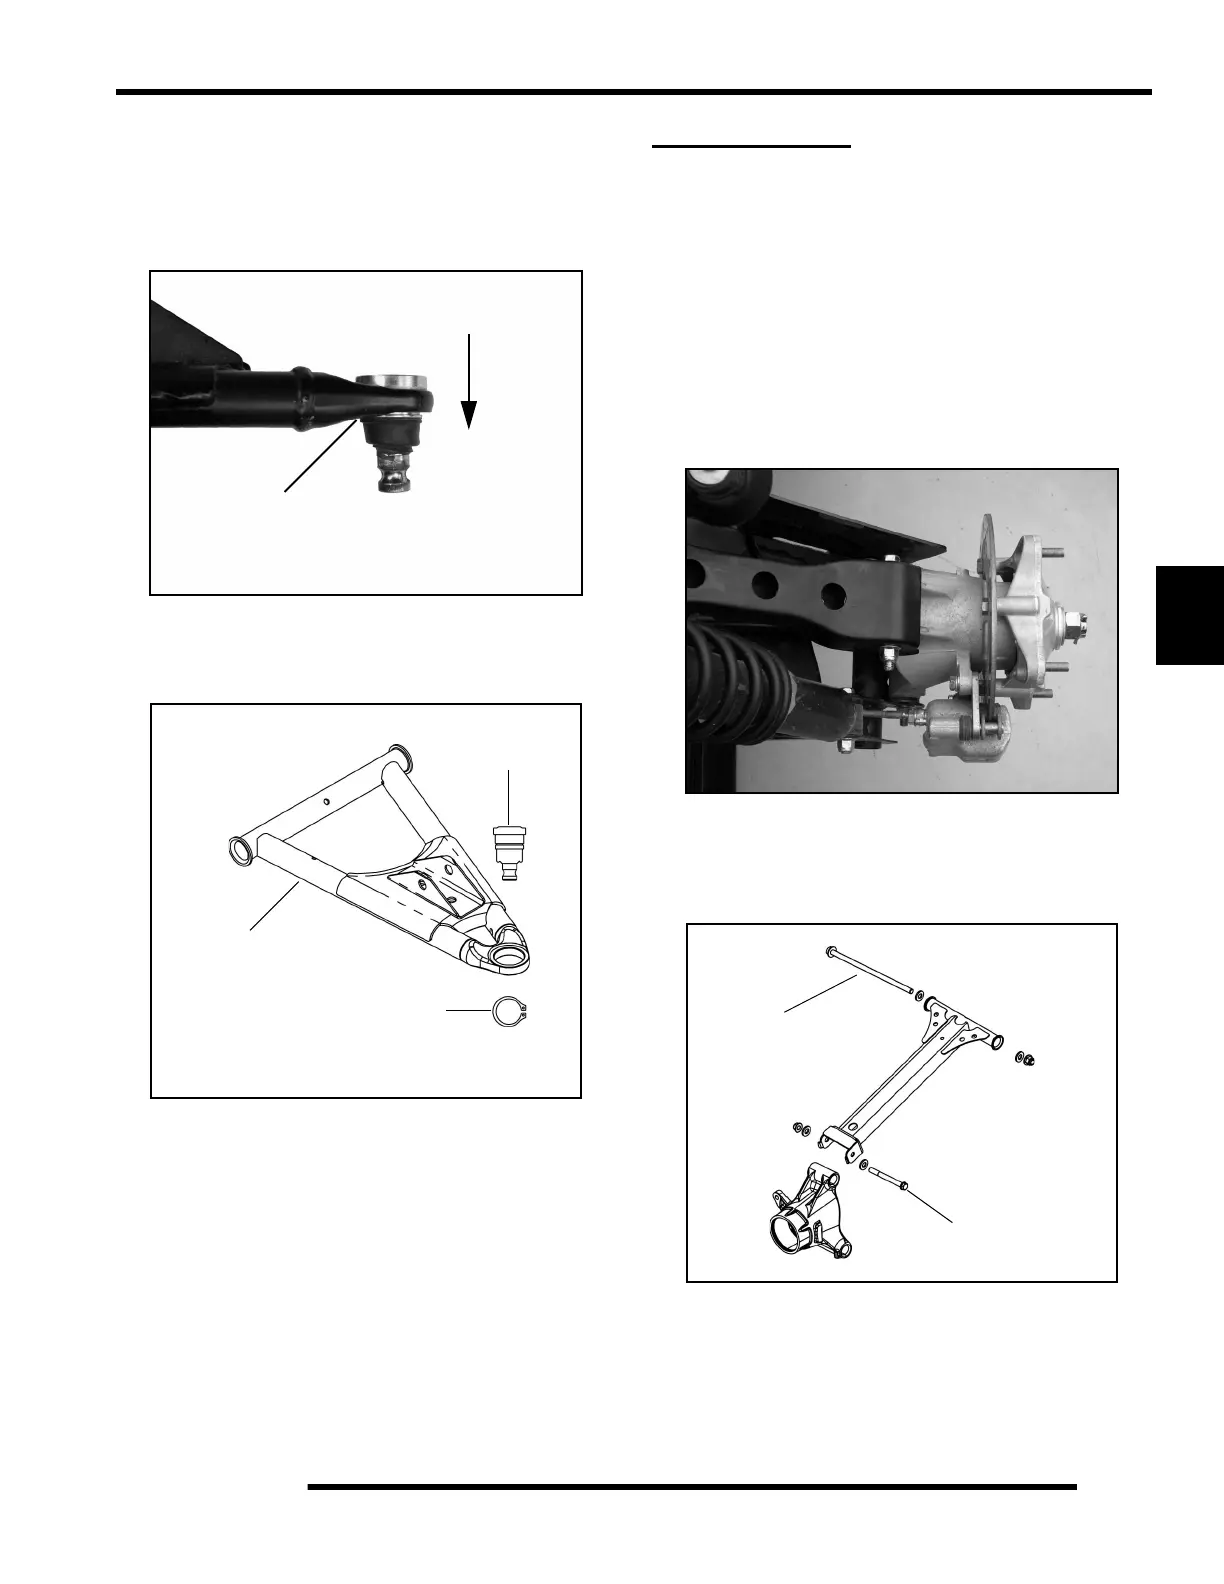
Upper A-arm Removal
1. Remove the fastener (A) attaching the upper A-arm to the
bearing carrier.
2. Remove the fastener (B) attaching the upper A-arm to the
frame and remove the upper A-arm from the vehicle.
3. Examine A-arm and bearing carrier bushings and pivot
tubes (see “Exploded View” on page 5.41). Replace if
worn. Discard hardware.
Press into the A-arm
in this direction
Place driver HERE
to support A-arm
Upper A-Arm Shown
Ball Joint
Upper A-arm
NEW
Retaining Ring
 Loading...