16
Polyend Play+ Manual Rev 2
Overview
1
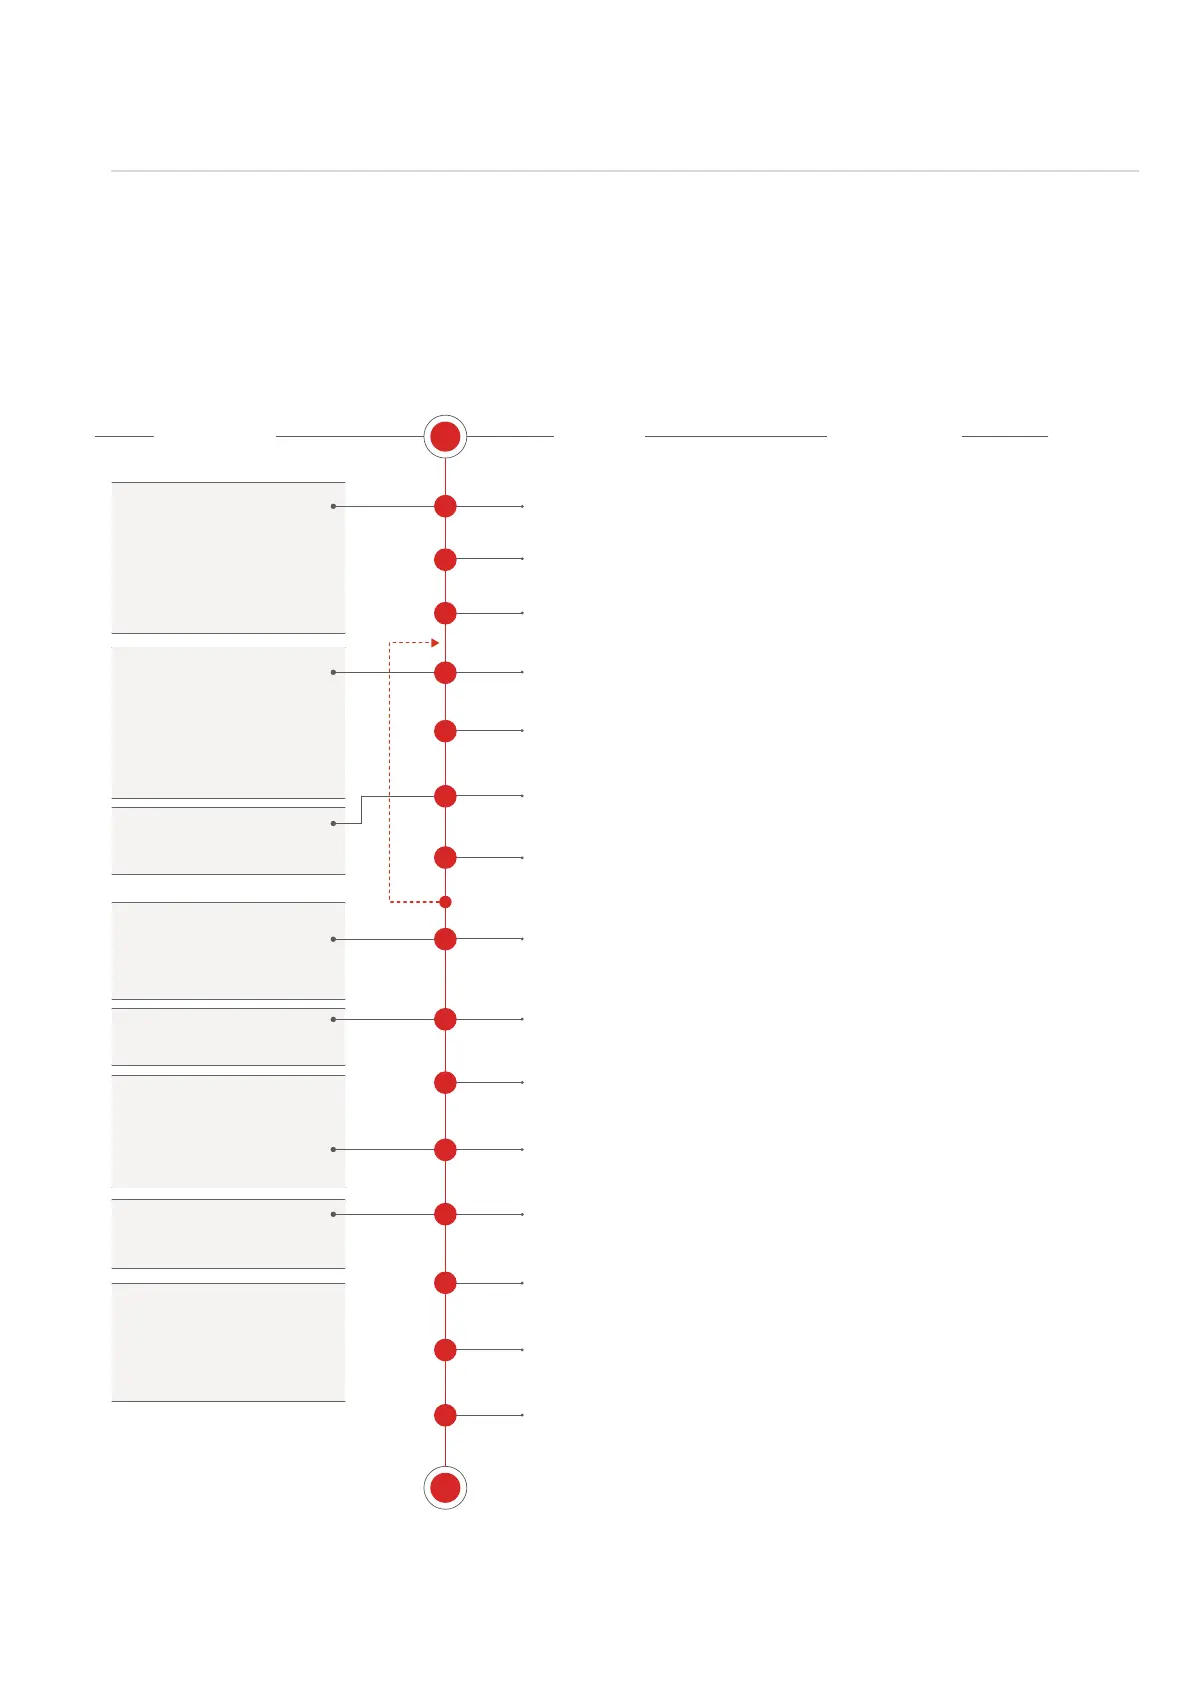
1.9 Example Workow.
The workow adopted with Play+ will of course develop to t your personal approach. To get started
a typical journey is described below which covers the sample tracks but a similar process is applied
for MIDI / Synth tracks.
S
E
1
2
3
4
5
6
7
8
10
11
12
13
15
14
9
Create & Save New Project
Set Project Tempo
Load Samples from SD Card
Sample Select
Edit Sample
Edit Parameters
Place into Steps
Add Steps and Develop Pattern
Add Master Effects
Mix the Tracks
Congure Performance Options
Render Audio Out
Housekeeping
Save Project
Chain Patterns into a Song
The SD Card must be installed to start a new
project and use Play+. Projects are stored on the
SD Card. Create a new project
Project (Tempo) 10-400 BPM. Tracks can be set
individually later in the process if desired.
The prerequisite starting point is
to create a project and populate
the sample pool. Global settings
are usually setup once, typically
at the start of the rst new
project.
Select a sample and adjust
parameters as a ‘work step’ ready
to be placed in the sequencer
steps. Step placement can be
made manually or tracks lled
automatically with note steps
Edit and adjust parameters.
Steps are assembled to create
beats and melodies in a
number of patterns
Patterns arranged into a song.
Master effects can be added
and adjusted for the main
output of all 8 tracks.
Performance settings can be
applied, ideal for a live set.
The project can be saved (is in
fact auto saved) and audio
rendered if required by bouncing
to audio stems.
Project
Pick & Place
Select & Adjust
Pattern
Chain
Master
Perform
Output
Populate the sample pool with sample packs or
user samples. WAV samples from the SD will
automatically convert to the audio engine format.
Select a sample located in the audio pool using
the (Sample) function. A synth can also be
selected when in MIDI / Synth mode.
Option to edit the sample, i.e. start, end, level etc
if required. This can be the work step or edit
existing steps. For synths, macro’s allow patch
editing using dened knobs.
Adjust and set the parameters for the work step
ready to place into a pattern. Can be adjusted
later on a step by step basis.
Place the work step into pattern steps. The work
step sample and settings can continuously be
placed into the pattern steps or automatically
populated with intelligent [Fill] options.
An empty pattern can be populated with steps to
create a sequence. A step contains a Note and
associated parameters including the sample.
Master effects can be included at the main output
stage. Also some effects like reverb and delay
can be added at a step level
Mix and balance the 8 tracks using the sample
volume level, panning etc
Perform mode allows conguration and live
performances with dened control over specic
elements. Adds variety and improvised creativity.
Render out audio stems to mix and master further
in DAWs or to share with others maybe to create
remixes. Export is in the main menu - le options.
Although projects are auto-saved, it is always
good practice to manually save a nished
production. Maybe rename with ‘Save As’.
Yeah yeah…. The boring bit. But it will help as
projects develop to keep things tidy. Maybe delete
old projects or backup the SD Card.
Patterns can be chained in sequence to create a
song. This is a sequential arrangement of
patterns which are played in a dened order.
ACTION COMMENTSPROCESS