31
Polyend Play+ Manual Rev 2
Project & Tracks
3
NOTES
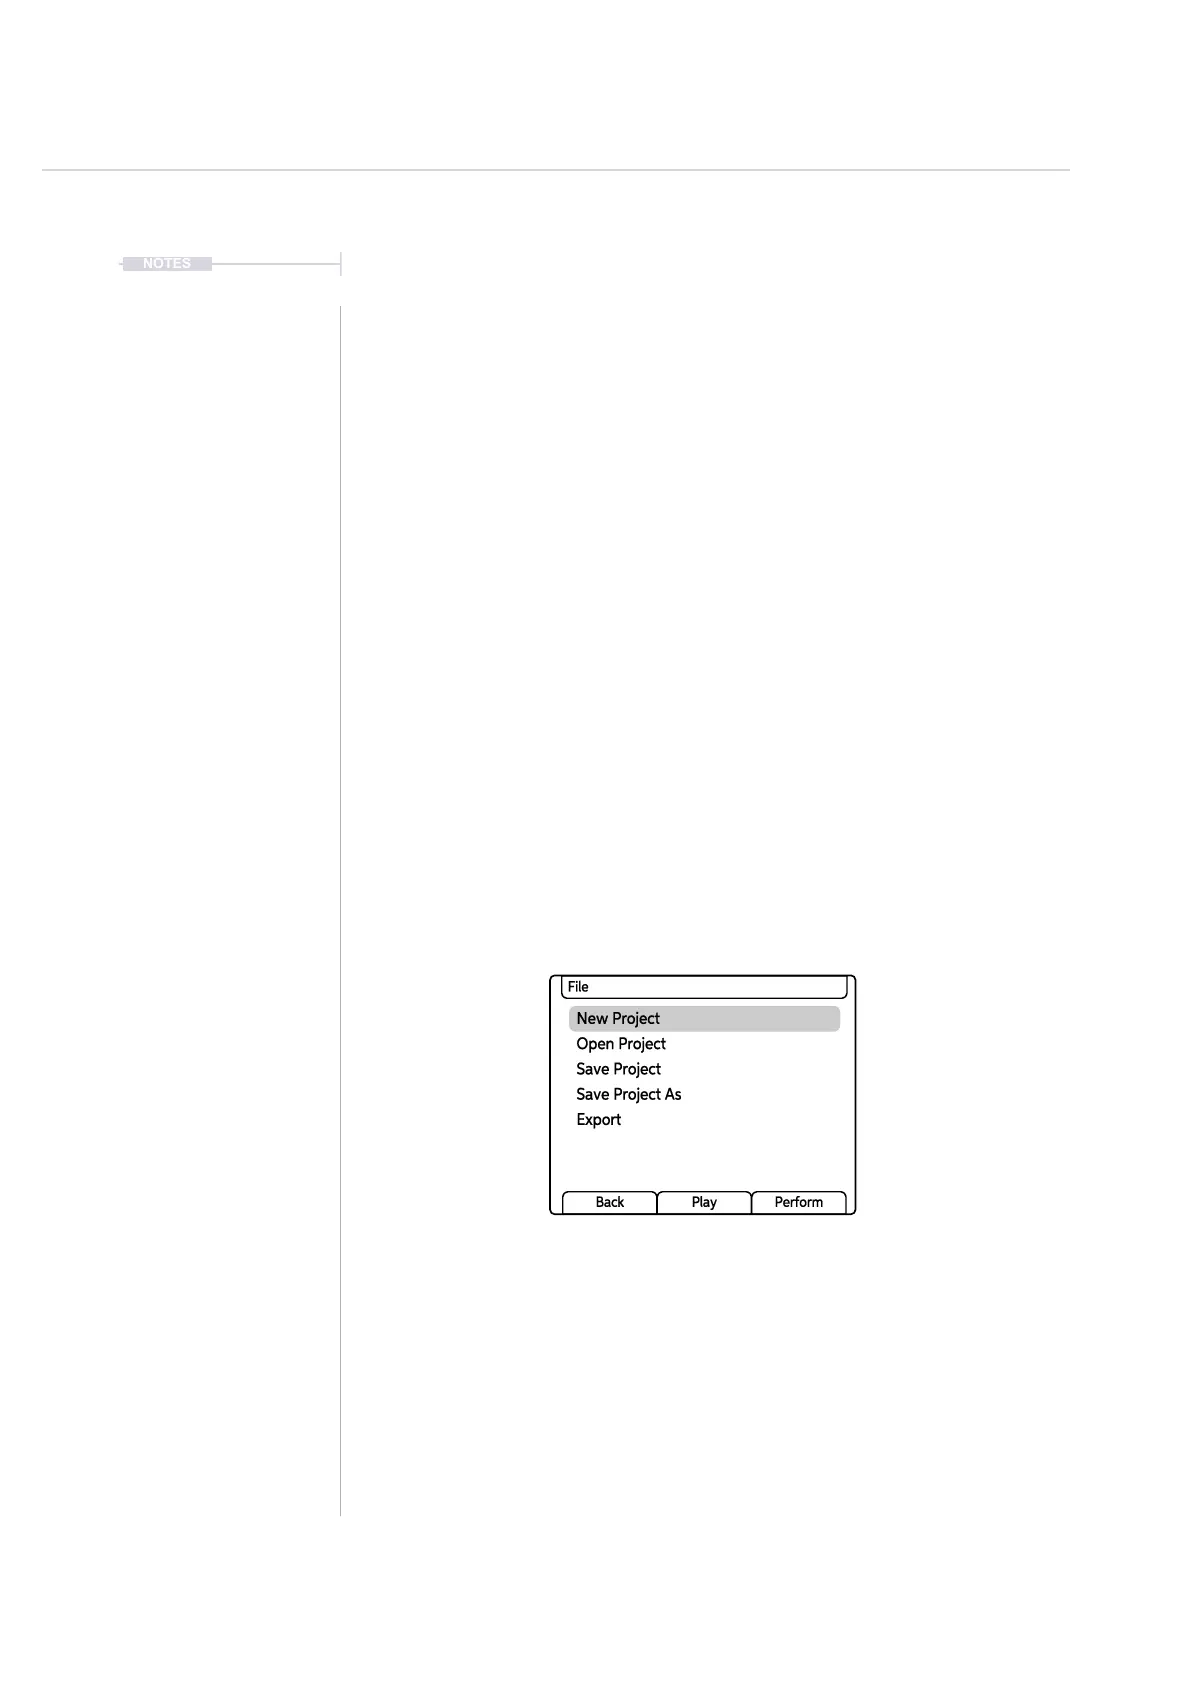
▌ CREATING A NEW PROJECT
1. Press (Screen), the multi-functional screen encoder. The main menu
will be displayed. Turning (Screen) will navigate the menu.
2. Turn (Screen) to highlight ‘File’ in the menu.
3. Press (Screen) to select the highlighted ‘File’ option and to open the
submenu options.
4. Turn (Screen) to highlight ‘New Project’ in the menu.
5. Press (Screen) to select the highlighted ‘New Project’ option.
6. A prompt ‘Do you want to to save the current project?’ may be offered.
To save press [Yes], on the dynamic screen button. If no message is
displayed, i.e. project is already saved, skip this step. Option to not
save is also presented.
7. A new project will be created with the default settings.
8. Once a project is created it is recommended to save. This is also
performed in the le menu. ‘Save’ will perform a ‘Save As’ function if this
is the rst save. This will allow a name to be created or auto naming.
New Project
Open Project
Save Project
Save Project As
Export
File
Back Play Perform
In order to get started with a new empty project, samples or a sample pack should be loaded
and a sample or synth assigned to a work step in order to build patterns. The quick steps for
samples are; 1) Press (Screen) to open main menu, 2) Turn & Press (Screen) to choose and
select ‘Samples’, 3) Turn & Press (Screen) to choose and select ‘Load Sample Pack’, 4) Turn &
Press (Screen) to choose and select the sample pack to load. Once loaded, samples are
available and can be assigned with the (Sample) Knob.