IV
PFC-6006 • 5403559 • REV D • 11/17
KEYPAD STEPS PANEL MENU OPTIONS
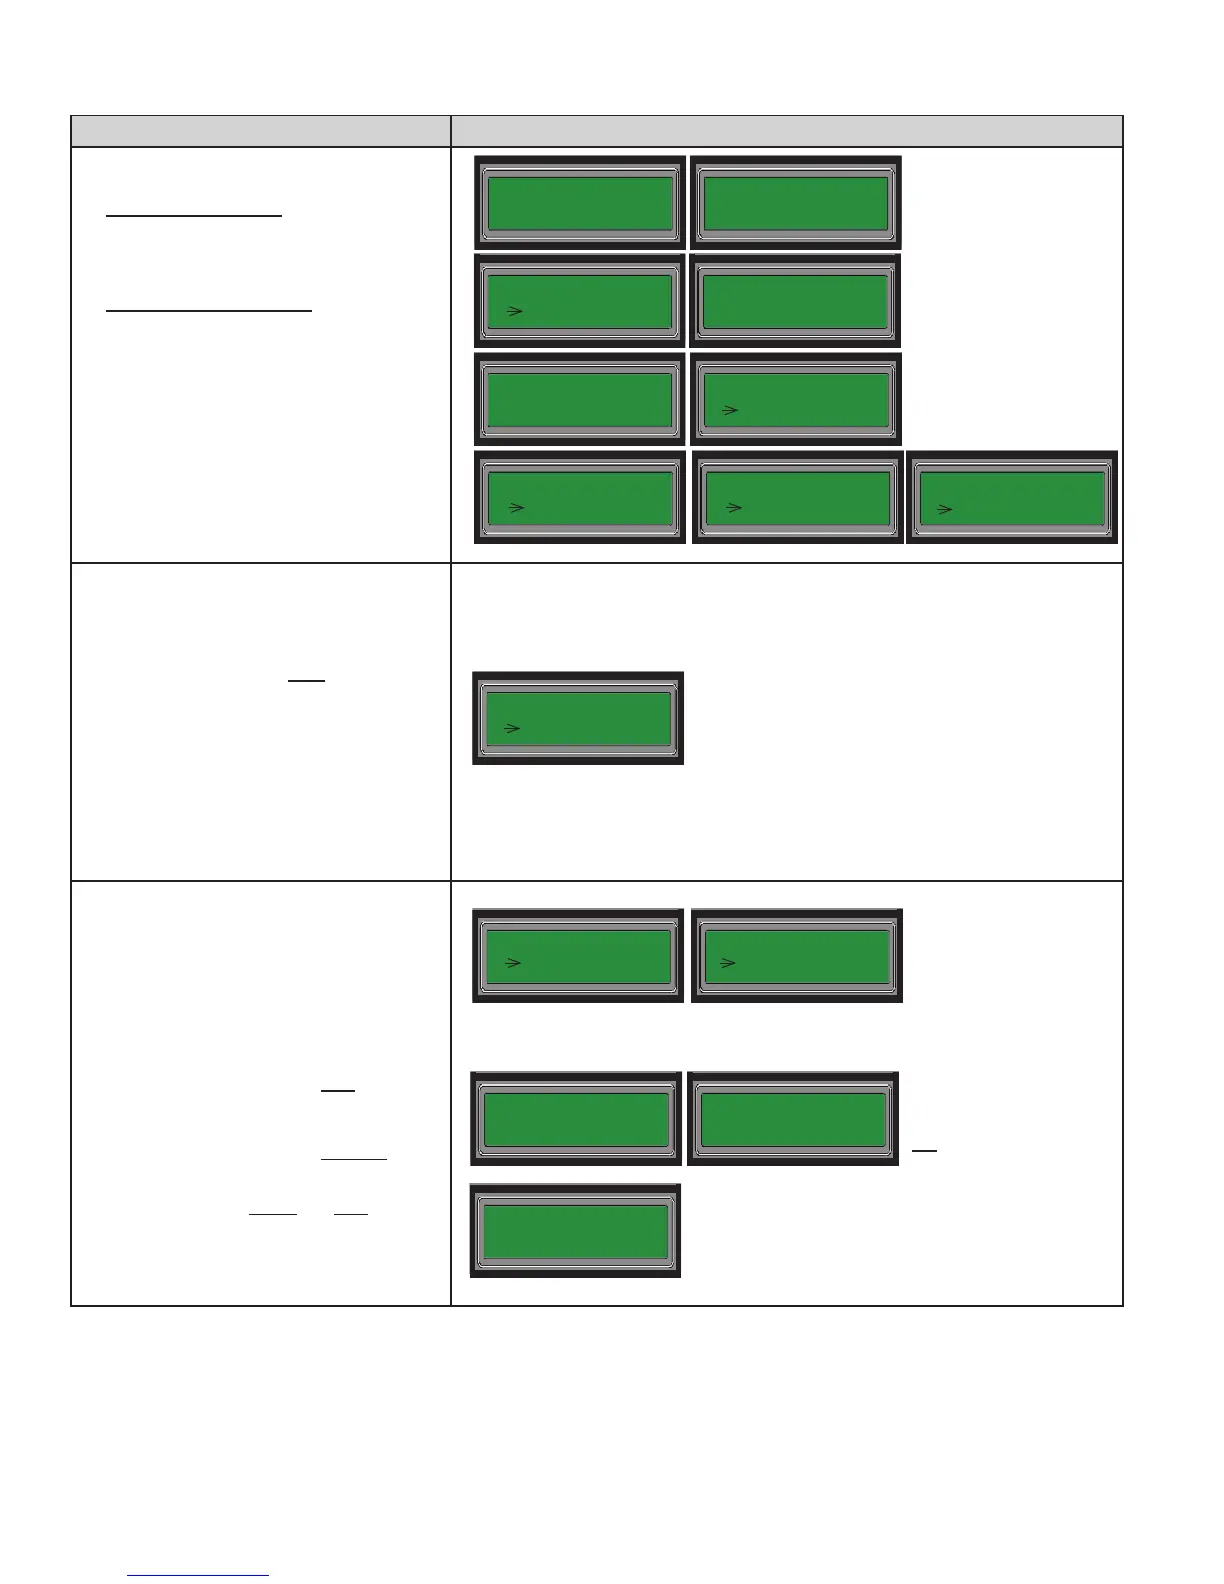
19. Enter "7" – Sec Acct ID, and enter the
secondary account ID provided by your
central station.
20. Enter "8" – Sec Phn No. and enter the
secondary phone number provided by
your central station.
21. Enter "9" – Sec Rpt Fmt; press 1" – SIA
or "2" – CID.
22. Enter "0" – Sec Rpt Test; press "1" – ON
or "2" – OFF.
23. Press ESC to display the "DACT Setup"
menu.
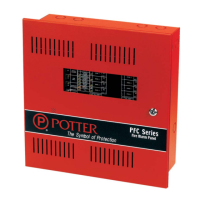
Setup Account(s) 2-5, if used at site,
otherwise:
[Skip to Step #26 when nished.]
24. Repeat Steps 13-23 for each additional
Account used at your site.
25. From the "DACT Setup" menu:
• Enter "4" – Acct2 Setup.
• Enter "5" – Acct3 Setup.
• Enter "6" – Acct4 Setup.
• Enter "7" – Acct5 Setup.
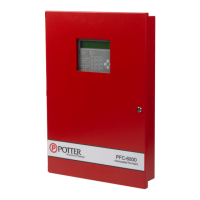
26. Press ESC to exit the "DACT Setup"
menu.
• Press ESC again to exit the "System
Setup" menu.
• Press ESC a 3rd time to exit the
"Programming" menu.
• Press "1" to Accept (or save all
changes).
-OR-
• Press "2" to Cancel (or not save
changes).
• Press Enter to accept and save changes.
• Panel restarts to complete updated
DACT settings.
Acct2 Setup
1 Rpt Event Type
Programming
1 System Setup
1 = AC PWR Delay
2 DACT Setup
Press 1–Accept
2–Cancel.
Press ENTER to
Accept Changes
[Panel beeps until you
press "ENTER" to
continue -OR- "ESC" to
not save changes.]
Restarting...
[A series of initialization
messages display.]
6 = Pri Rpt Test
7 = Sec Acct ID
ID:
__
8 = Sec Phn No.
9 = Sec Rpt Fmt
7 = Sec Acct ID
8 Sec Phn No.
Phn:
__
Fmt: CID
1 SIA
9 = Sec Rpt Fmt
0 Sec Rpt Test
Test: OFF
1 ON
2 = Line2 Setup
3 Acct1 Setup
[Repeat Steps #13-23 to setup
Accounts 2-5, if needed!]
[Skip to Step #26 when nished.]