5-54
PFC-6006 • 5403559 • REV D • 11/17
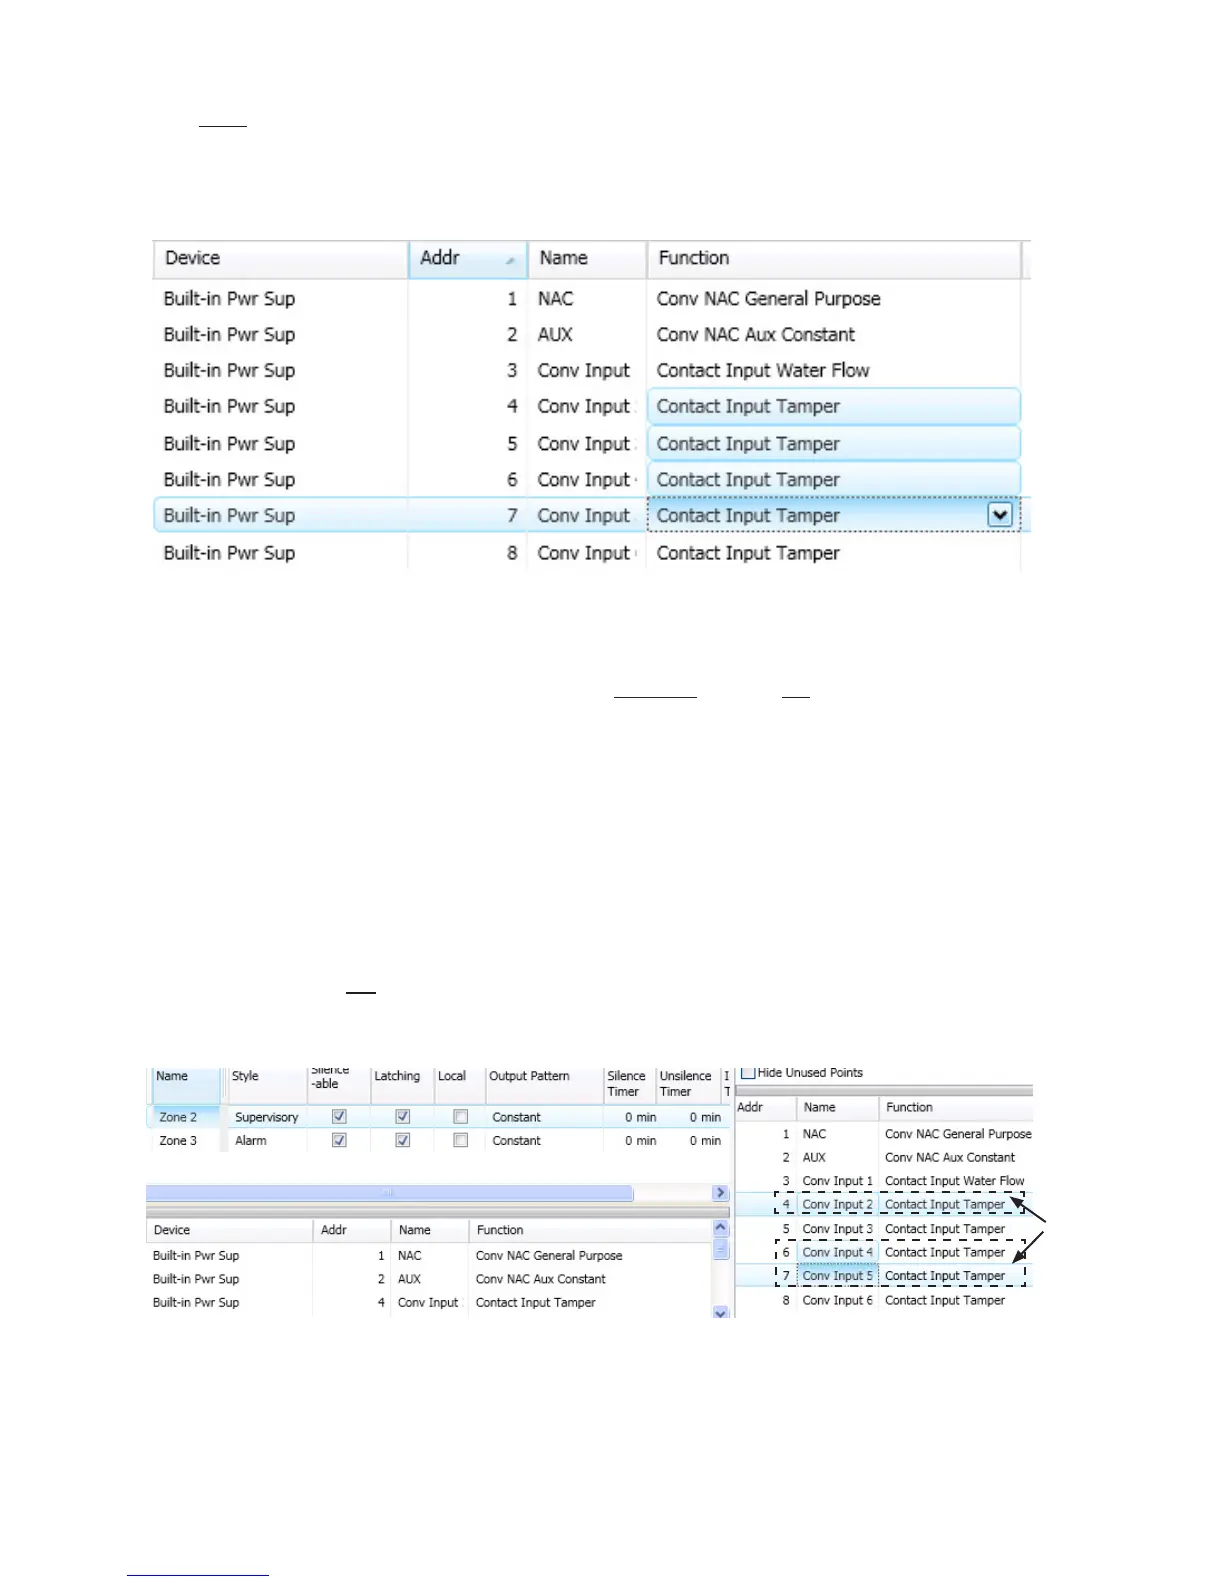
To congure a range of points:
1. Click the rst point to congure from the “Function” eld.
2. Press and hold the SHIFT key, then click in “Function” eld of last point.
Figure 60. Example of Conguring a “Range” of Points
3. Right-click from “Function” eld to display conguration options.
Notes:
•y If you right-click outside of “Function” eld, the range is deselected, and only one (1) point will be congured.
•y You may alternatively use the CTRL key to select multiple, non-adjacent points.
4. Click on device function from shortcut menu.
5. Continue conguring other points, as needed.
Adding Points to Zones
This section provides procedures and examples of adding points to one or more zones. Points can be moved and deleted from
zones through the Zones panel using the “drag and drop” technique. The examples illustrate how to use shortcuts to expedite
conguring zones and also to reinforce the interaction between the Zones and Points windows.
To move one or more points into one zone:
1. Open the Zones’ conguration window and adjust Points' window to display full function name(s).
Figure 61. Example of Resizing Points Window From Zone Screen
2. Click on one or more points to select; use the SHIFT or CTRL keys to select a range or group of points.
Zones 2 & 3 are
selected in this
example.
Points 4,
6 & 7 are
selected.