Hammer Spring Assembly
185
Hammer Spring Assembly
Removal
1. Prepare the printer for maintenance (page 132).
2. Remove the shuttle frame assembly (page 215).
3. Carefully vacuum the shuttle frame assembly.
4. Remove the hammer bank cover assembly (page 177).
CAUTION
Hammer springs and hammer tips are fragile. Do not touch the hammer
springs or tips. Handle hammer spring assemblies by the thick
mounting base only. Apply pressure only to the mounting base.
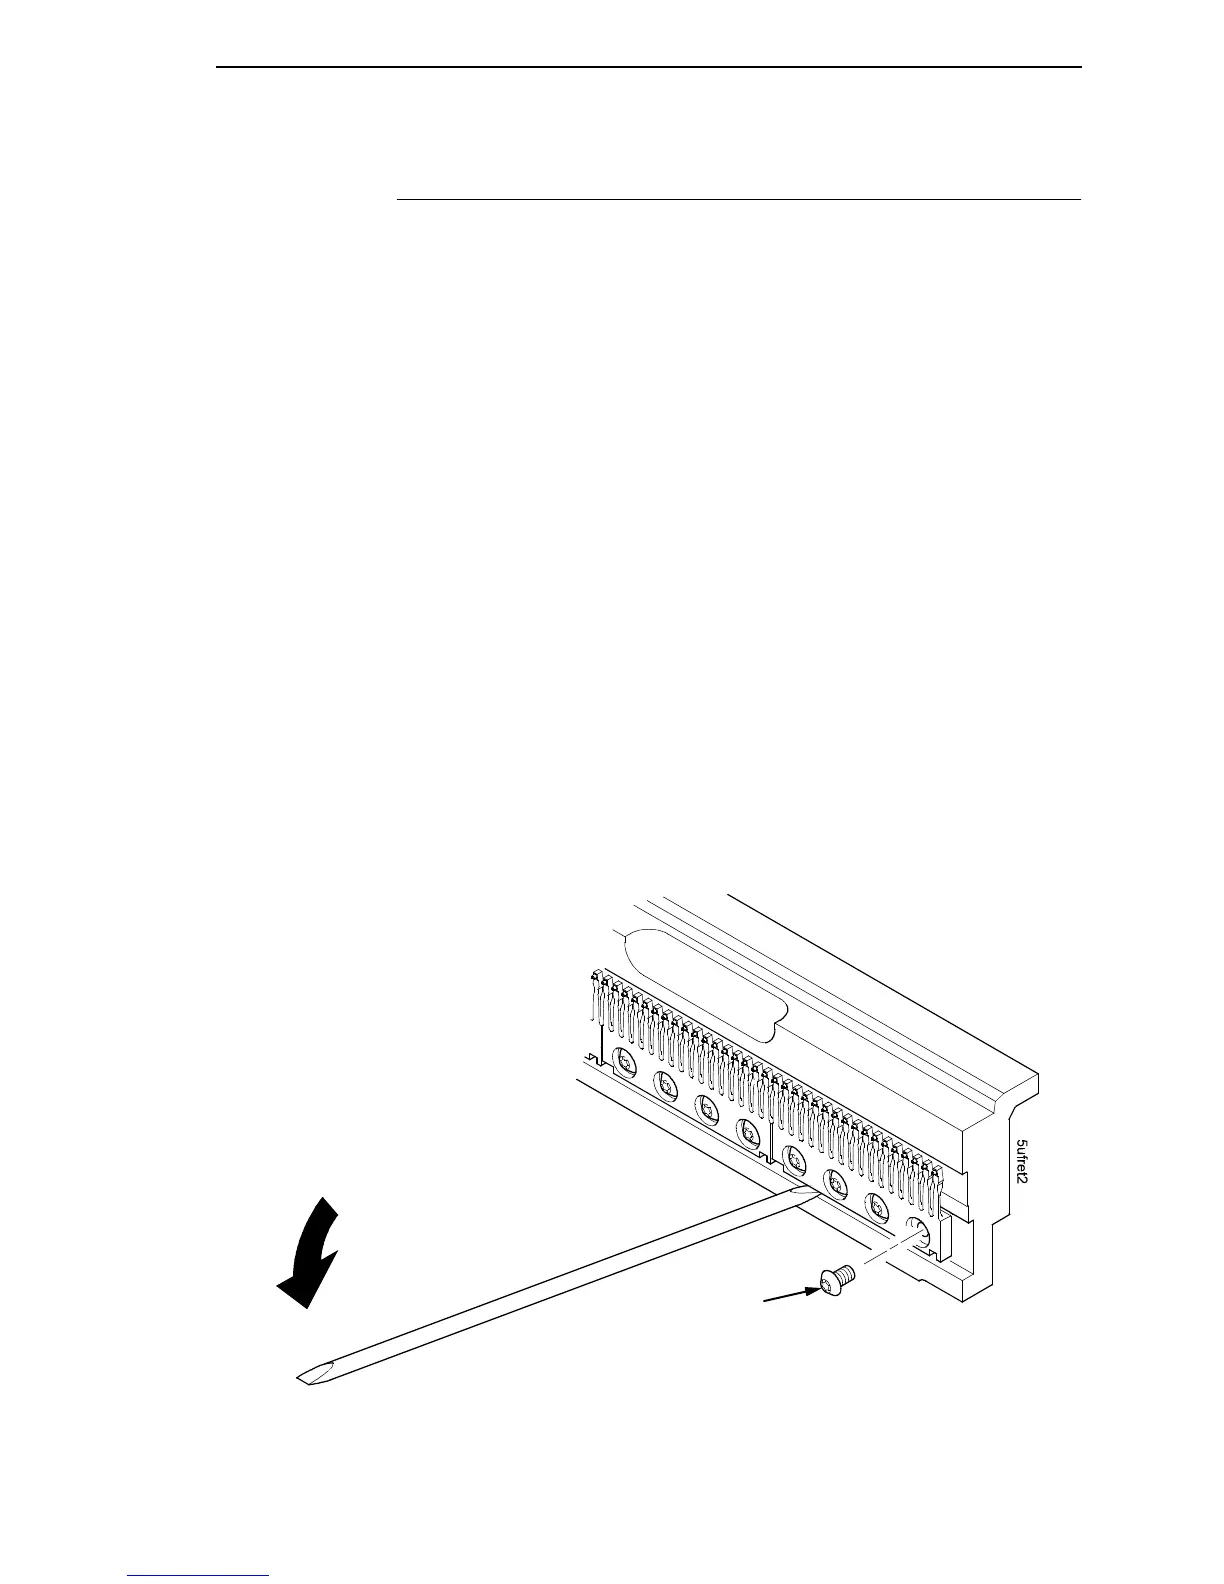
5. Remove the mounting screws from the old hammer spring assembly.
(See Figure 24.)
6. Handling the hammer spring assembly by the mounting base only, gently
push up the mounting base and pry the old spring assembly off its
mounting pins. (See Figure 24.)
7. Inspect the hammer bank and the old hammer spring assembly:
a. If there is ink on the hammer bank mounting surface, the hammer
spring assembly mounting surface, or the hammer spring neck or
tines, reinstall the old hammer spring assembly and replace the
shuttle frame assembly (page 215).
b. If the old hammer spring assembly and the hammer bank are free of
ink, install the new hammer spring assembly, as shown in the next
section.
Figure 24. Hammer Spring Assembly, Removal
Discard old screws.
NOTE: The hammer spring assemblies
shown here are for a P5015 printer.
Although hammer spring assemblies
vary in appearance and number of
mounting screws, removal and
installation are the same for all models.