Loading Through the Network Interface Card (NIC)
159
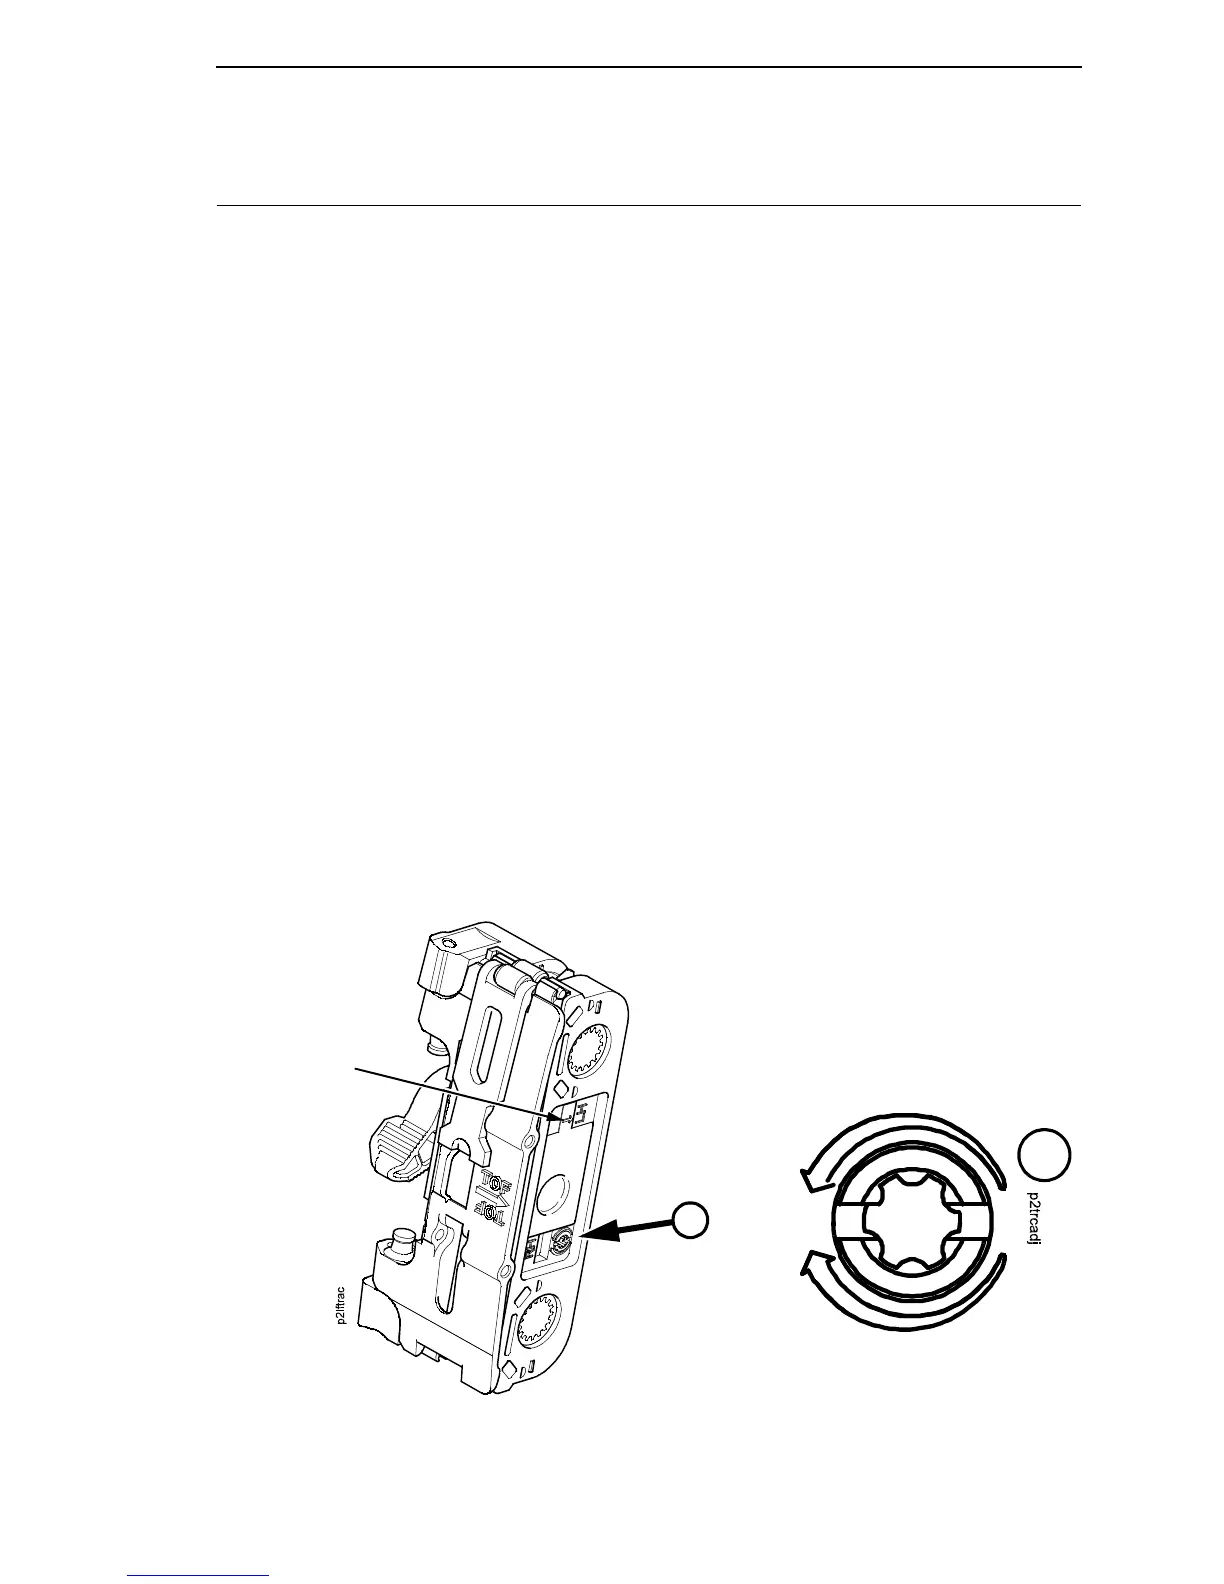
Tractor Belt Tension Adjustment
Print compression can be reduced by adjusting the tension of the tractor belts.
The procedure below removes the slack that might occur in some tractors.
IMPORTANT
Only do this procedure when the user reports that the first print line of
forms is compressed and only after adjusting the dynamic paper
tension (page 157). Always adjust both tractors.
1. Prepare the printer for maintenance (page 132).
2. Adjust the dynamic paper tension (page 157).
3. Carefully note the initial position of the adjustment screws. (See Figure
21.)
CAUTION
Adjust tractors only ONE detent at a time. Over-tightening a tractor belt
can cause other paper feed problems and result in premature wear in
the tractors.
4. On the inner side of the left tractor, use a Torx T-10 driver to rotate the
adjustment screw one detent to increase tension. On the inner side of the
right tractor, use a Torx T-10 driver to rotate the adjustment screw one
detent to increase tension. (See Figure 21.)
5. Load paper, run a print test, and check for first line compression.
6. If compression still occurs, rotate the adjustment screws one more detent
and test again.
7. If compression is not improved after adjusting the tension by two detents,
return the adjustment screws to the initial positions you noted in step 3.
8. Return the printer to normal operation (page 133).
Figure 21. Tractor Belt Tension Adjustment
A
A
Arrow points to LH
(left) or RH (right)
tractor. Left tractor
(LH) is shown here.
Left Tractor: One Click and Test.
Right Tractor: One Click and Test.