361
Replacing The Timing Belts
1. Remove the stacker assembly from the printer (page 339).
2. Raise the elevator assembly to its highest position and secure it to the
vertical rails using tie wraps or string. Do not over-tighten the tie wraps or
string; tighten them just enough to hold the elevator up.
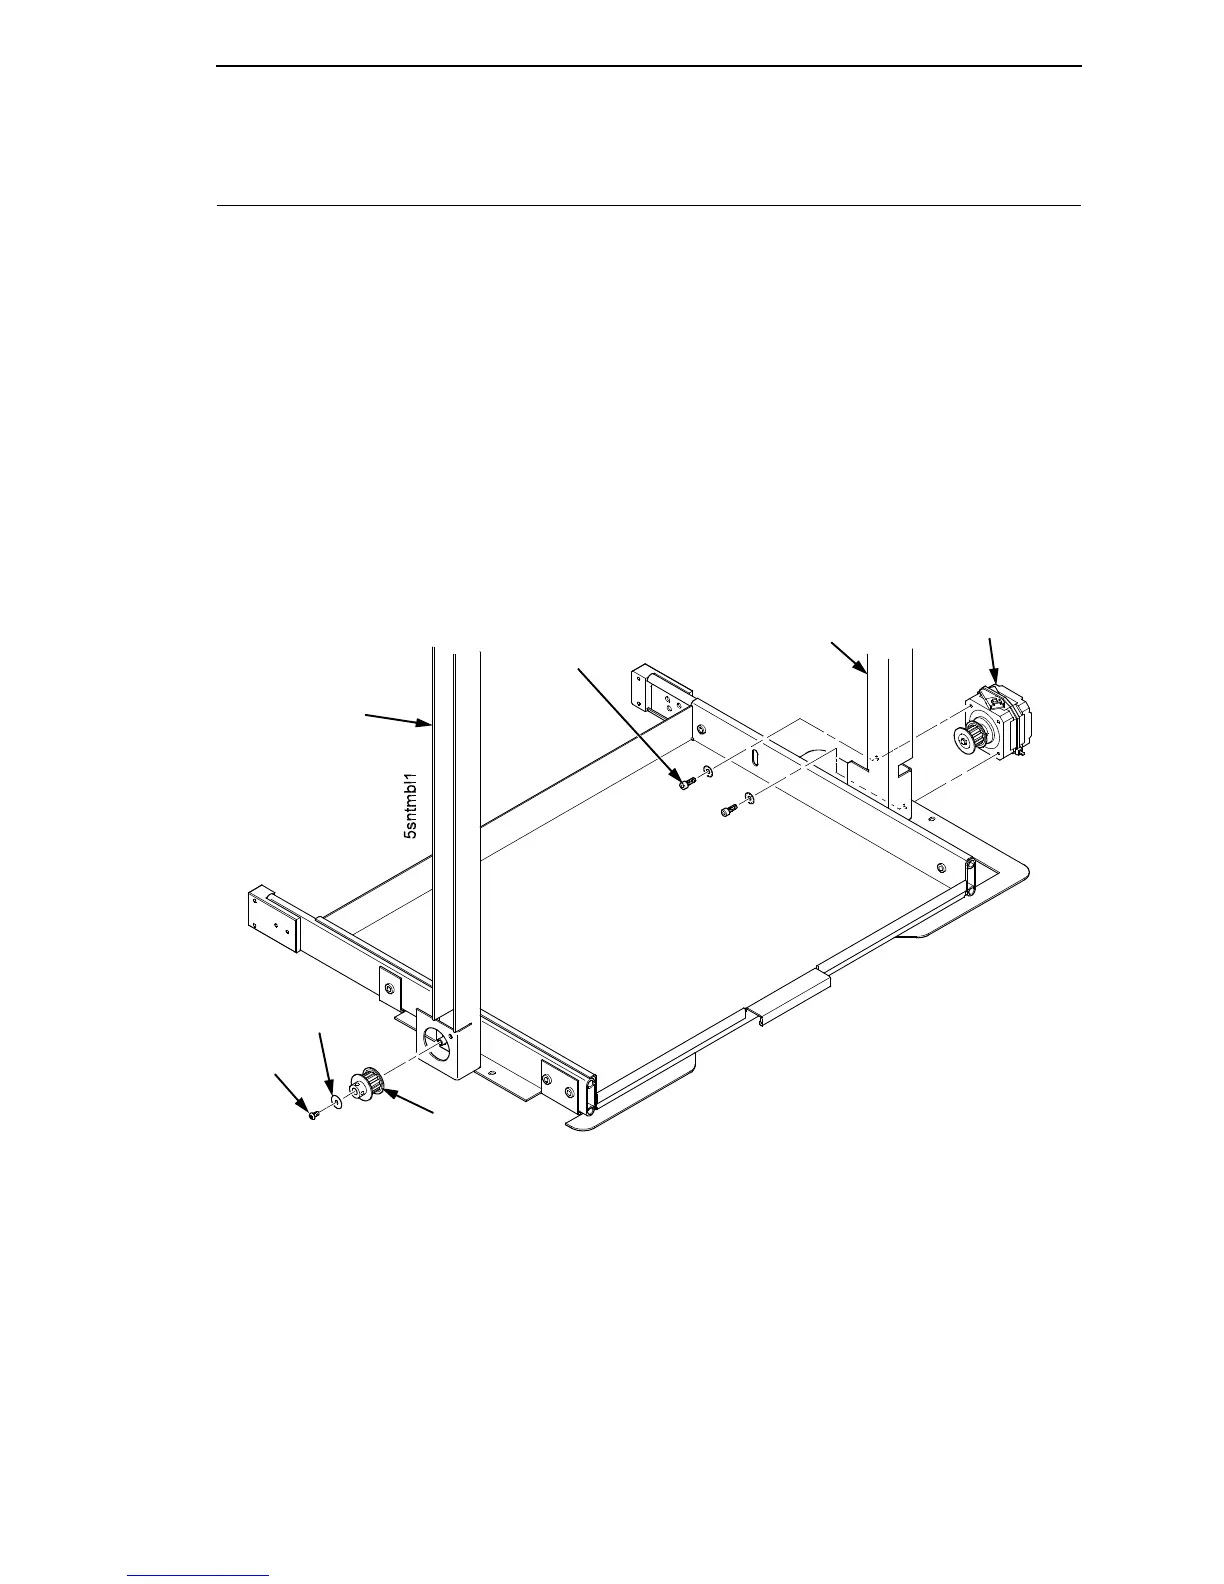
3. If you are removing the left timing belt, remove the screw and washer
from the pulley at the bottom of the left vertical rail, and remove the pulley.
(Figure 89.) Go to step 6.
4. If you are removing the right timing belt, remove the two metric Allen
screws that secure the timing belt motor to the right vertical rail.
(Figure 89.) Go to step 5.
Figure 89. Removing the Timing Belt Pulley and Motor
Metric Allen Screw
and Washer (2)
Right Vertical Rail
Timing Belt
Motor
Pulley
Screw
Left Vertical
Rail
Washer