7-6 Maintenance and repair
4 Remove the platen roller if you are changing the printhead on print
station #1.
5 Use a Phillips screwdriver to loosen the captive printhead mounting
screw over the top of the printhead.
6 Raise the printhead assembly by the handle to allow the printhead to
drop down away from the bracket.
7 Gently pull the printhead out to the side until the three connectors on the
top of the head are exposed. These connectors are a press fit. Pull up on
each harness to disengage them from the rear of the printhead.
8 Reconnect the three harness connectors to the replacement printhead and
push the head back under the bracket. There are locating pins under the
bracket. Position the printhead over these pins until the printhead seats
flat against the bracket.
9 Tighten the captive mounting screw 1/4 turn to secure the printhead to
the bracket.
Caution: Do not over-tighten the captive mounting screw. Damage or
warpage to the printhead could occur. The screw should only be ¼ turn
beyond hand tight.
Ensure the harness is routed straight through the hole in the main plate.
10 Reinstall the platen roller on print station #1 if it was removed.
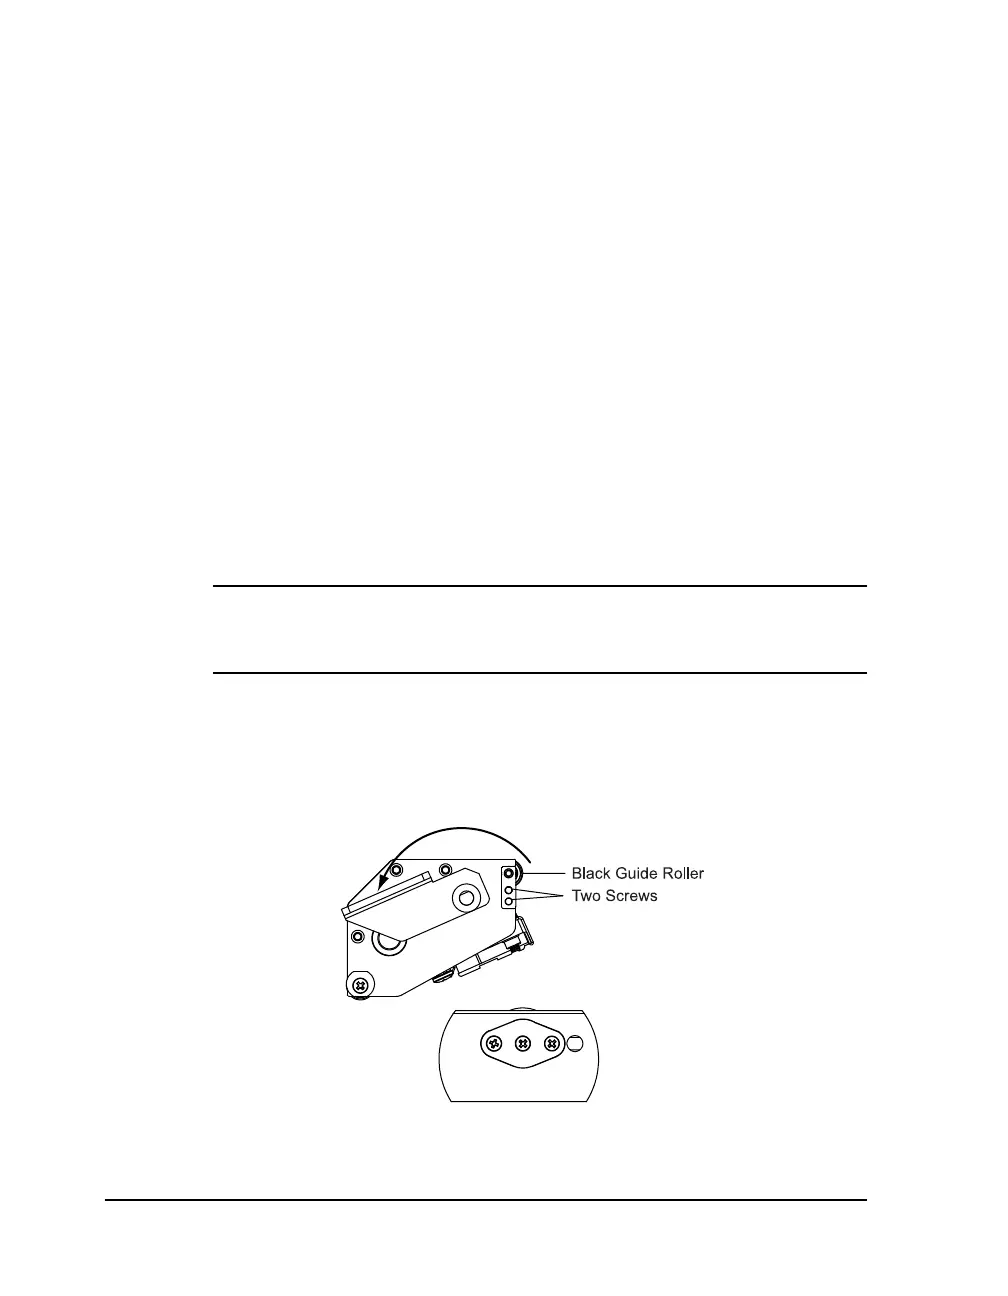
11 Reposition the black guide roller and secure it with the two screws.