QLS-4100 Xe 8-11
Print & Peel Setup
This section describes how to set up Print & Peel.
To set up Print & Peel:
1 Ensure the printer power switch is in the On position. Move the Print &
Peel Base power switch to the On position. The printer and base will be
powered up.
Note: Ensure that compressed air is connected. For more information,
refer to Chapter 2: Physical Setup.
2 Move the Rewind Enable/Disable switch to the down position. This will
disable the rewind motor for the setup process.
3 Fully seat an empty cardboard takeup core on the rewind mandrel on
the Print & Peel Base.
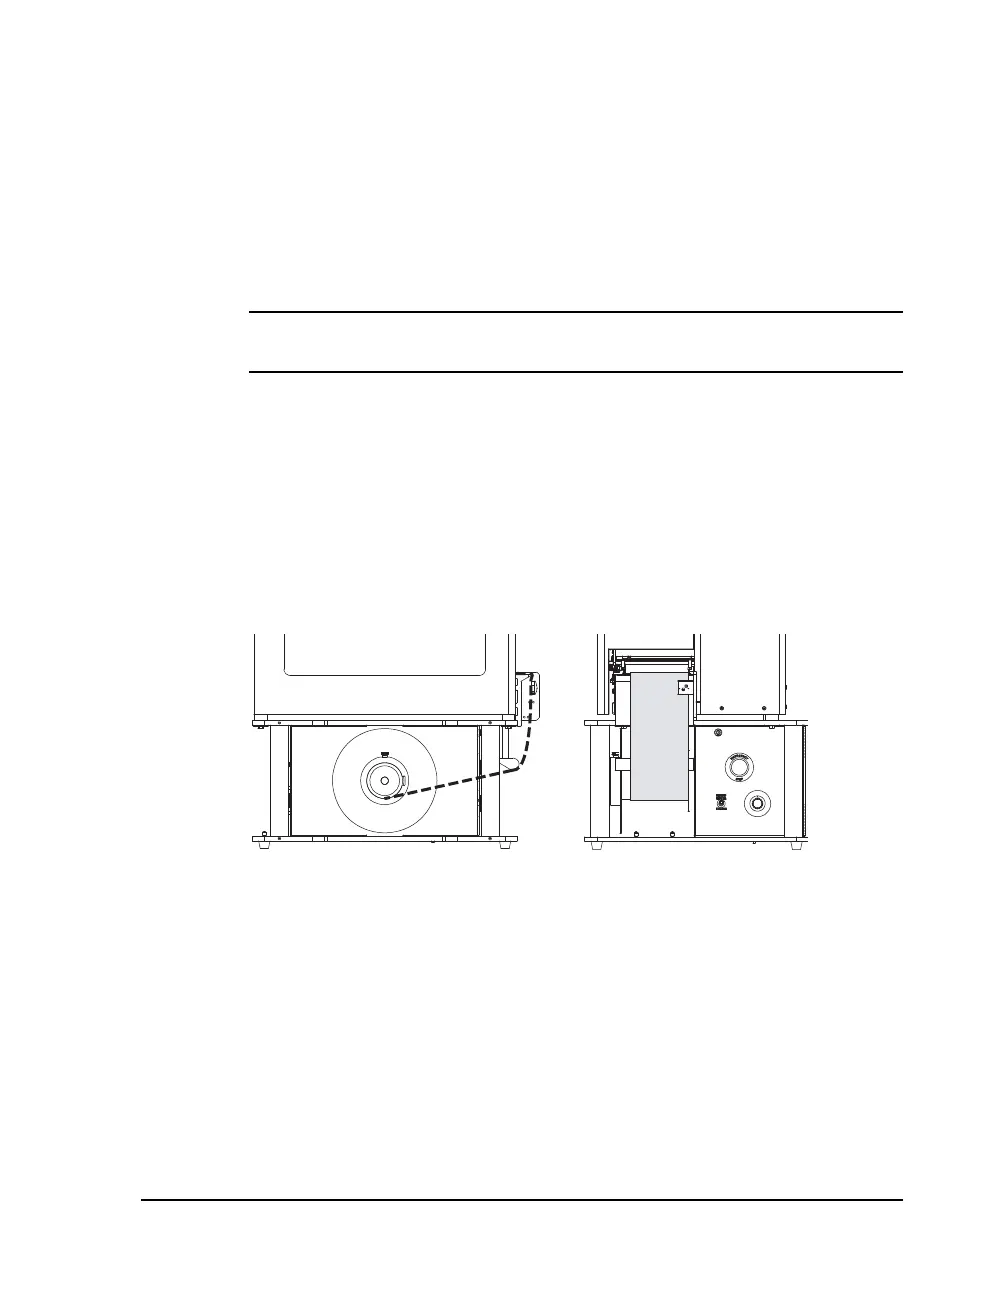
4 Press the FORM FEED/ADVANCE key until you have enough media to
reach the takeup core on the Print & Peel Base. Remove the labels from
this section to expose the liner. Refer to the following illustrations.
Thread the liner as indicated. Ensure the liner passes beneath the sensor
on the right side of the liner guide.
Wrap the end of the liner under the takeup core and secure the end with
a small piece of adhesive tape.