119
Digital Messages
13. Select Loop 5, then select clip C in the Audio Clips list, then click the >> button to move
clip A to the Composition list.
Clip A appears inside Loop 5.
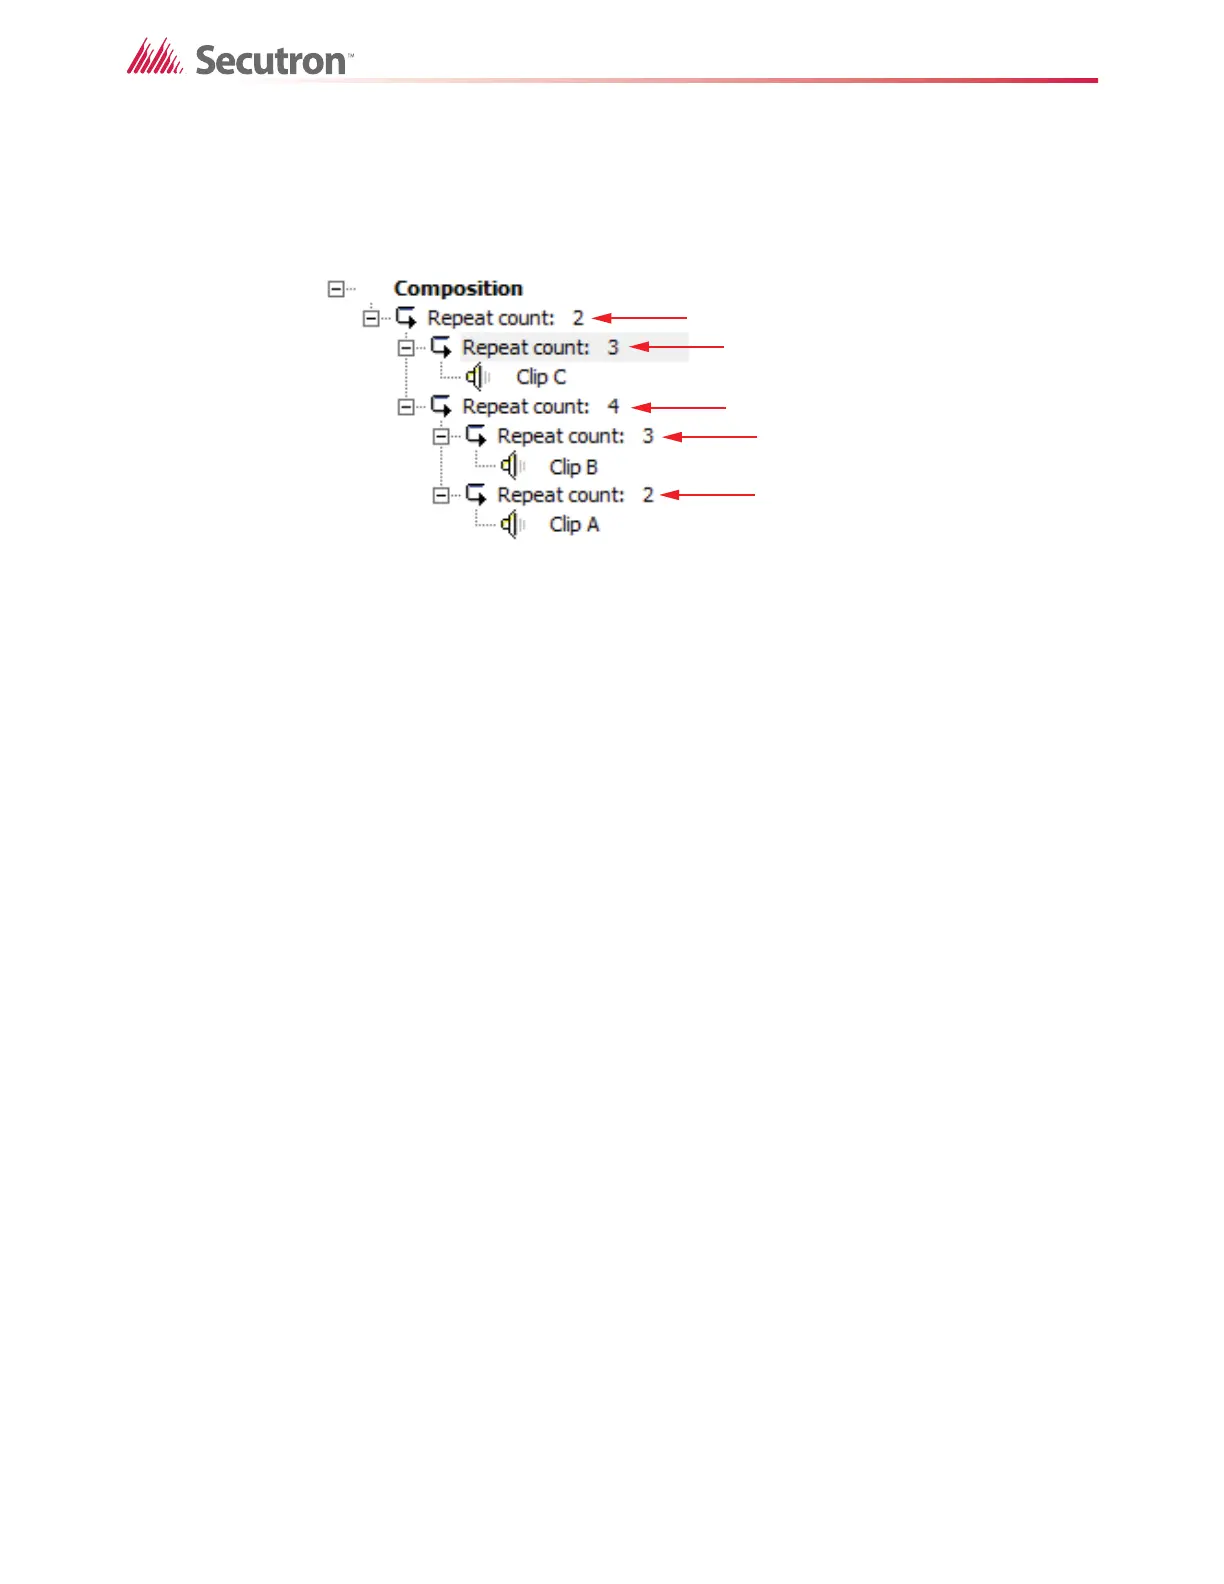
14. The composition should look like this (Figure 76):
Figure 76 Nested Loop Example
15. Select Loop 2 (not the clip) and click the Up button to move it above Loop 5.
16. Select Loop 3 and click the Up button to move it above Loop 4.
The composition should now look like Figure 75.
16.4 Configuring MMX to use your new composition
1. In the Audio Setup window (Figure 71), click the ... button beside Alert 1, Alert 2, or
Evac.
The Choose a Message window appears.
2. Select your composition, and then click OK.
The MMX system will use your new composition as the Alert 1, Alert 2, or Evac
message, depending on which one you selected.
The message associated with Alert 2 will be disabled if the Sound pre-announce tone
when paging check box is selected.
•Select Sound pre-announce tone when paging to make a 900 Hz pre-announce tone
play (using the Alert 2 channel) for 2 seconds before the paging audio source is applied.
This special tone will un-silence speakers that are currently silenced.
•Select Silence telephone buzzer when handset off hook to make the call-in buzzer
on the audio controller silent when the local master handset is off the hook.
16.5 Correlating Digital Messages to a Zone or Switch
You can correlate compositions that you create to a zone or switch. The message will play
when the zone or switch becomes active.
To correlate a digital message
1. Right-click the zone or switch that you want to associate with the digital message, and
then click Add Correlations.
2. Click the Digitized Msgs tab.
A list of the digital messages that you have created appears.
3. Click the message that you want to correlate, and then click Add.
Loop 1
Loop 5
Loop 2
Loop 4
Loop 3
 Loading...