4-83
FACSIMILE
Contents
4
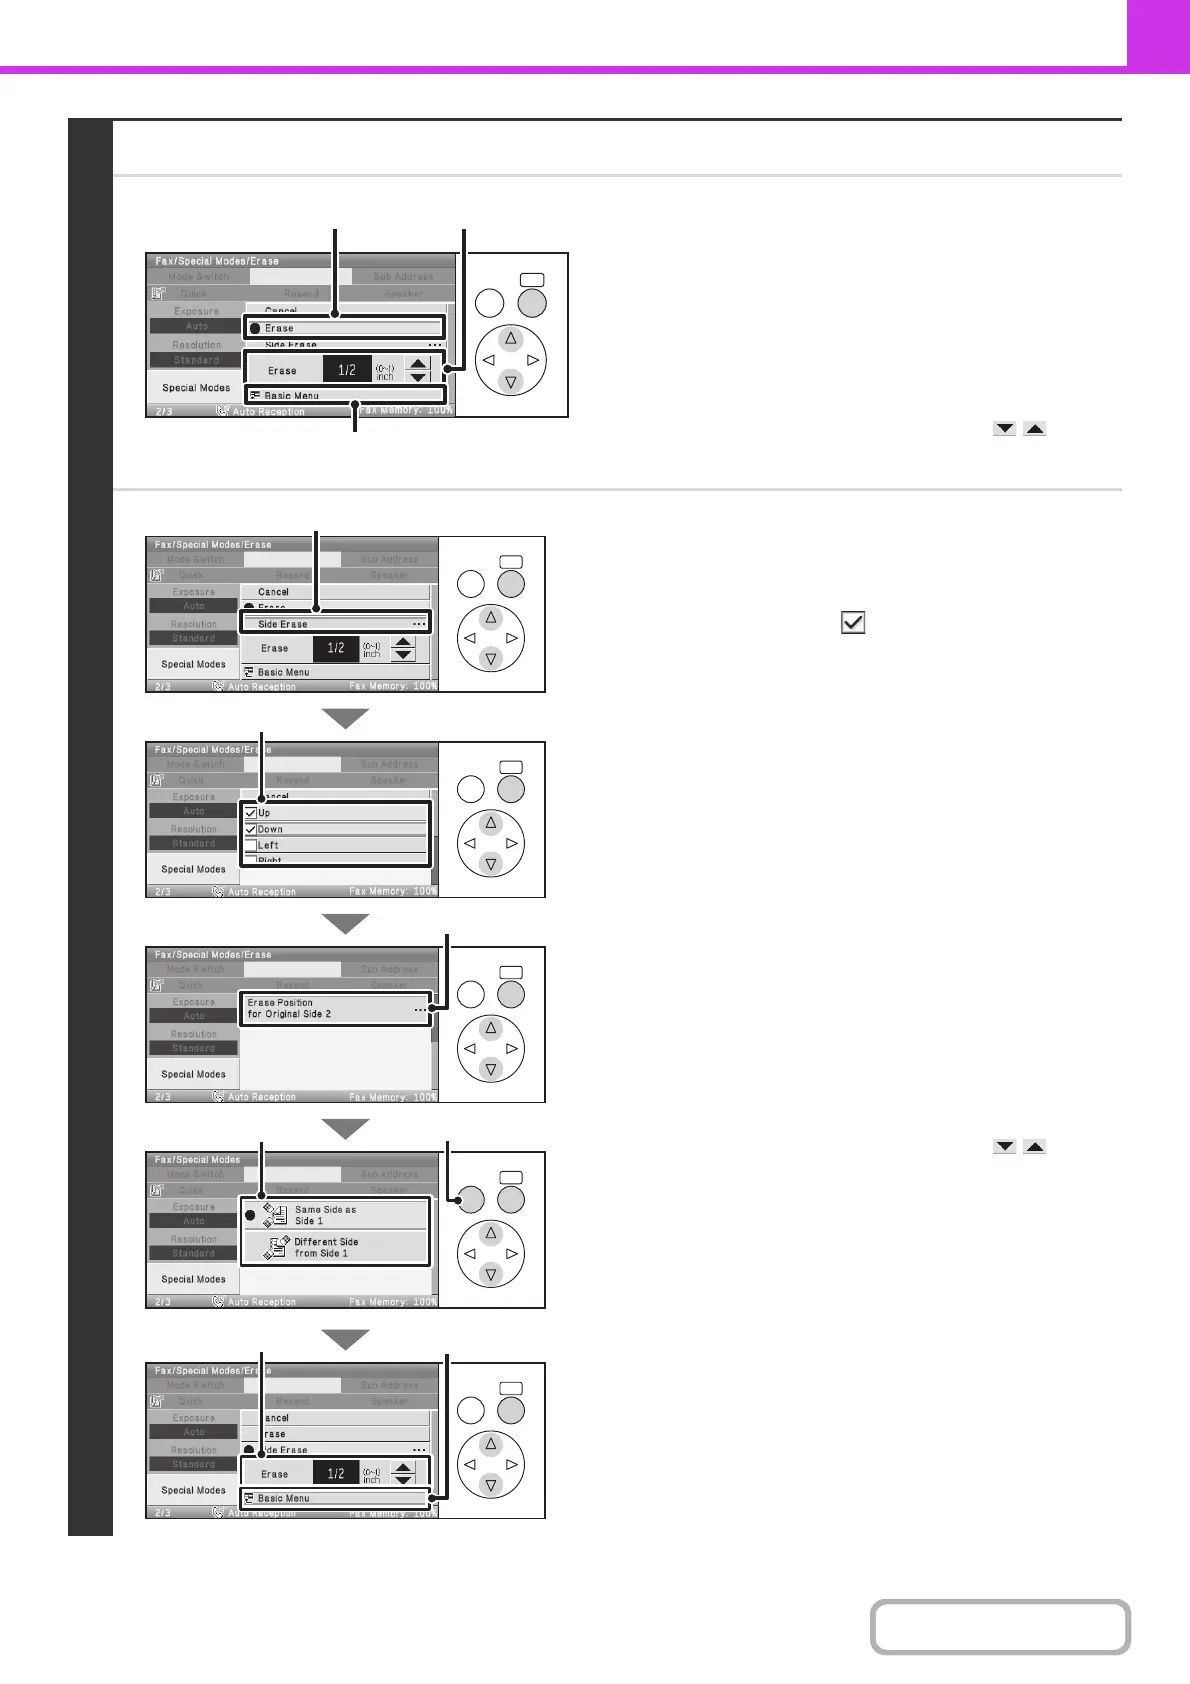
Select the erase settings.
● When [Erase] is selected
(1) Select the [Erase] key.
(2) Set the erasure width.
Select the number display and press the [OK] key. A
number entry screen will appear. Enter the desired
number with the numeric keys and select the [OK] key in
the number entry screen.
0" to 1" (0 mm to 20 mm) can be entered.
You can also change the number with the keys.
(3) Select the [Basic Menu] key.
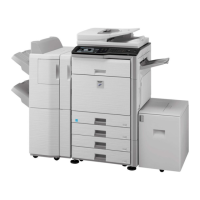
● When [Side Erase] is selected
(1) Select the [Side Erase] key.
(2) Set the sides to be erased.
Select the checkboxes of the sides that you wish to
erase.
(3)
Select the [Erase Position for Original Side 2]
key.
(4) Set the erase edge on the reverse side.
When performing two-sided scanning, set the erase edge
on the reverse side.
• If you select the [Same Side as Side 1] key, the edge in
the same position as on the front side will be erased.
• If you select the [Different Side from Side 1], the edge in
the position opposite to the erased edge on the front
side will be erased.
(5) Press the [BACK] key.
(6) Set the erasure width.
Select the number display and press the [OK] key. A
number entry screen will appear. Enter the desired
number with the numeric keys and select the [OK] key in
the number entry screen.
0" to 1" (0 mm to 20 mm) can be entered.
You can also change the number with the keys.
(7) Select the [Basic Menu] key.
OKBACK
(2)(1)
(3)
OKBACK
OKBACK
OKBACK
OKBACK
OKBACK
(1)
(2)
(4)
(3)
(5)
(6)
(7)