5-41
SCANNER/INTERNET FAX
Contents
4
Check the original scan size and
placement orientation.
To make sure that the original is scanned in the correct
orientation (the orientation in which the top edge of the original
appears at the top of the display), check the size and
orientation of the original placed in step 1.
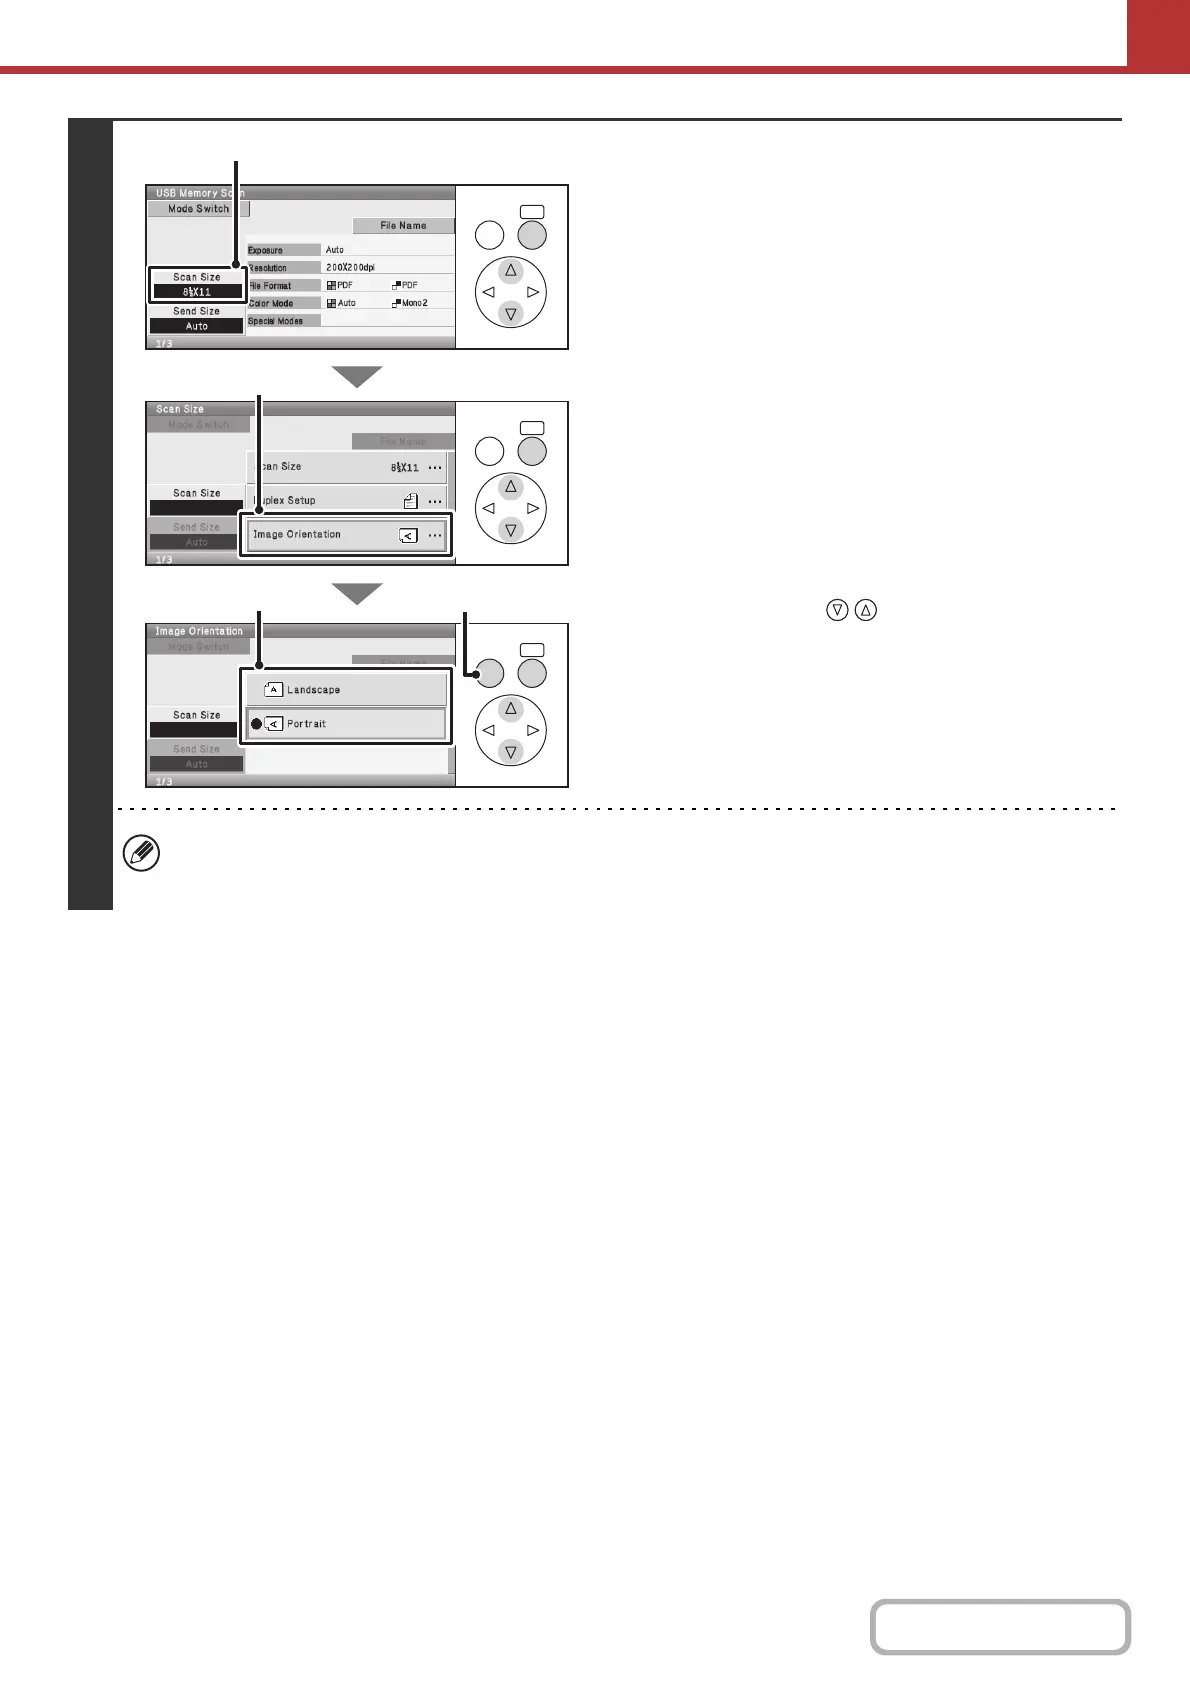
(1) Check the scan size.
Check if the size of the placed original is displayed in the
[Scan Size] key. If the displayed size is different from the
size of the placed original, set the original size.
☞ SPECIFYING THE ORIGINAL SCAN SIZE AND
SEND SIZE (page 5-61)
(2) Select the [Scan Size] key.
(3) Select the [Image Orientation] key.
(4)
Set the placement orientation of the original.
If the original is placed with the top edge at the top, select
[Landscape] with the keys. If the top edge is
placed to the left, select [Portrait]. Press the [OK] key.
(5) Press the [BACK] key.
You will return to the basic screen.
• The placement orientation of the original is initially set to [Portrait]. If you placed the original with the top edge to the
left, this step is not necessary.
• The original size set in the system settings appears as the original size.
OKBACK
OKBACK
OKBACK
(1), (2)
(3)
(4)
(5)
 Loading...