Fig. 52
LowerthegaugeandpressSTART;thedisplaywillshowrst:
TEST key check
in progress !
And then:
To compare detected
quotestGaugeZ20
on reader clamp.
[START]
RemovethekeyfromthereadingclampandttheZ20templateinitsplace.
Fig. 53
ATTENTION: carefully clean the Z20 template, test key Z3 and clamps before gauging.
LowerthegaugeandpressSTART;thedisplaywillshowrst:
Gauge dimensions
reading in progress.
and then:
Adjustements:
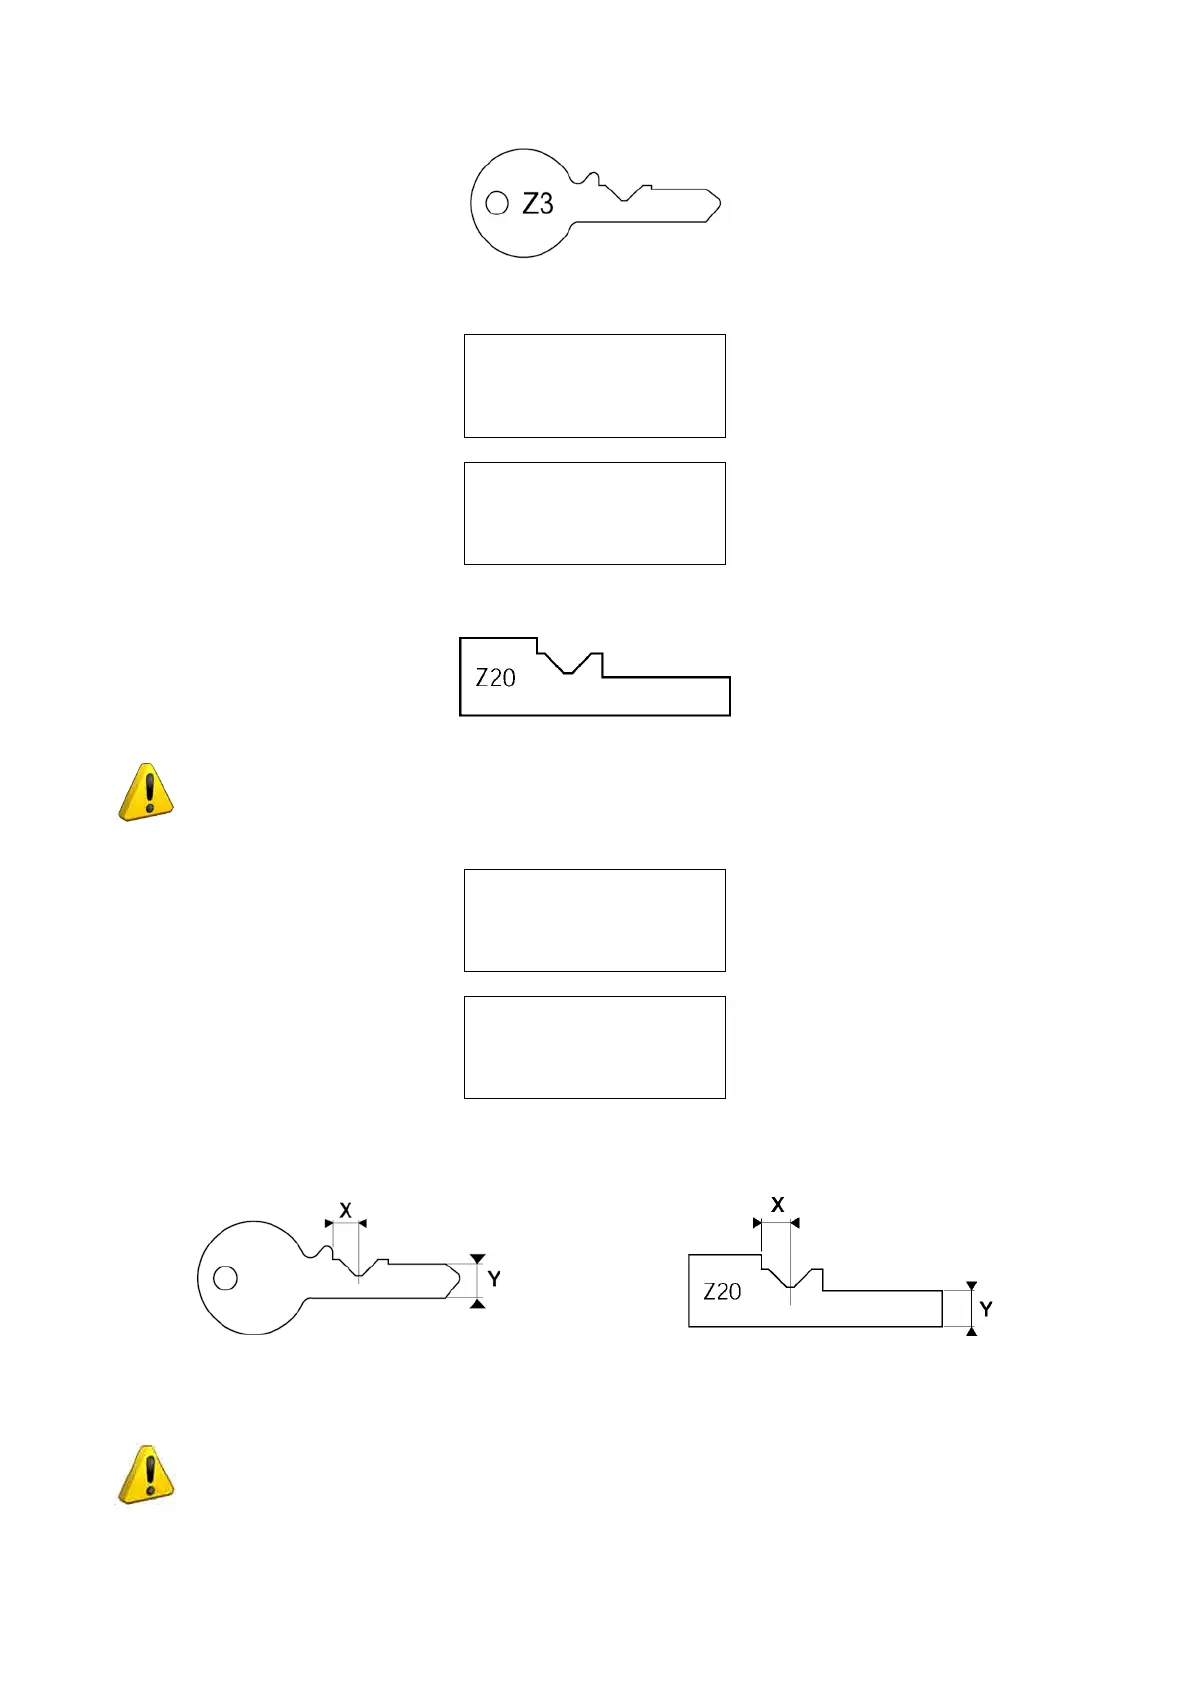
X =-005 Y= +002
Savedata?
No=STOP Yes=ENTER
The display will show the adjustments relating to the X and Y axes; the correction values are viewed automatically
(they are the difference between the value read on the key and the template value) (Fig. 54).
Fig. 54
Press ENTER to save the adjustments, which will be applied automatically to the cutting side L100 clamp.
ATTENTION: if the STOP key is pressed, the new settings will be lost. If so, only the previous
setting values will remain valid. The settings will be accepted only if the tolerances remain
within a range between -40/ +40 hundredths of a mm.
Operating Manual UC199
Copyright Silca 2012
44