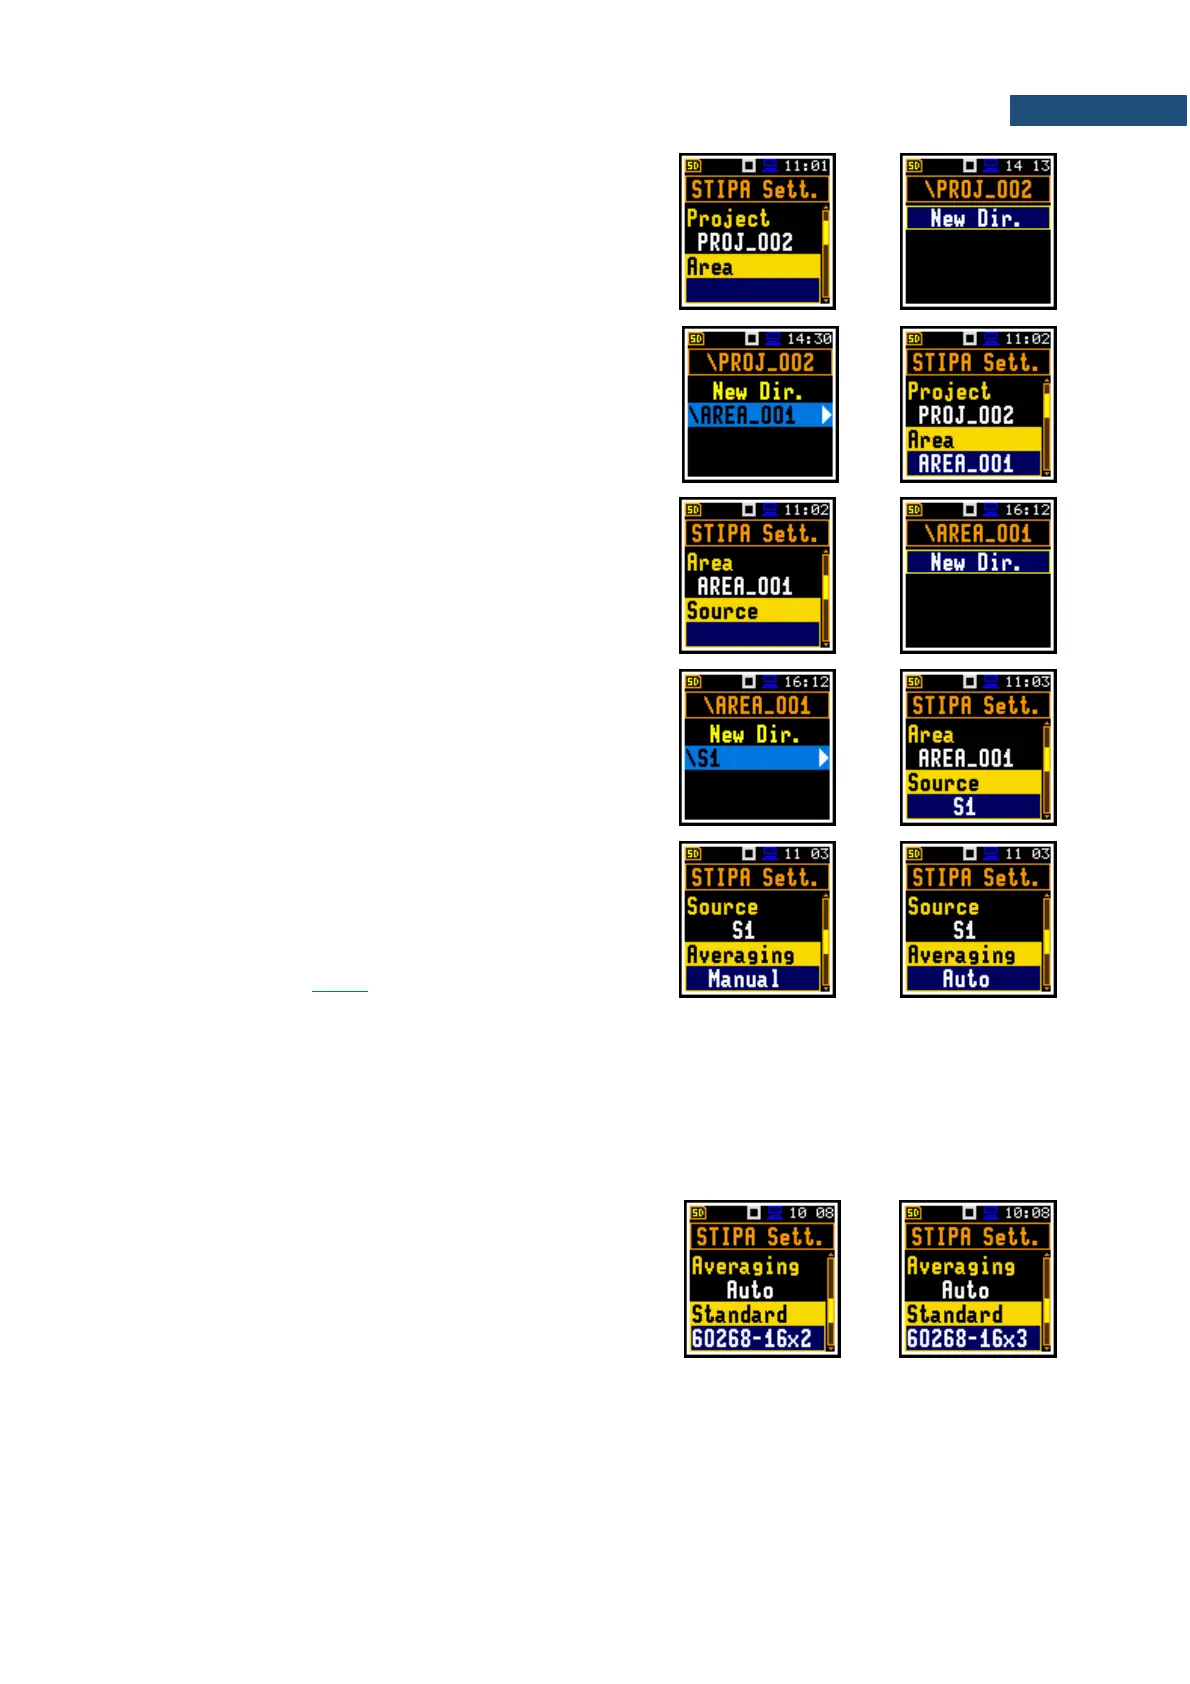
3. Go to the Area position and press the ► key. In the
File Manager screen create a new area directory
<New Dir.> or select the directory of the previously
created Area in the selected Project.
After creation of a new area directory or selection of
the existed one press <Enter> and the selected
area name will be displayed in the Area position of
the STIPA Sett. screen.
4. Go to the Source position and press the ► key. In
the File Manager screen create a new source
directory <New Dir.> or select the directory of the
previously created Source in the selected Area.
After creation of a new source directory or selection
of the existed one press <Enter> and the selected
source name will be displayed in the Source
position of the STIPA Sett. screen.
5. Select the Averaging type: Manual or Auto.
Manual averaging means that you may perform as
many measurements for the measurement point as
you heed, and you will decide when to stop series
of measurements by using the Complete command
– see Chapter 13.3.6.
Automatic averaging assumes that the measurements will be averaged according to IEC 60268-
16:2011 which assumes two types of averaging – for standard measurements (60268-16x2) and for
measurements with fluctuating noise (60268-16x3). In the standard abbreviation x2 means that no
less than two measurements should be made, and x3 means that no less than three measurements
should be made. When the automatic averaging is selected, additional position Standard appears
in the STIPA Settings screen.
6. In case of automatic averaging, choose the
Standard that defines the averaging type:
60268-16x2 or 60268-16x3.
In the automatic averaging mode, you make
measurements the same way as in the manual
mode. The difference is that in automatic mode, the
instrument decides when to end the series of
measurements and ends it automatically when the
appropriate condition is met.