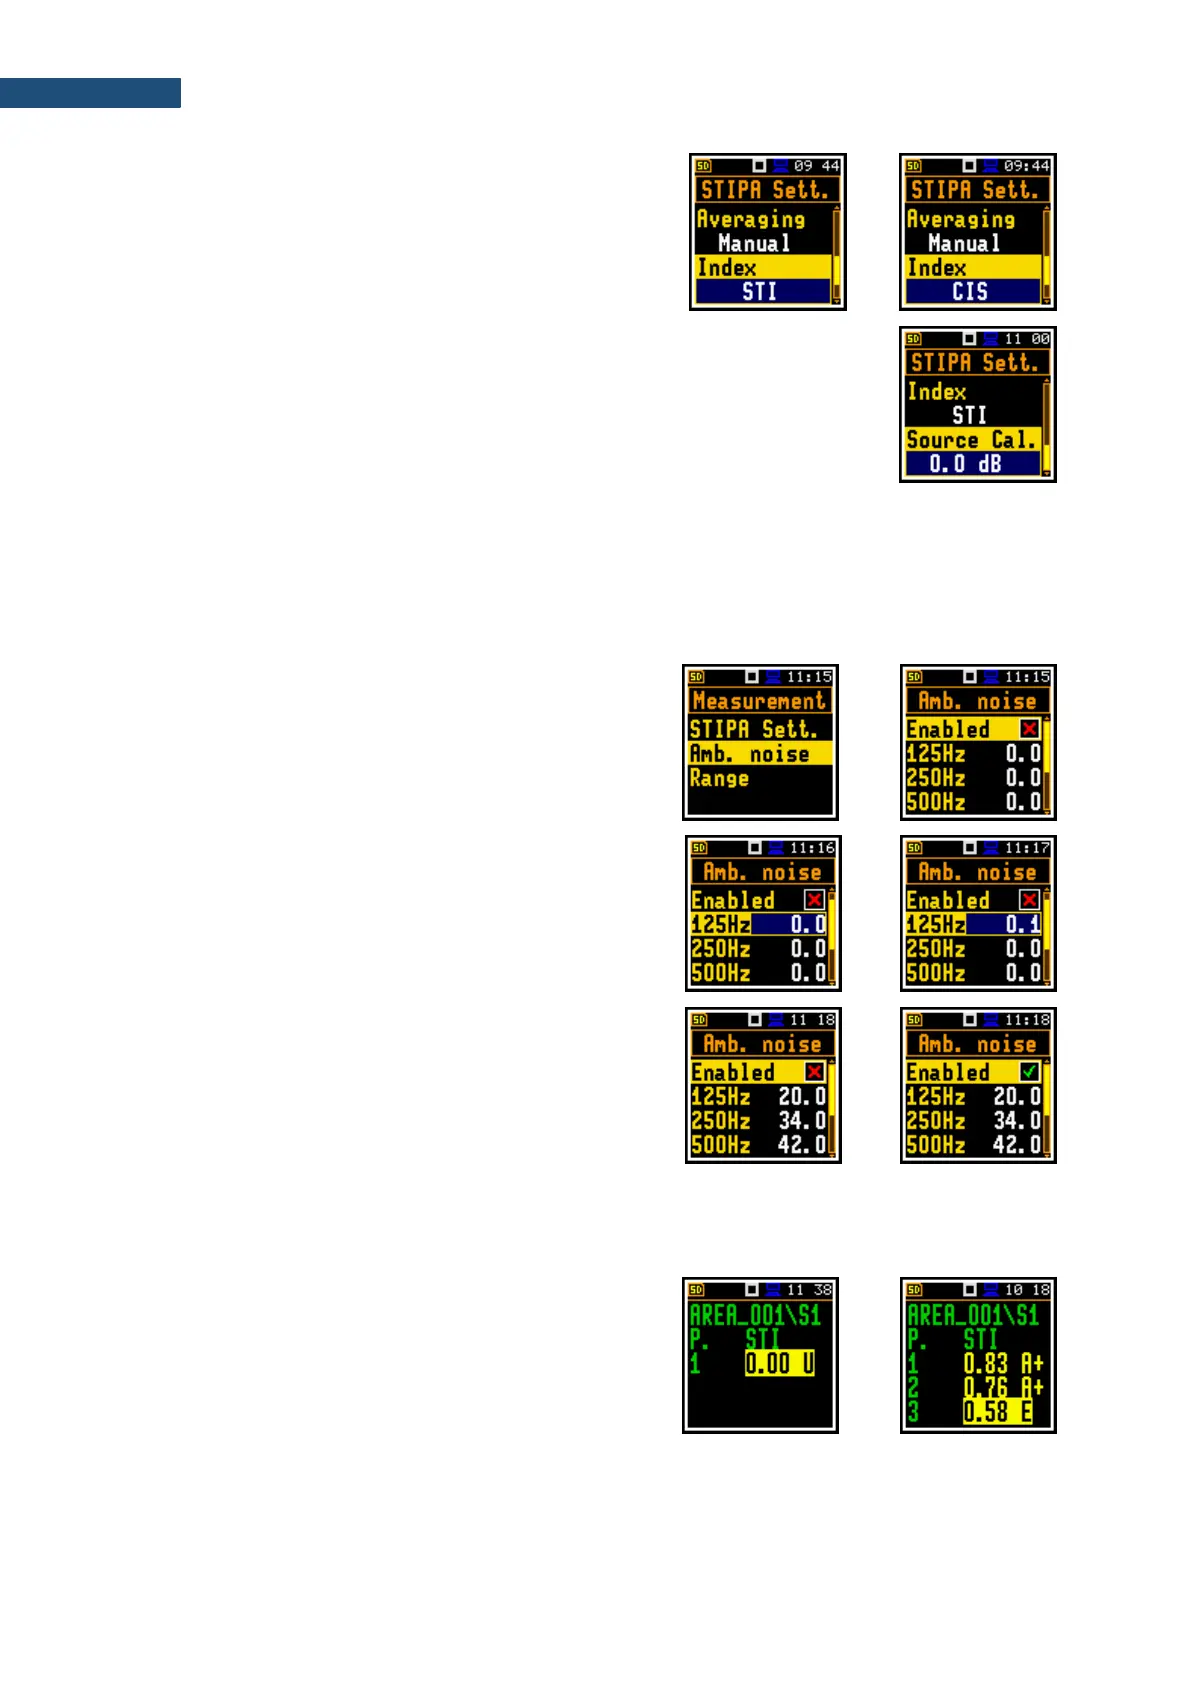
7. In the Index position, choose the result STI or CIS
to be displayed in the main STIPA views.
8. In the Source Calibration position, set the adjustment of the reference
STIPA signal level to the level of a real voice signal in the tested area.
LAeq of both signals must be measured and if the difference between the
real signal and STIPA signal is different than -3 dB, enter it as the Source
calibration.
13.3.5 Considering ambient noise distortions
During the measurement, the effect of ambient noise distortions can be considered in combination with
the STIPA signal in the 1/1-octave bands with central frequencies from 125 to 8000 Hz. These sound
pressure values are not necessarily should be the result of some measurements. They can be defined
on the basis of the user's knowledge, design assumptions, literature, etc.
In the Ambient noise screen, you can set noise levels
for octave bands that will be considered in STIPA
calculations.
To set the ambient noise, select the 1/1-octave band and
with the ◄/► key set the required value in dB.
In the Enable position, you can enable or disable the
consideration of ambient noise for subsequent
measurements.
13.3.6 STIPA measurements
When STIPA settings are complete, you can start measuring.
1. To perform measurements, go to the measurement
mode (escape from the configuration menu).
If you begin measurements, the Area view will show
the first measurement point with zero STI value.
If you have already made the measurements for
some measurement points, you should create a new
measurement point – see step 5.