STIPA measurements require averaging of STI/CIS indexes. This averaging concern two aspects:
1) averaging of results for a measurement point.
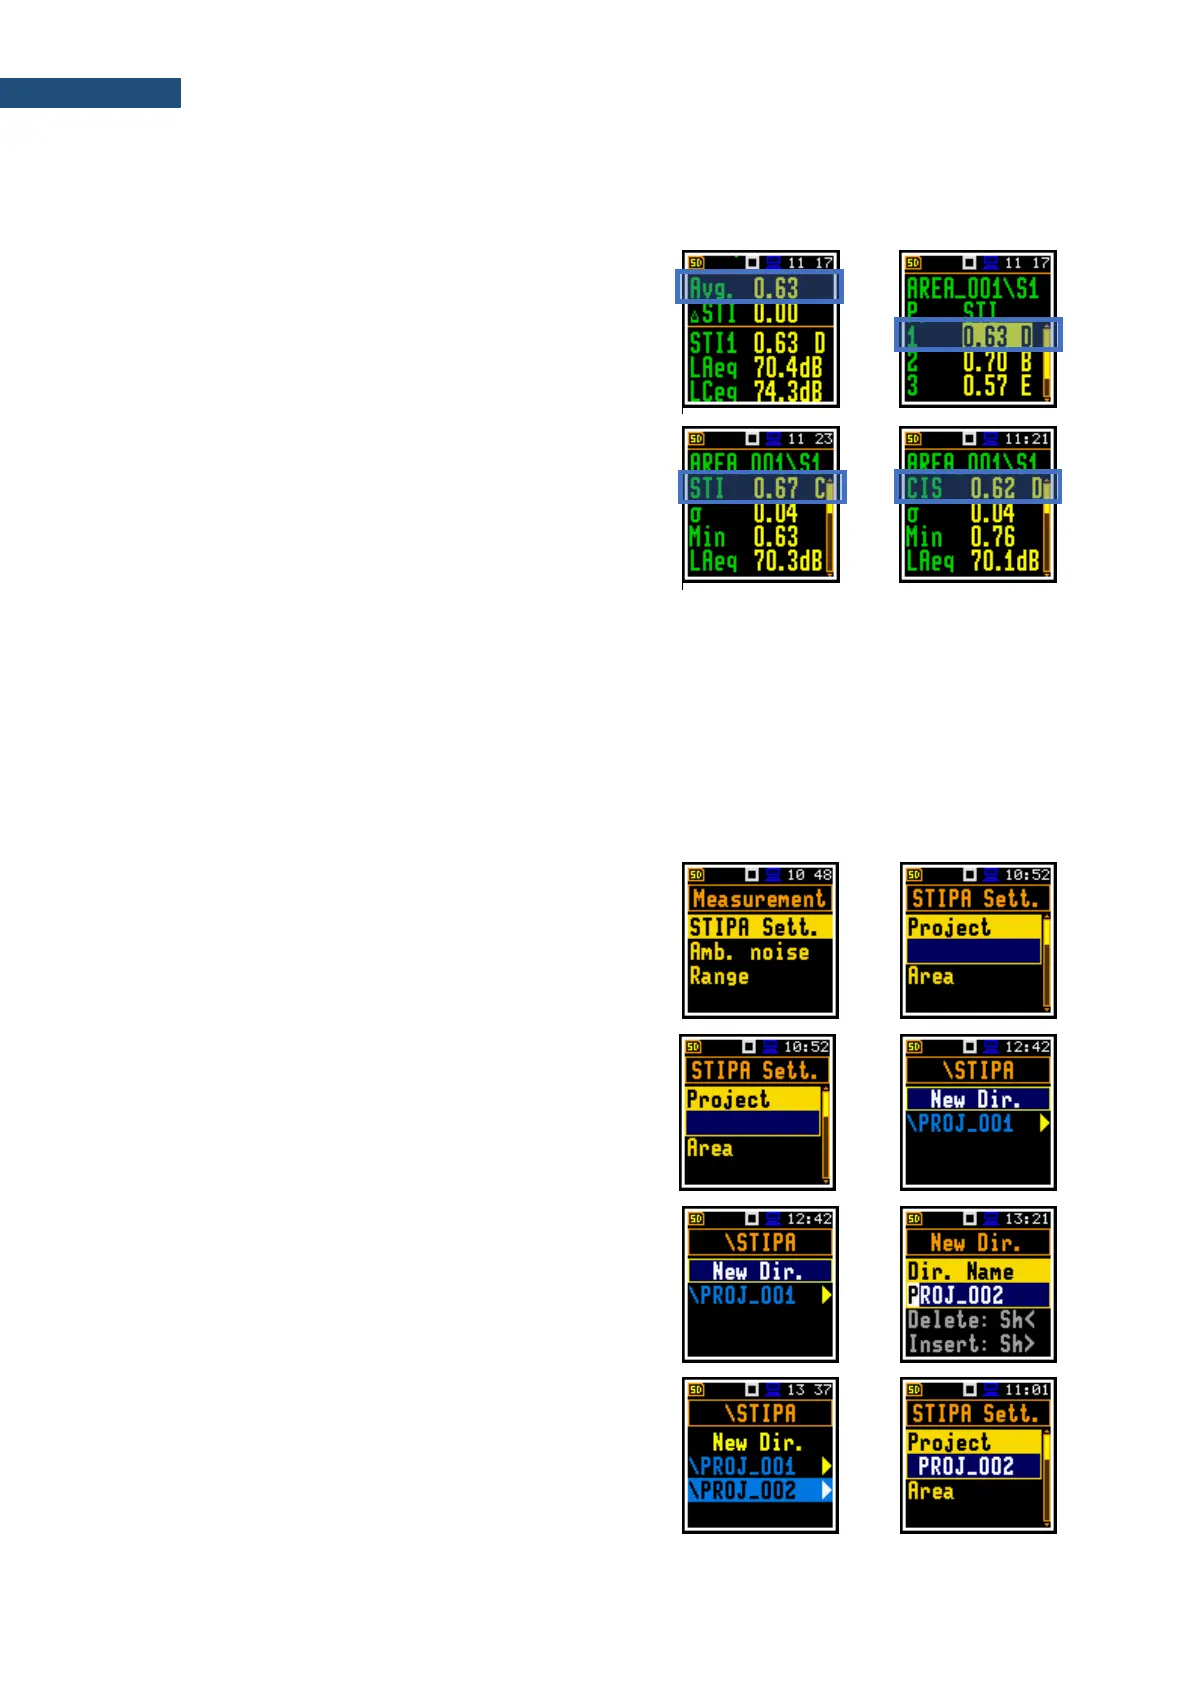
Averaged STI/CIS for the measurement point is
displayed in the first line of the Point view and in the
measurement points list of the Area view.
2) averaging of results for a tested area.
Averaged STI/CIS for the tested area is displayed in the
second line of the Area summary view.
According to most standards, it is good practice to average the results for measuring points from two or
three measurements. In case of fluctuating noise occurring during measurements, it is recommended to
make not less than three measurements and check whether the spread of the obtained STI results does
not exceed 0.03.
The standard deviation is determined with the calculation of the mean STI (or CIS) for the area.
STIPA measurements are configured in the STIPA Settings and Ambient noise screens. To configure
a STIPA project follow these steps:
1. Select the STIPA Sett. position in the
Measurement section and open it with the <Enter>
key.
2. Being at the Project position, press the ► key and,
in the File Manager screen, select <New Dir.> to
create a new project directory or select the directory
of the previously created Project and press
<Enter>.
In case of <New Dir.> the instrument will propose a
default name for the new Project directory which can
be modified in the editor screen opened after
pressing the <Enter> key.
After edition of the directory name it should be
confirmed by the <Enter> key.
Being at the new created directory line in the
File Manger screen press <Enter> to return to the
STIPA Sett. screen.
The selected project name will be displayed in the
Project position of the STIPA Sett. screen.