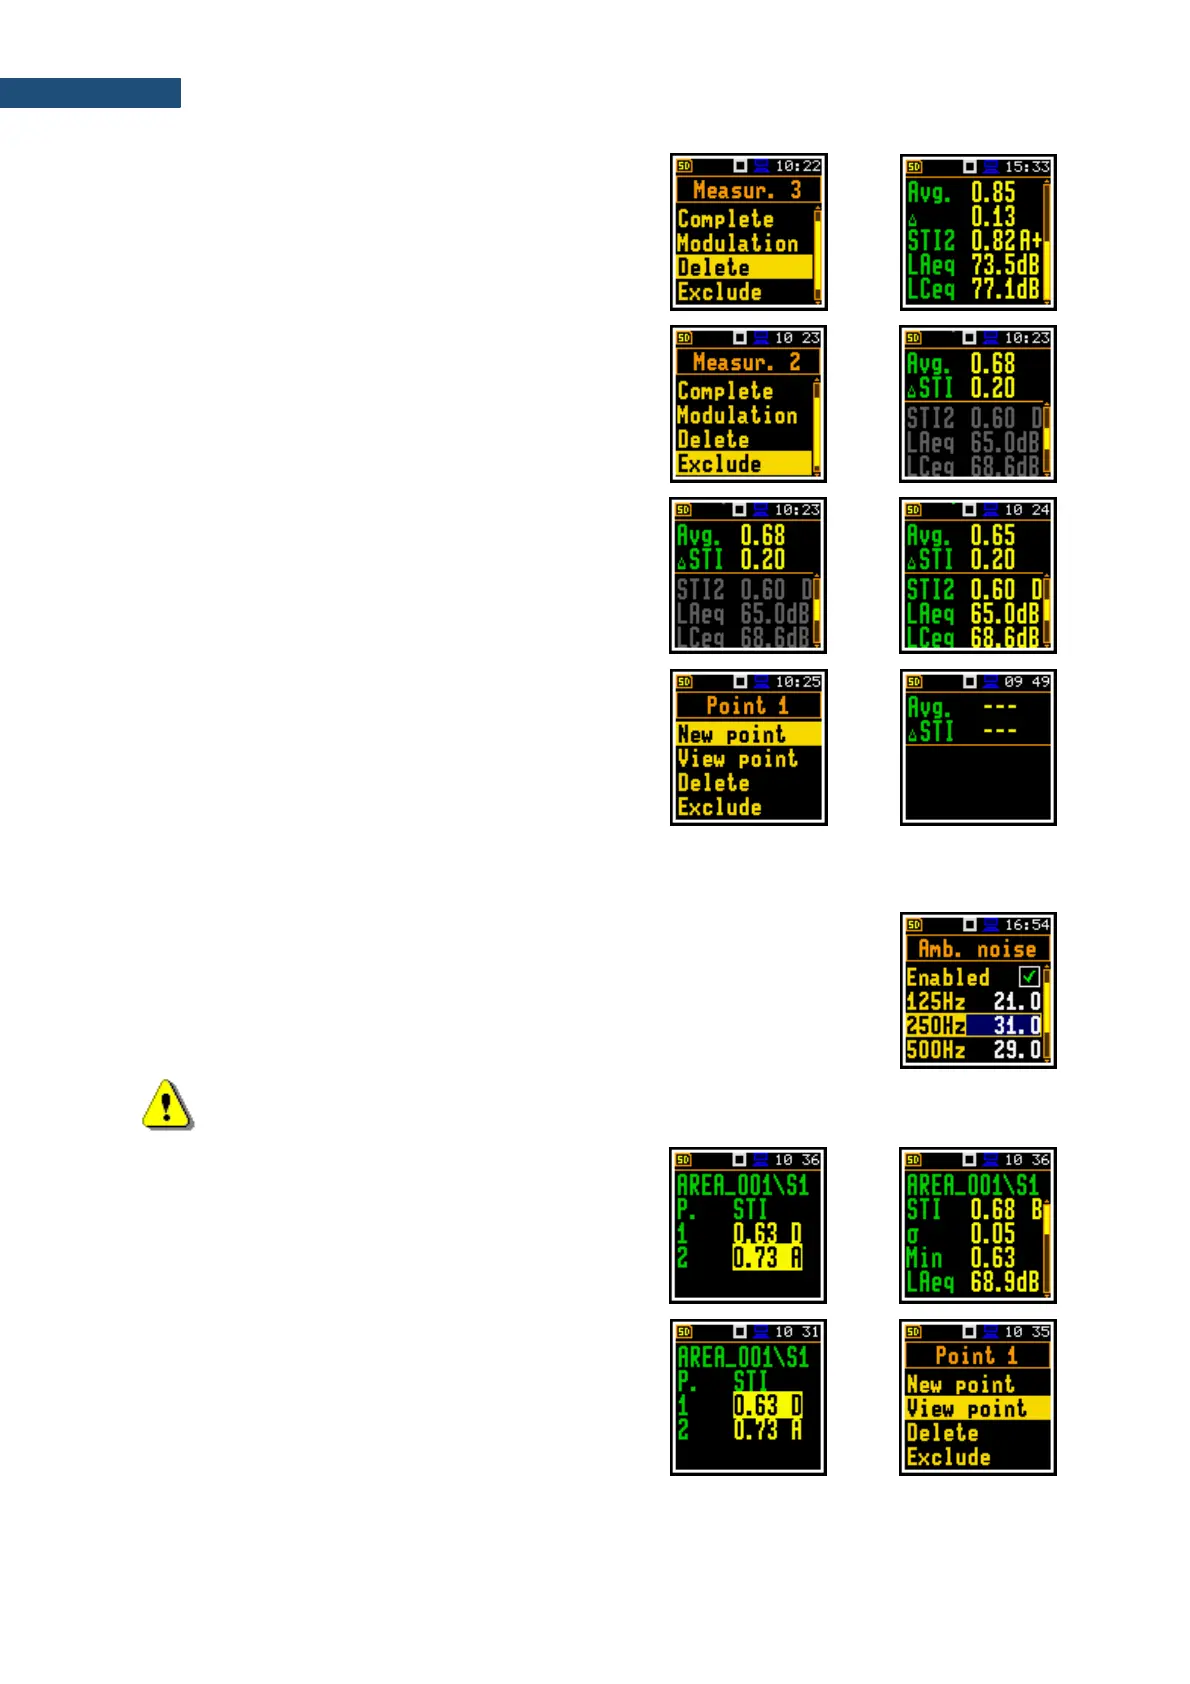
If you choose Delete and press <Enter> the instrument
will delete the selected measurement from the
measurement list and change the numeration in the Point
view. At the same time the file with the measurement
results will be deleted from the Point directory.
If you choose Exclude and press <Enter> the instrument
will exclude the selected measurement from averaging
and in the Point view the excluded measurement results
will be shown in grey.
If you select the excluded measurement and open the
command list the last command will be named Include.
You can also exclude/include the selected measurement
from the averaging directly in the Point view with the
◄ / ► key pressed together with <Shift>.
The file with the excluded measurement results will have
the “_” character instead of “M”.
5. After completion of the measurement series for the
measurement point, you can create a new
measurement point.
For this press <Enter> in the Area view and in the
command list, select the New point position and
press <Enter>. The instrument will create a new
point directory.
To start measurements in the new measurement
point, press the <Start> key and follow steps 2 – 4.
In some cases, it may be necessary to change ambient noise levels for a new
measurement point. In such a case you should open the Ambient noise screen
of the Measurement section and make necessary adjustments of the noise levels
for octaves. After confirmation of the changes with the <Enter> key you can return
to the measurement mode with new ambient noise distortion parameters.
Note: Any confirmed changes in the Ambient noise table will replace the previous ones!
The summary results for the Area are presented in the
Area summary view, which is accessible from the Area
view if you press the ▼/▲ key together with <Shift>.
If you select the measurement point in the Area view and
open the command list, you can also go to the Point view
(View point) and delete (Delete) or exclude from the
averaging (Exclude) the selected measurement point.