4 – Mixer configuration and settings
7 SOLO MODE buttons
Tap these buttons to set the solo function operation mode.
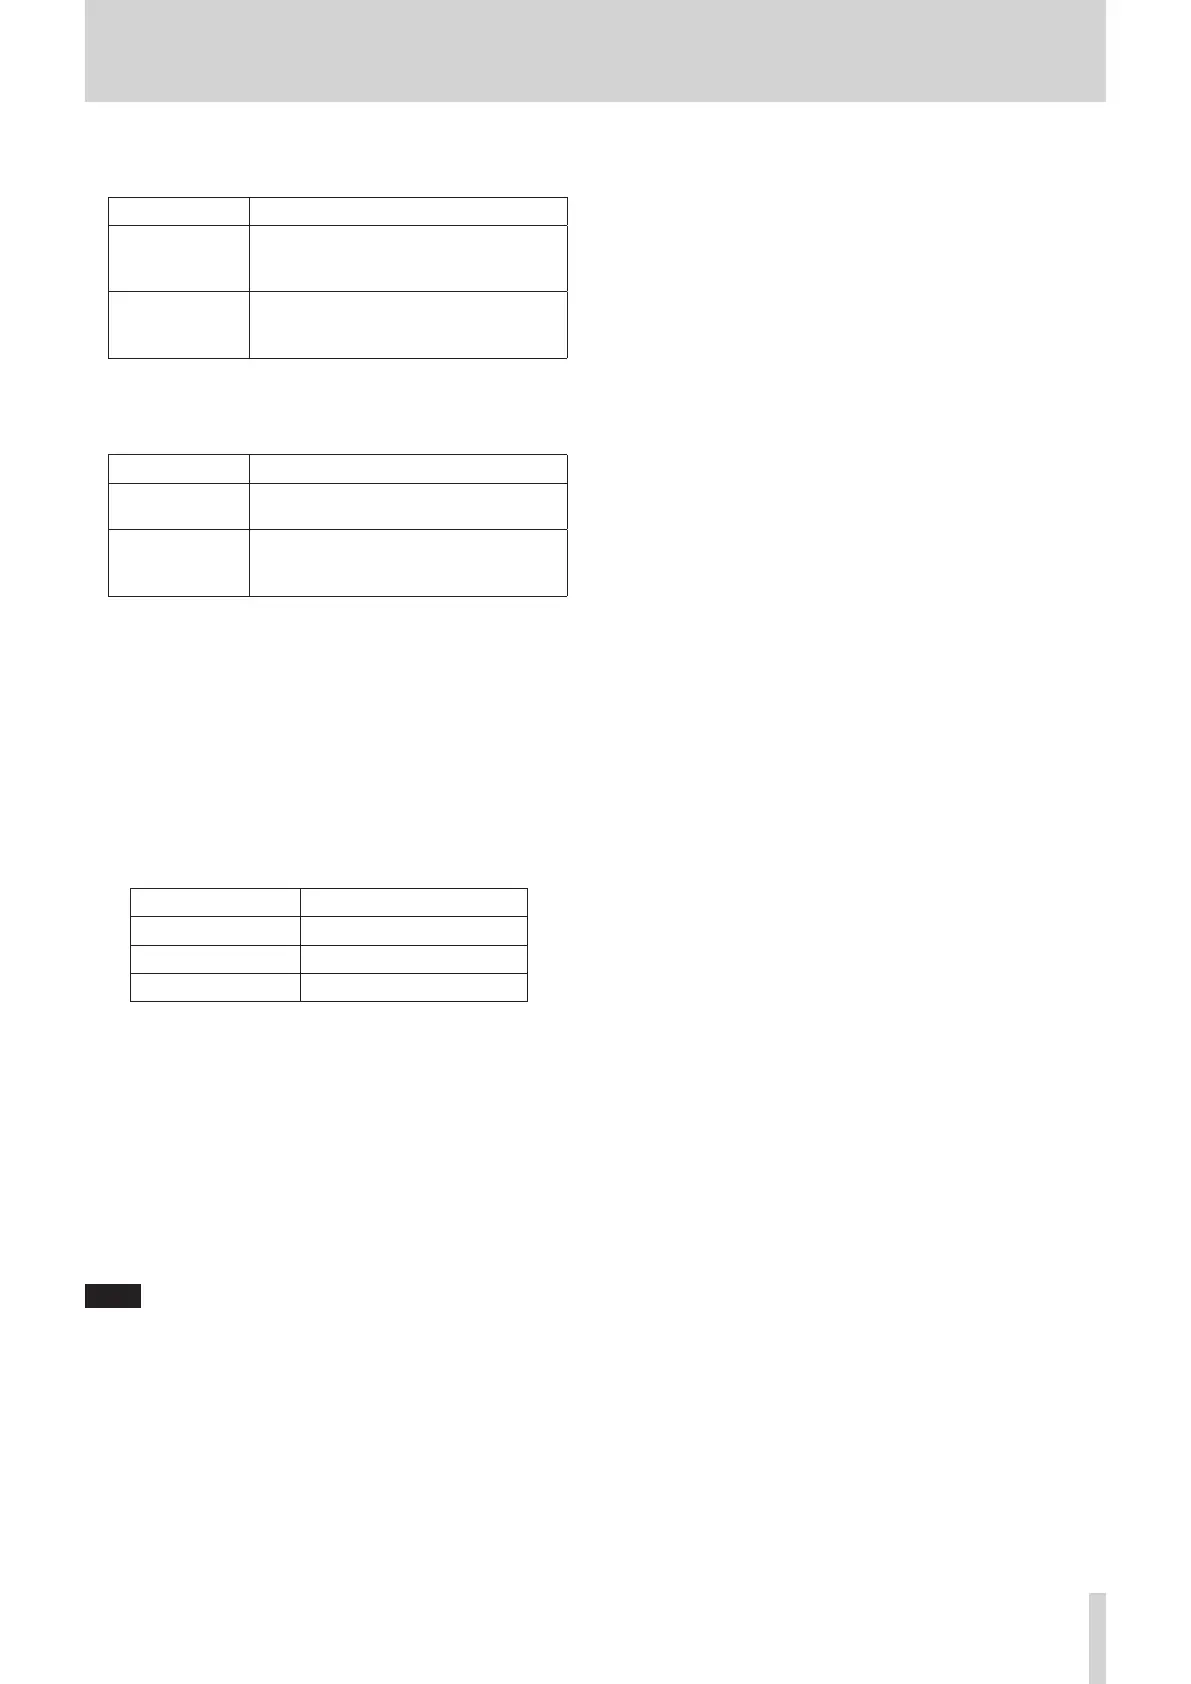
Option Meaning
MIX (default)
In solo mode, signals from modules that
have their SOLO keys pressed are mixed
for solo monitoring.
EXCLUSIVE
In solo mode, only the signal from the
module that had its SOLO key pressed
last is used for solo monitoring.
The selected button will be highlighted.
8 SOLO TYPE buttons
Tap these buttons to set the solo function type.
Option Meaning
PFL (default)
Pre-fader signals are used for solo
monitoring.
AFL
Signals after panning (post-fader for the
MAIN L/R Master module) are used for
solo monitoring.
The selected button will be highlighted.
9 DIM LEVEL knob
This adjusts the amount of monitoring signal attenuation
when the DIM function is on.
Range: -40 dB – 0 dB (default: -20 dB)
Turn LCD knob 3 (lit red) to adjust it.
0 DELAY TIME
This adjusts the delay time used to correct the timing of
monitoring signals, for example.
The highlighted unit will be used for operation, so tap the
button for the desired unit.
Unit options Range
meter 0 – 117.3 (meter)
feet 0 – 384.8 (feet)
msec (default) 0 – 341.32 (msec)
Turn LCD knob 4 (lit green) to adjust it.
q SOLO LEVEL knob
Use this to adjust the output level from the SOLO L/R bus.
Range: -∞ dB – +10 dB (default: 0 dB)
Turn LCD knob 7 (lit red) to adjust it.
w SOLO CLEAR button
o This button will appear highlighted when soloing is on for
any of the modules.
o When this button is highlighted, tap it to end soloing on
all channels.
NOTE
This has the same function as the SOLO CLEAR key on the top
panel.
TASCAM Sonicview 16/Sonicview 24 V1.1.0 55