5 – Routing
This chapter explains mixer input and output routing.
Input routing
Use the following screen for input routing.
CH 1–40/ST IN 1–2 MODULE (OVERVIEW)
Screens
Tap the MODULE NAME area on the Home Screen to open this
screen.
CH 1–40 modules
ST IN 1–2 modules
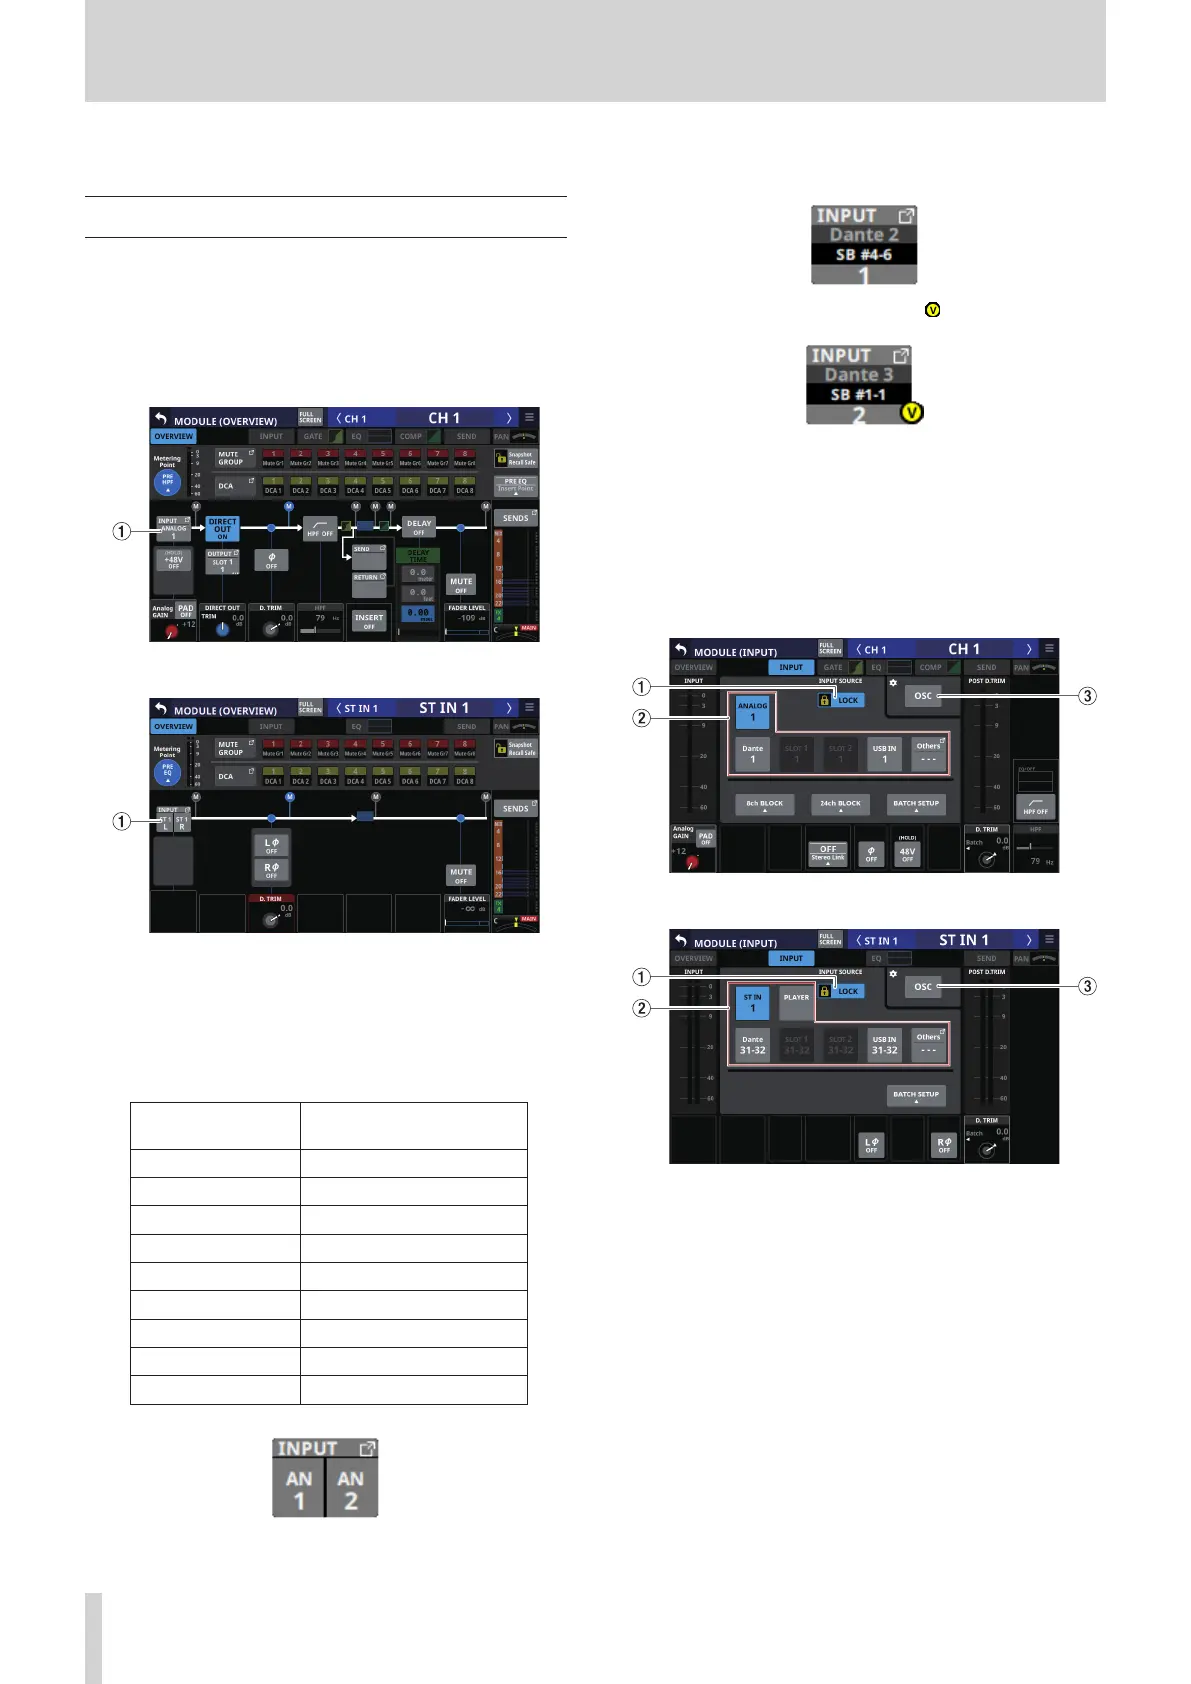
1 INPUT button
o This shows the name of the input source assigned to the
selected module.
o If the module is stereo, input source names will appear
split left and right and abbreviated as follows.
Module name
shown
Stereo module name
shown
ANALOG AN
Dante DA
SLOT 1 S1
SLOT 2 S2
USB IN USB
ST IN 1 ST1
ST IN 2 ST2
PLAYER PL
SB-16D SB
o If a Dante port that has a mounted SB-16D assigned is
selected, “SB #[ID] [port number]” will be shown.
If it is a virtually-mounted SB-16D, will appear.
o Tap this button to open the INPUT SOURCE SELECT Screen
where input sources can be selected. (See “INPUT SOURCE
SELECT screen” on page 102.)
CH 1–40/ST IN 1–2 MODULE (INPUT) Screens
Tap the INPUT area on the Home Screen of a CH 1–40/ST IN 1–2
module when the selection frame is shown to open this screen.
CH 1–40 modules
ST IN 1–2 modules
1 LOCK/UNLOCK button
o This button locks/unlocks routing setting change
operations for the unit. This is always locked at the time of
start up.
o When set to “LOCK”, tapping INPUT SOURCE (2) and OSC
(3) buttons will not change settings. Furthermore, the
8ch BLOCK, 16ch BLOCK, 24ch BLOCK and BATCH SETUP
buttons will also be disabled. However, tapping the Others
button and switching to the INPUT SOURCE SELECT
Screen is possible.
o When set to “LOCK”, tap this button to open a confirmation
message. Tap the UNLOCK button to close the message
and set it to “UNLOCK”. Tapping the CANCEL button on
the confirmation message will close it and maintain the
locked state.
94 TASCAM Sonicview 16/Sonicview 24 V1.1.0