5 – Routing
5 Scroll knob and scrollbar
These appear when all selectable options cannot be shown
on the display at the same time.
Drag the display to scroll the screen. The screen can also
be scrolled by swiping up and down on the output port
selection button (3) area as well as by turning LCD knob 8.
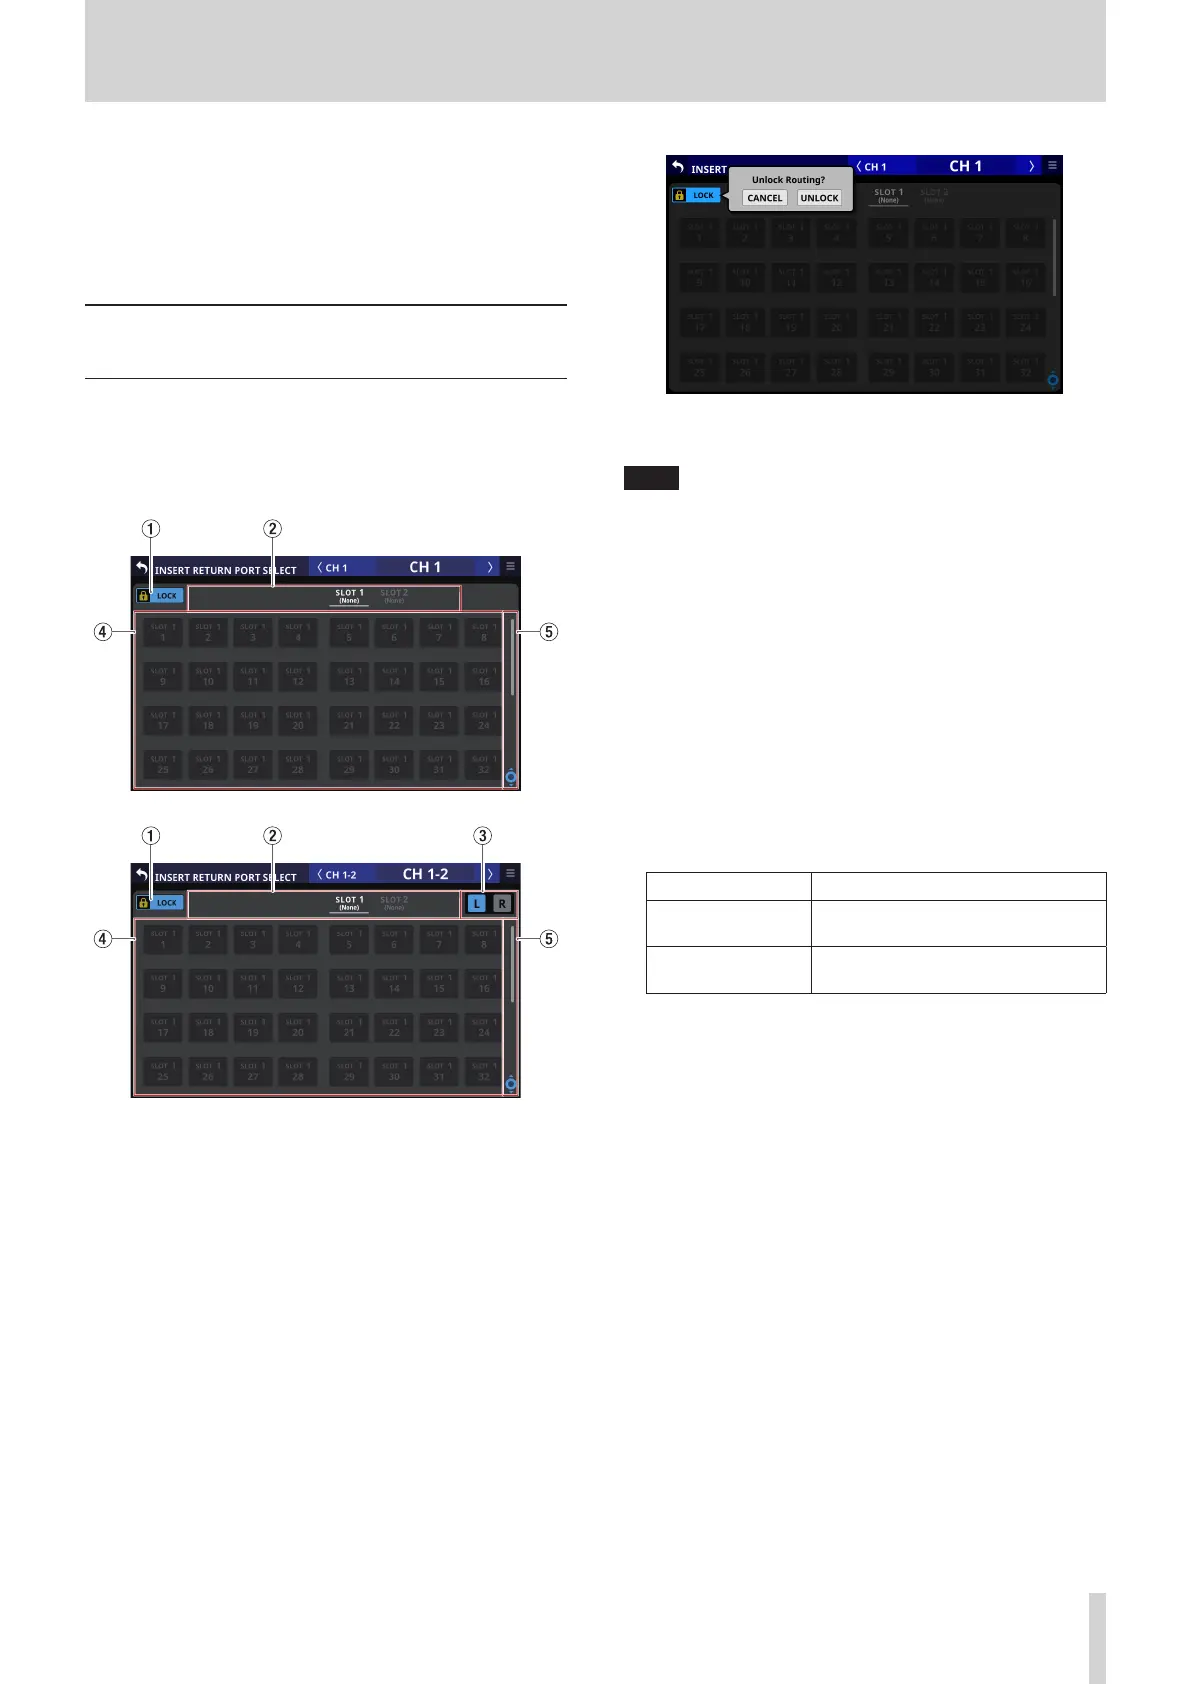
INSERT RETURN PORT SELECT
screen
Set INSERT RETURN signal input ports for CH 1–40, MIX 1–22 and
MAIN L/R Master modules on this screen.
Tap the RETURN button on the MODULE (OVERVIEW) Screen of
these modules to open this screen. (See “Insert input and output
routing” on page 98.)
1 LOCK/UNLOCK button
o This button locks/unlocks routing setting change
operations for the unit. This is always locked at the time of
start up.
o When set to “LOCK”, tapping the input source selection
button (3) will not change settings.
o When set to “LOCK”, tap this button to open a confirmation
message. Tap the UNLOCK button to close the message
and set it to “UNLOCK”. Tapping the CANCEL button on
the confirmation message will close it and maintain the
locked state.
o Tap this button when set to “UNLOCK” to switch it to
“LOCK”.
NOTE
The LOCK/UNLOCK button (1) setting is shared by the
following routing setting screens.
i MODULE (INPUT) Screen
i MODULE (OUTPUT) Screen
i INPUT SOURCE SELECT Screen
i OUTPUT PORT SELECT Screen
i DIRECT OUT PORT SELECT Screen
i INSERT SEND PORT SELECT Screen
i INSERT RETURN PORT SELECT Screen
2 Input source group page switches
o These show input source group page names.
o Tap a page name to switch to the page with the
corresponding input source group. The name of the
selected page will be highlighted. An * will appear next to
the name of the page that the selected input source is on.
Page name Contents
SLOT 1
Select the inputs of the expansion
card installed in SLOT 1.
SLOT 2
Select the inputs of the expansion
card installed in SLOT 2.
3 L/R selection buttons
These select whether to set the input ports of the left or right
channels of stereo modules.
Tap these buttons to switch between left and right. The
selected button will be highlighted.
4 Input source selection buttons
o When the LOCK/UNLOCK button (1) is set to “UNLOCK”,
tap these buttons to select input sources. The selected
button will be highlighted light blue. Buttons that cannot
be used will appear dark gray. If a button that cannot be
used is selected, it will appear dark blue.
o For stereo modules, “L” will be shown to the bottom left
of the button selected for the left channel and “R” will be
shown to the bottom right of the button selected for the
right channel.
5 Scroll knob and scrollbar
These appear when all selectable options cannot be shown
on the display at the same time.
Drag the display to scroll the screen. The screen can also
be scrolled by swiping up and down on the input source
selection button (3) area as well as by turning LCD knob 8.
TASCAM Sonicview 16/Sonicview 24 V1.1.0 107
 Loading...