8 – Saving and recalling setting data
Exporting snapshots
1. Tap the snapshot name area (2) on the Menu Screen to
open the Snapshot List Screen. (See “Snapshot List Screen”
on page 168.)
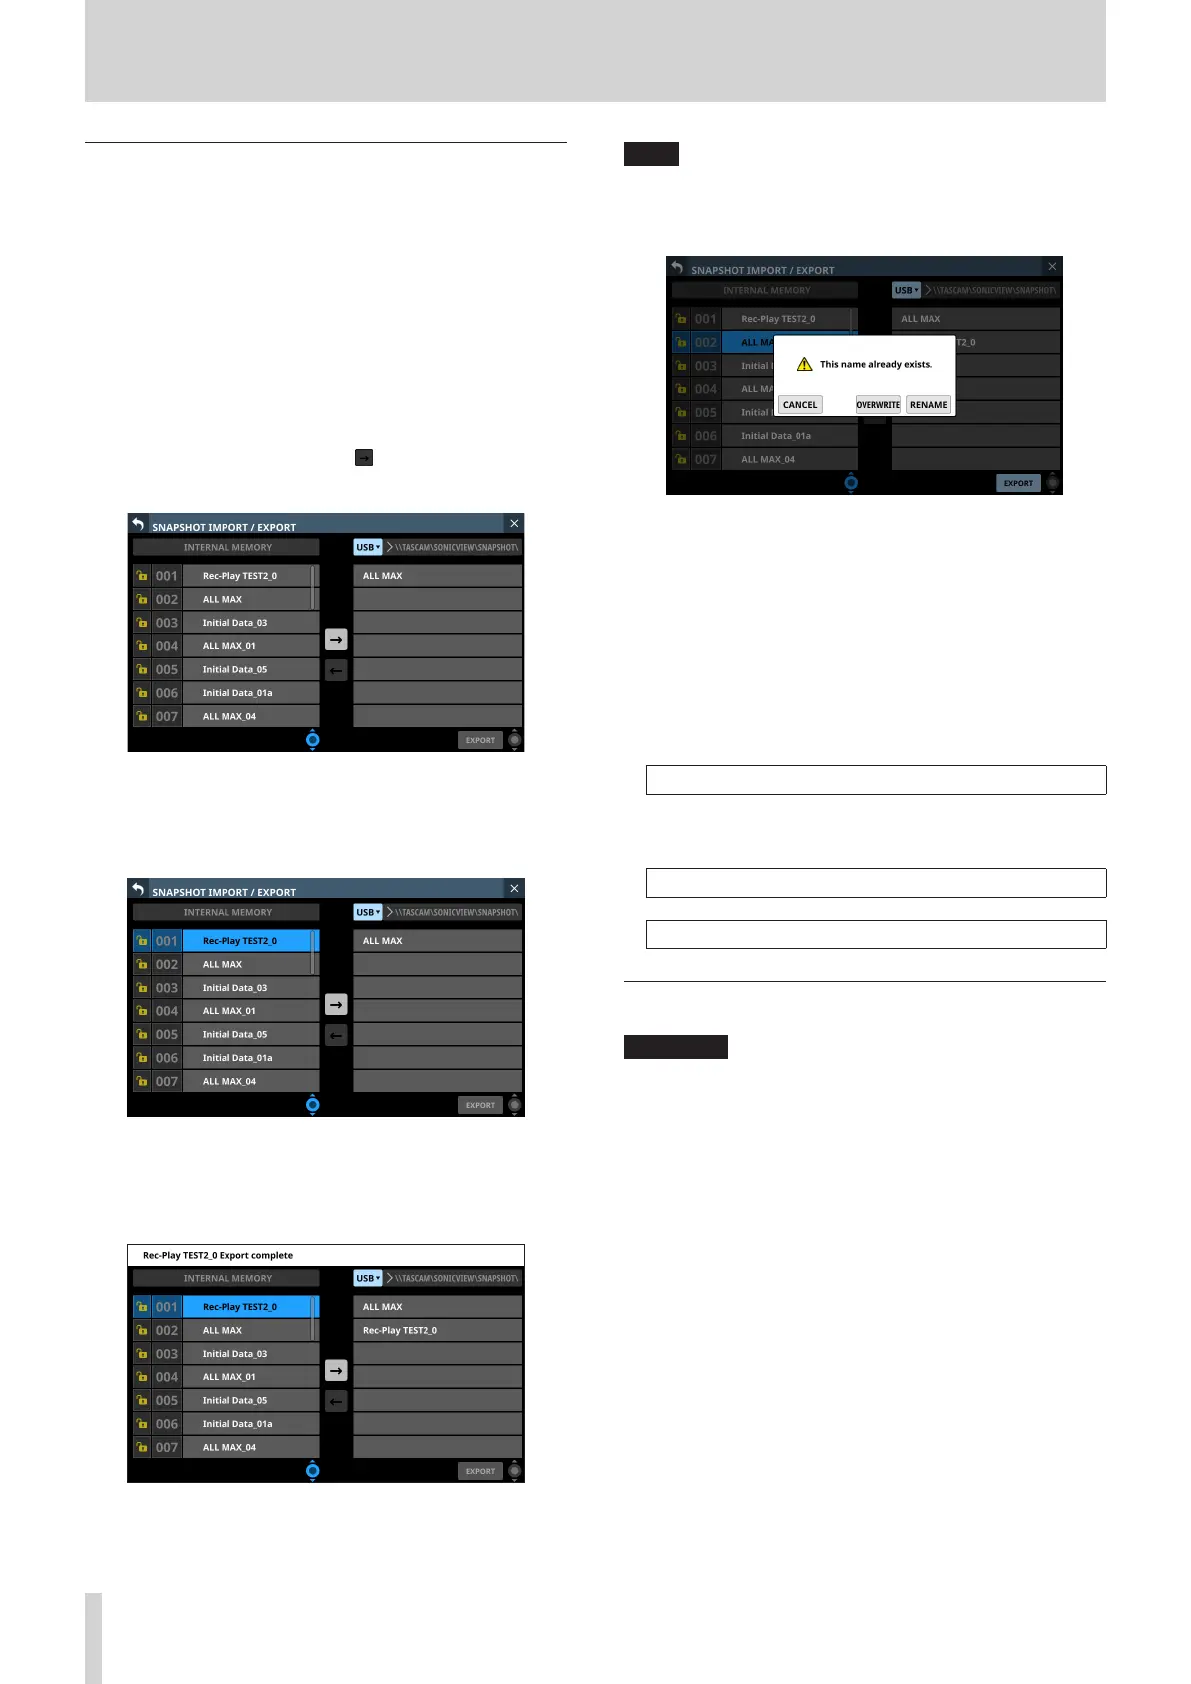
2. Tap the IMPORT/EXPORT button on the Snapshot List
Screen to open the SNAPSHOT IMPORT/EXPORT Screen.
(See “SNAPSHOT IMPORT / EXPORT screen” on page 173.)
3. Connect the export destination media.
4. Use the media selection button (1) to select the media
to use as the export destination. (See “1 Media selection
button” on page 173.)
5. Tap the EXPORT/IMPORT mode (5) button to switch to
export mode.
6. In the list of snapshots in the unit’s internal storage (3), tap
the snapshot data to be exported.
The snapshot data to be exported and the EXPORT button
will be highlighted.
7. Tap the EXPORT button.
The exported snapshot data will be added to the exported
data list (6), and an export complete message will appear
at the top of the screen.
NOTE
i A confirmation message will be shown if snapshot data with
the same name already exists on the export destination
media.
i Tap the CANCEL button to cancel exporting and close the
confirmation message.
i Tap the OVERWRITE button to overwrite the data of the
snapshot with the same name and close the confirmation
message.
i Tap the RENAME button to open the RENAME Screen.
Input a name that is not the same as an existing snapshot
name. Then, tap the Enter button to execute the export
and return to the SNAPSHOT IMPORT/EXPORT Screen.
i The following message will be shown if the export
destination media is a locked SD card.
Cannot Export. SD card Locked.
i One of the following messages will be shown if the export
destination media does not have enough open space.
Cannot Export. SD card is full.
Cannot Export. USB memory is full.
Importing snapshots
ATTENTION
If a snapshot created on a unit with firmware version 1.1.0 or
later is recalled by a unit with firmware version 1.0.x, proper
operation will not be possible, so the following restriction
applies.
i Snapshots created on units with firmware version 1.1.0 or
later cannot be imported by units with firmware version
1.0.x. (Snapshots created by units with firmware version
1.0.x can be imported by units with firmware version 1.1.0
or later.)
1. Tap the snapshot name area (2) on the Menu Screen to
open the Snapshot List Screen. (See “Snapshot List Screen”
on page 168.)
2. Tap the IMPORT/EXPORT button on the Snapshot List
Screen to open the SNAPSHOT IMPORT/EXPORT Screen.
(See “SNAPSHOT IMPORT / EXPORT screen” on page 173.)
3. Connect the import source media.
4. Use the media selection button (1) to select the media to
use as the import source. (See “1 Media selection button”
on page 173.)
174 TASCAM Sonicview 16/Sonicview 24 V1.1.0

 Loading...