Optional Rear Remote Control Panel
137
Changing the Setpoint
The setpoint can be changed when the Remote Standard
Display is shown.
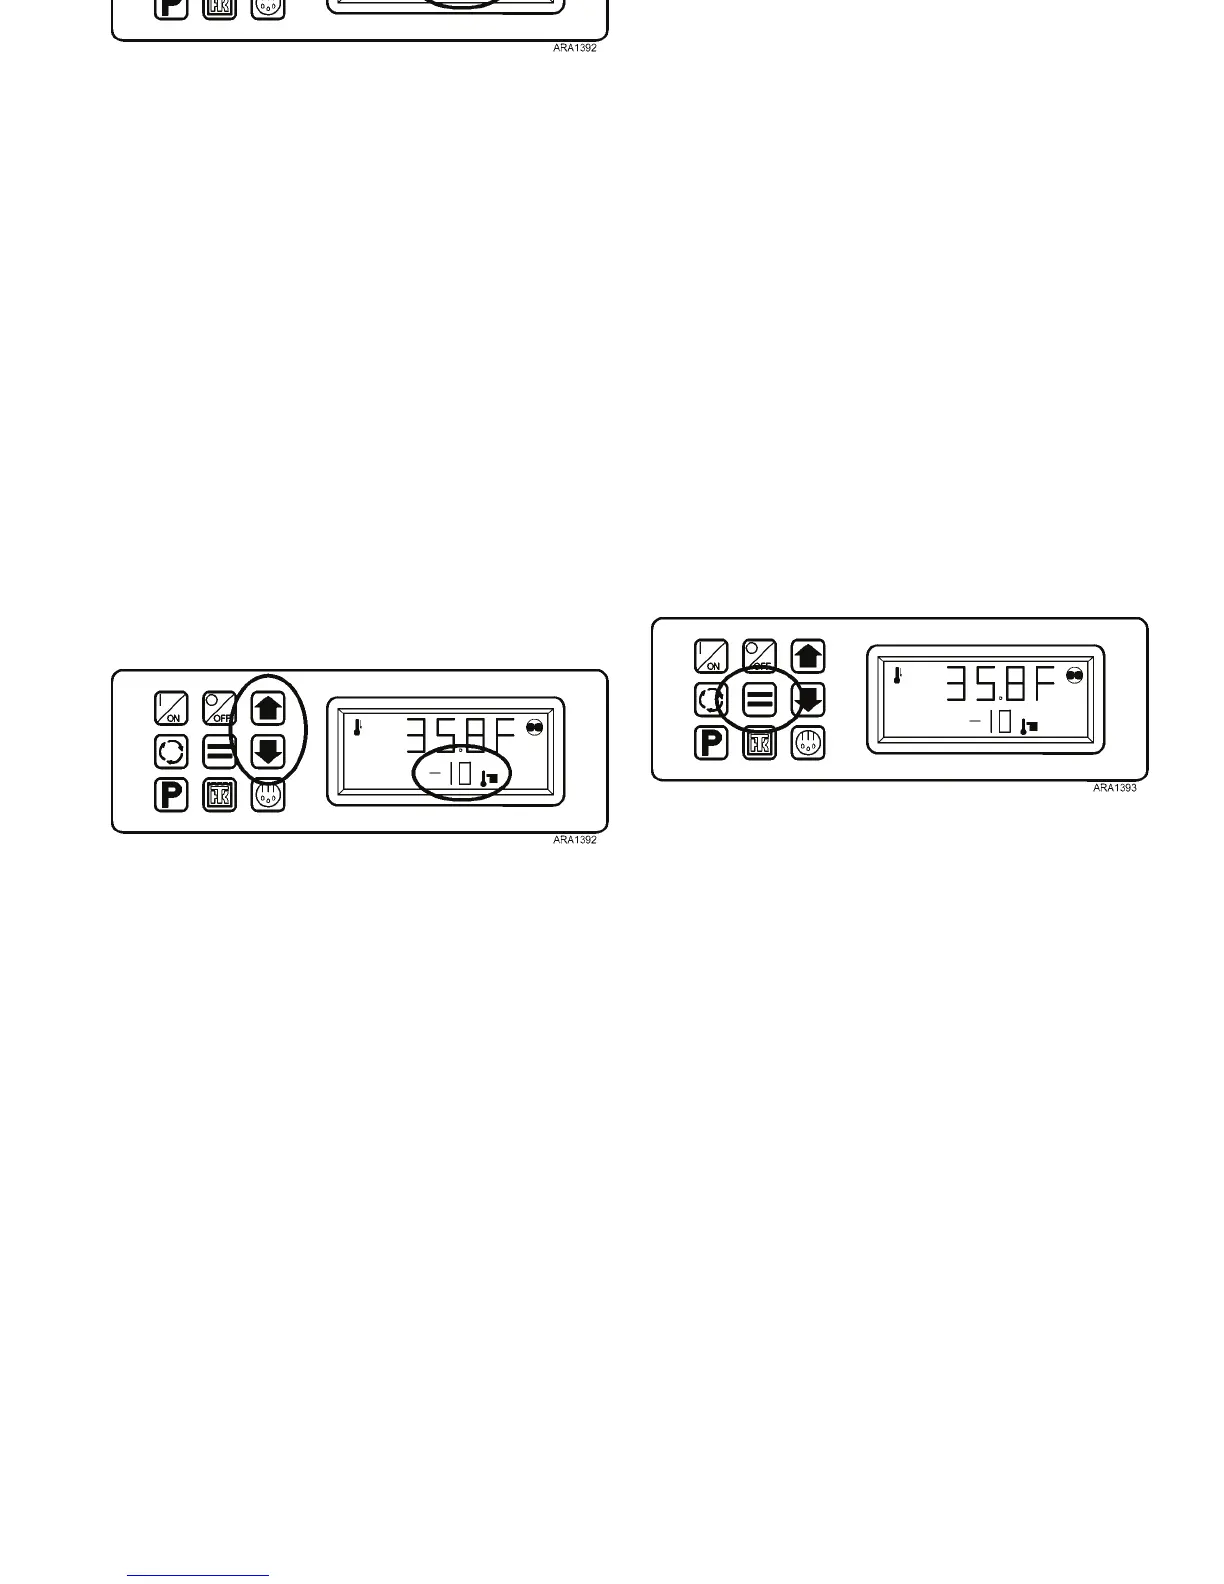
1. When the Remote Standard Display is shown, press the
Up or Down Arrow Keys to select the desired setpoint.
Figure 103: Press Up or Down Arrow Keys
2. When the desired setpoint is shown on the display,
immediately press the Enter Key to load the new setpoint.
The display will briefly show [Lod] and then the new
setpoint will reappear in the display.
Figure 104: Press Enter Key
IMPORTANT: The Enter key must be pressed or the setpoint
will not be changed. The display will return to the Standard
Display and the setpoint will return to the old setpoint in
about 10 seconds if the Enter Key is not pressed. Alarm Code
127 Setpoint Not Entered is set, to indicate that the setpoint
change was started but not completed.
IMPORTANT: Confirm that the correct setpoint is set.
Optional Rear Remote Control Panel
137
Changing the Setpoint
The setpoint can be changed when the Remote Standard
Display is shown.
1. When the Remote Standard Display is shown, press the
Up or Down Arrow Keys to select the desired setpoint.
Figure 103: Press Up or Down Arrow Keys
2. When the desired setpoint is shown on the display,
immediately press the Enter Key to load the new setpoint.
The display will briefly show [Lod] and then the new
setpoint will reappear in the display.
Figure 104: Press Enter Key
IMPORTANT: The Enter key must be pressed or the setpoint
will not be changed. The display will return to the Standard
Display and the setpoint will return to the old setpoint in
about 10 seconds if the Enter Key is not pressed. Alarm Code
127 Setpoint Not Entered is set, to indicate that the setpoint
change was started but not completed.
IMPORTANT: Confirm that the correct setpoint is set.



 To Next Page