Jump Starting
172
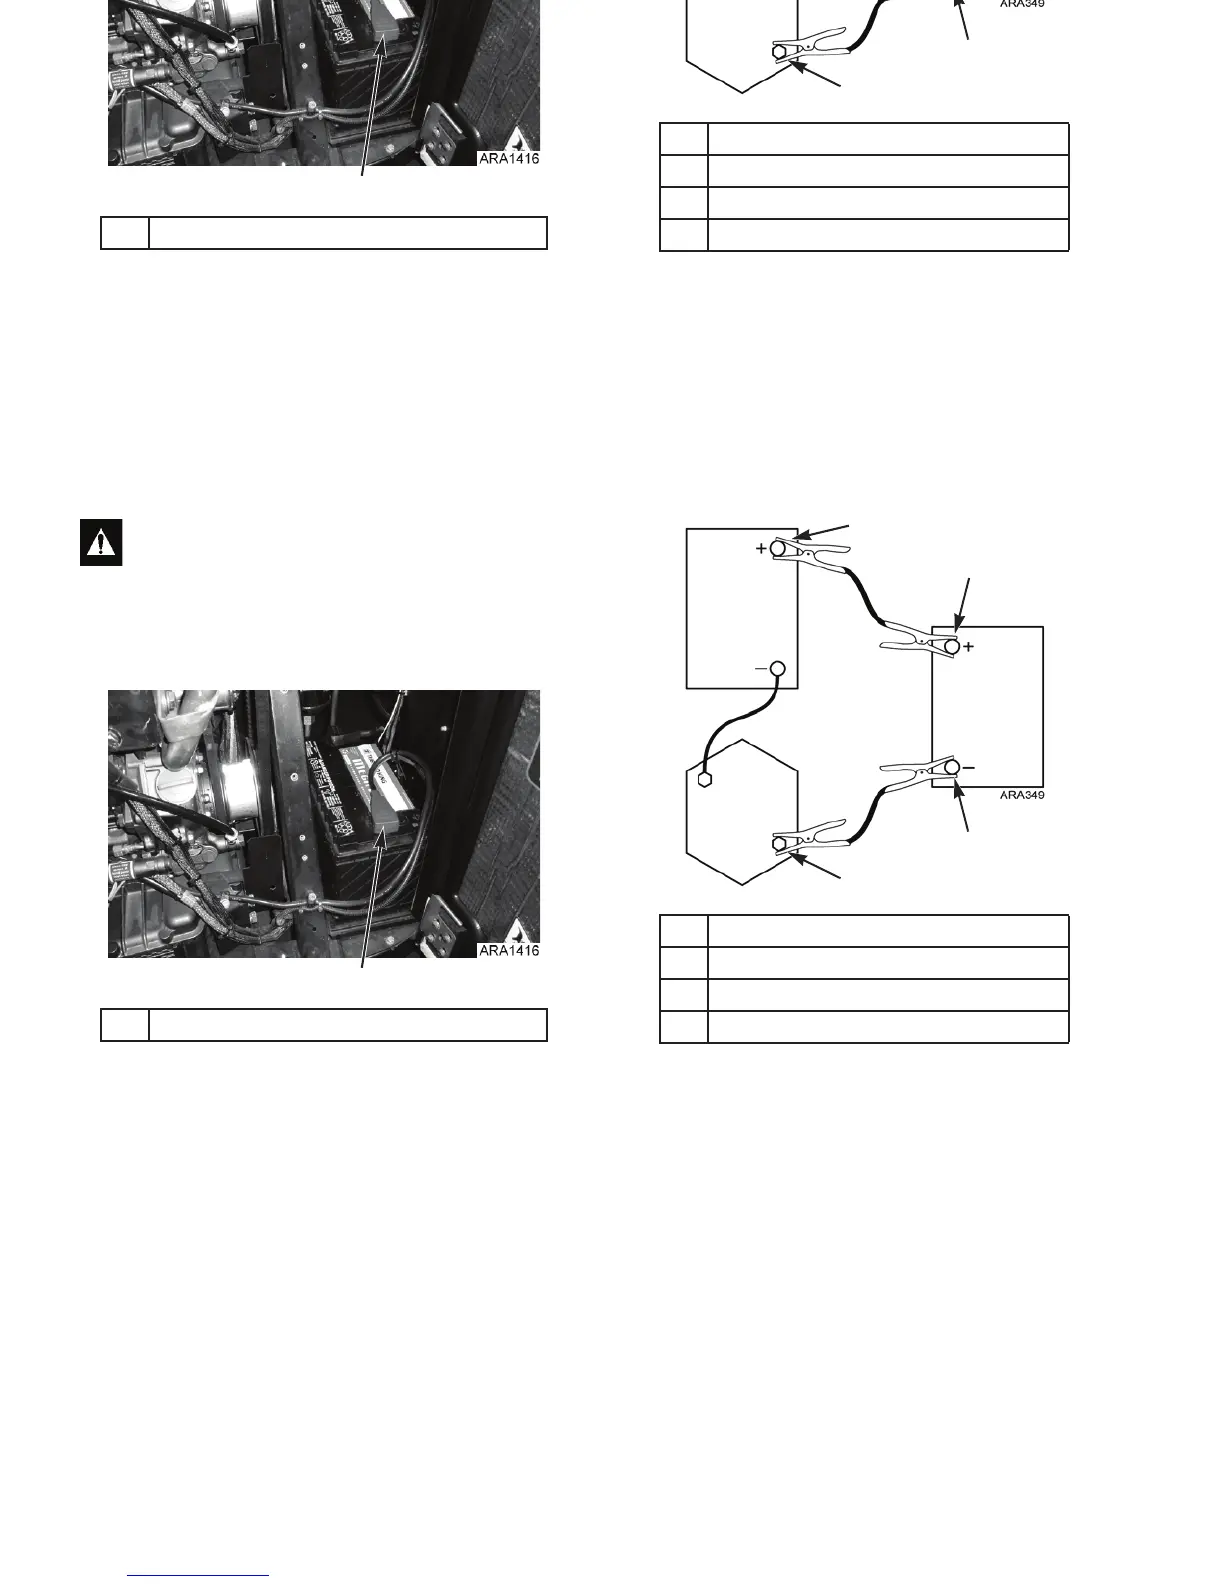
5. Remove the red cover from the positive (+) battery
terminal on the unit’s battery.
CAUTION: Do not use a match or lighter as a
light near the battery. Use a flashlight. A flame or
a spark can ignite the gas in the battery and cause
it to explode.
1. Red Cover on Positive (+) Battery Terminal
Figure 125: Unit Battery
1
1. Positive (+) Terminal on Unit Battery
2. Positive (+) Terminal on Good Battery
3. Negative (–) Terminal on Good Battery
4. Starter Mounting Bolt on Unit Engine
Figure 126: Sequence for Connecting Jumper Cables
1
Unit
(Discharged)
12-Volt
Battery
Good
12-Volt
Battery
Unit
Engine
2
3
4
Jump Starting
172
5. Remove the red cover from the positive (+) battery
terminal on the unit’s battery.
CAUTION: Do not use a match or lighter as a
light near the battery. Use a flashlight. A flame or
a spark can ignite the gas in the battery and cause
it to explode.
1. Red Cover on Positive (+) Battery Terminal
Figure 125: Unit Battery
1
1. Positive (+) Terminal on Unit Battery
2. Positive (+) Terminal on Good Battery
3. Negative (–) Terminal on Good Battery
4. Starter Mounting Bolt on Unit Engine
Figure 126: Sequence for Connecting Jumper Cables
1
Unit
(Discharged)
12-Volt
Battery
Good
12-Volt
Battery
Unit
Engine
2
3
4



 To Next Page