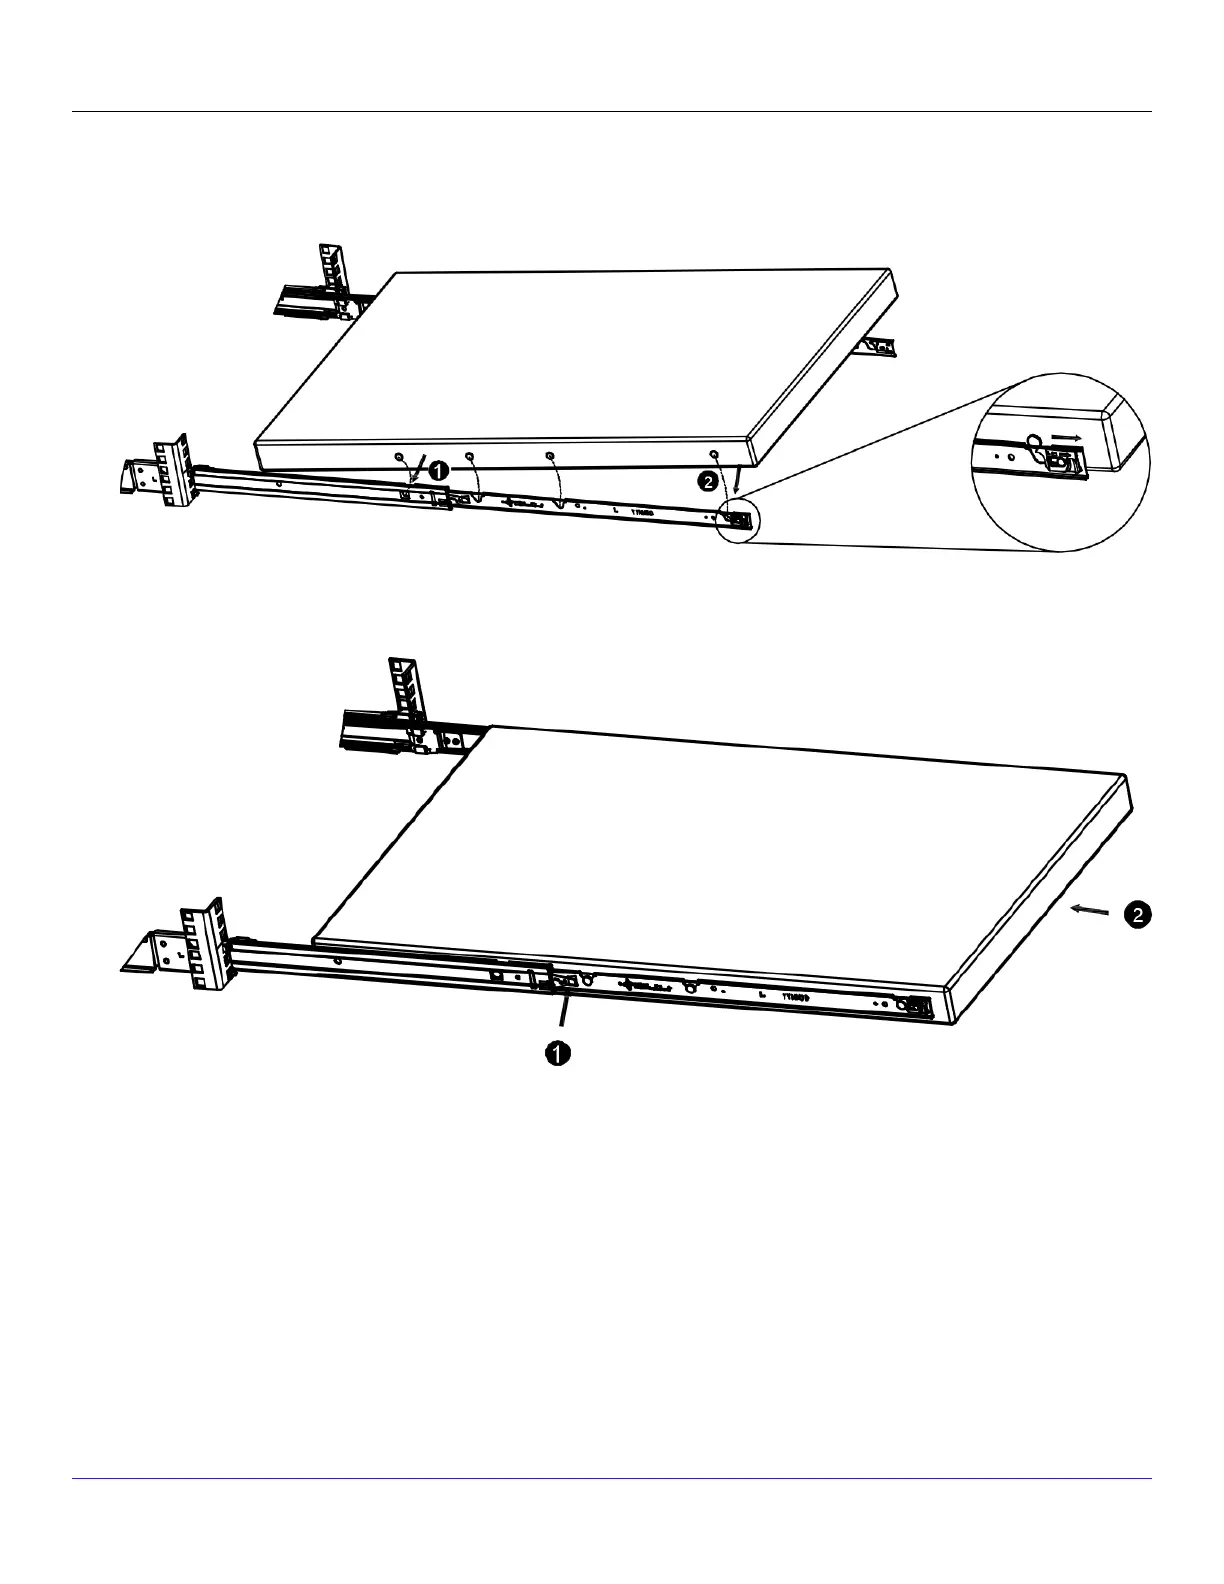
a. Place each inner member on both sides of the chassis unit. Position the mounting holes of the inner member with
matching mounting hooks on chassis unit.
b. Apply to both sides of chassis unit.
4. Install chassis unit into the rack.
a. Lift the release tab on both sides and push the inner members into the outer members until they lock in place.
b. Continue to push the chassis unit in until fully closed.
5.
Secure the chassis unit through the rack rails.
a.
With the chassis unit in fully closed position, secure using two spring screws provided in the chassis ear.
b.
Tighten the screws. The screws thread directly to the rack posts.
:
Redundant power supply
The basic conguration of a Sensor includes two hot-swappable power supplies. Each of these modules has one handle for
insertion or extraction from the unit as well as a release latch. If you have purchased an additional power supply from Trellix,
refer to the following sections to remove and install the new power supply.
| NS5x00 Sensors6
Trellix Intrusion Prevention System NS-series Sensor Product Guide
243



 To Next Page