List of figures
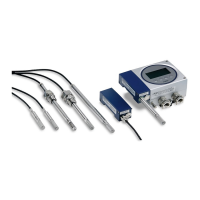
Figure 1 HMT370EX transmitter display options.................................................... 14
Figure 2 HMT370EX transmitter external parts....................................................... 16
Figure 3 HMT370EX transmitter internal parts........................................................ 17
Figure 4 Default plugs in HMT370EX lead-throughs..............................................18
Figure 5 HMT370EX parts overview...........................................................................22
Figure 6 Location of test points and service port...................................................25
Figure 7 HMT370EX parts overview...........................................................................28
Figure 8 Location of test points and service port................................................... 31
Figure 9 HMT370EX parts overview...........................................................................34
Figure 10 Location of test points and service port...................................................37
Figure 11 HMT370EX parts overview.......................................................................... 40
Figure 12 Location of test points and service port.................................................. 42
Figure 13 HMT370EX parts overview...........................................................................45
Figure 14 Location of test points and service port.................................................. 48
Figure 15 FM Approved wiring diagram for intrinsically safe operation........... 49
Figure 16 HMT370EX parts overview...........................................................................52
Figure 17 Location of test points and service port.................................................. 54
Figure 18 HMT370EX parts overview...........................................................................57
Figure 19 Location of test points and service port..................................................60
Figure 20 HMT370EX probe options............................................................................. 61
Figure 21 Location of configuration code on product label.................................. 63
Figure 22 Dimensions in mm (inches)..........................................................................63
Figure 23 Dimensions in mm (inches)......................................................................... 64
Figure 24 Left: Installation kit for duct mounting. Right:
Installation flange. Aluminum or stainless steel.....................................65
Figure 25 Dimensions in mm (inches)......................................................................... 66
Figure 26 HMP374 fitting body and clasp nut............................................................67
Figure 27 HMP375 probe and stainless steel installation flange.
Dimensions in mm (inches)......................................................................... 69
Figure 28 Dimensions in mm (inches)......................................................................... 70
Figure 29 Dimensions in mm (inches)..........................................................................72
Figure 30 HMP378 fitting body and clasp nut............................................................73
Figure 31 Inserting HMP378 into process with ball valve kit................................. 77
Figure 32 Example wall installation with HMP373 probe........................................ 81
Figure 33 Duct installation example with HMP373 probe and duct
installation kit...................................................................................................83
Figure 34 HMT370EX transmitter dimensions...........................................................83
Figure 35 Mounting HMT370EX directly through the transmitter body............84
Figure 36 Wiring example using one cable................................................................ 87
Figure 37 Wiring diagram with galvanic isolators....................................................88
Figure 38 Wiring diagram with Zener barriers..........................................................89
Figure 39 Multimeter test point overview...................................................................92
Figure 40 HMT370EX local display examples: measurement graph
view and main menu screen........................................................................94
Figure 41 HMT370EX display interface buttons....................................................... 94
List of figures
5