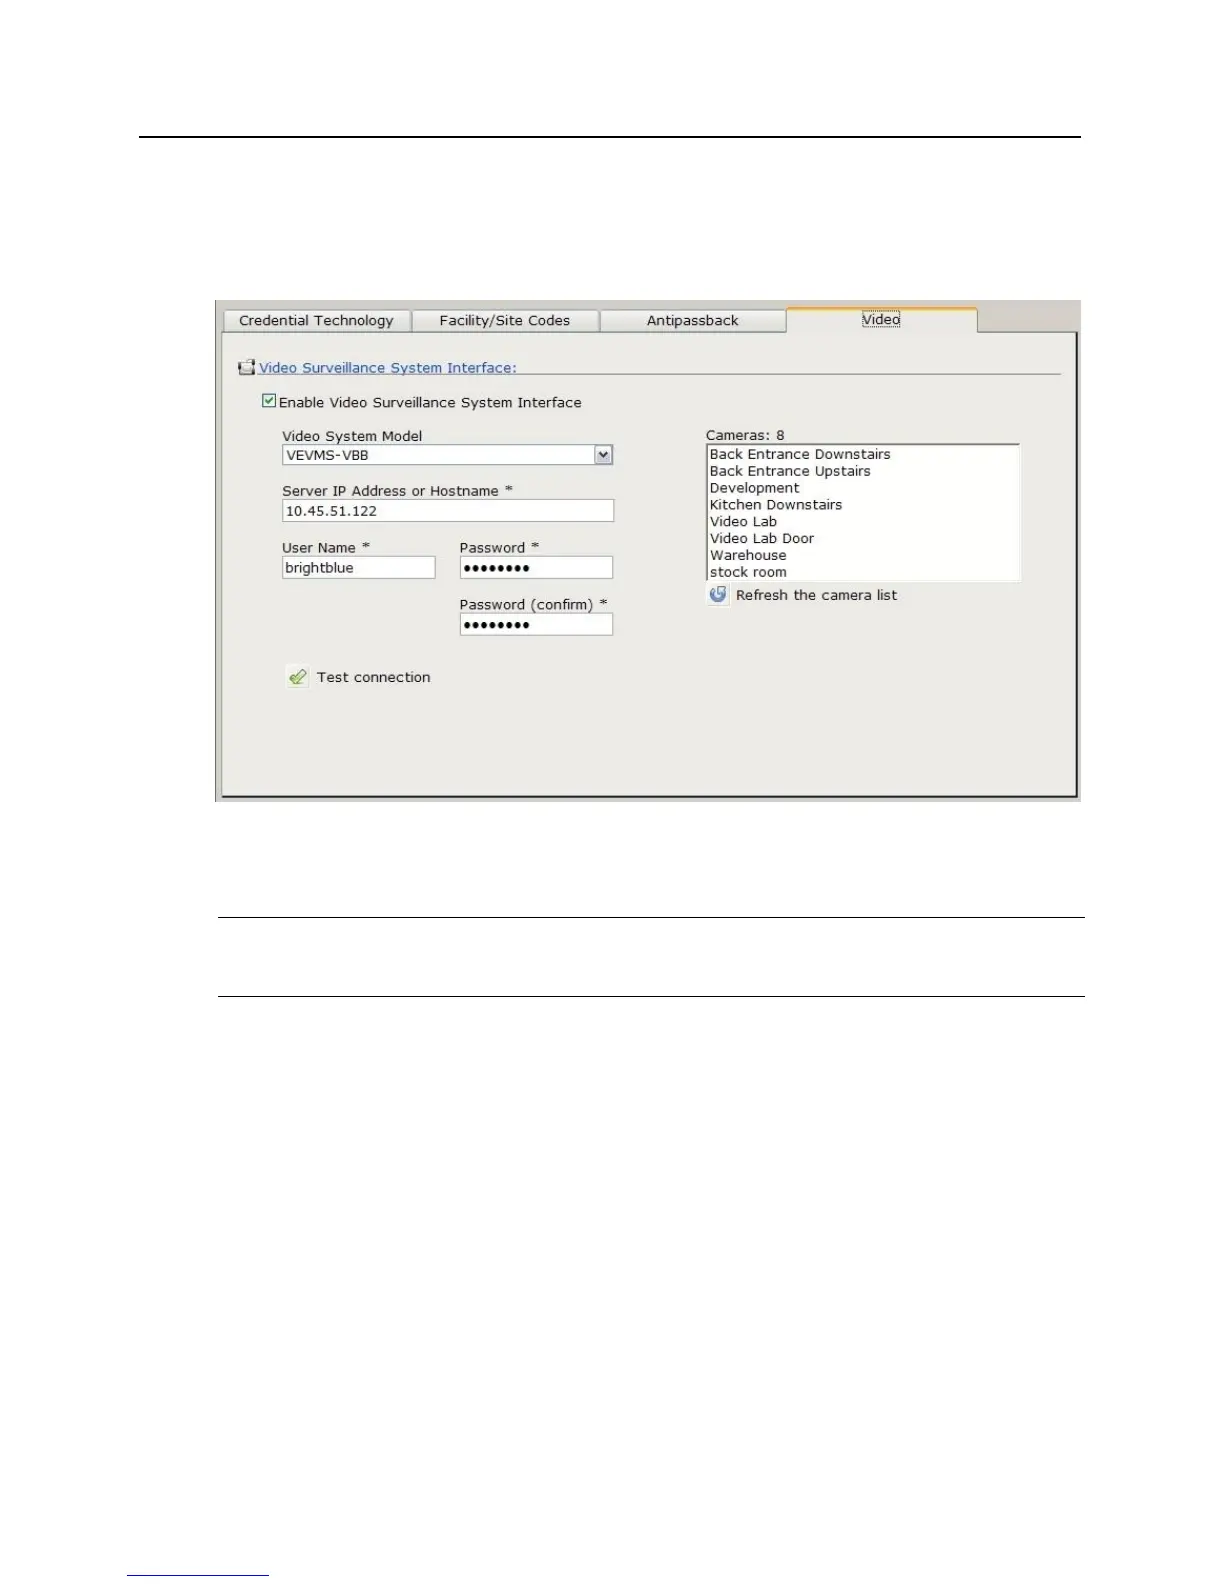
6 Once the VEVMS DVR/NVR has been setup properly, the lite blue video settings will need to be
configured. In the lite blue software, go to Door Setup --> View or Modify Global Settings and
switch to the Video tab. Check off "Enable Video Surveillance System Interface" and enter the IP
address, user name (vanderbilt) and password (vanderbilt). Click Save Changes to establish a
connection. If successful, the camera list will appear on the right hand side.
7 After making the initial connection, the Time Zone and Date / Time settings must be synchronized
between lite blue and the VEVMS DVR/NVR. Go to Utilities --> Set System Date, Time and Time
Zone and then configure the Time Zone (if necessary). Click Save Changes before attempting to
synchronize the date and time.
Note: The Time Zone in lite blue MUST match the Time Zone configured on the VEVMS DVR/NVR.
Please ensure that the VEVMS DVR/NVR has the correct Time Zone configured before completing Step 5.
The VEVMS DVR/NVRs Time Zone is displayed on the Date and Time tab in lite blue.
 Loading...