50-30 Operation D7x11 Series II Navigator Directional Drill
Short-String Method of Adding Drill Rod for Pre-Reaming
Step 1: Pre-assemble as many rods as practical at the exit location. These will be attached later to reamer
swivel. Before assembling rod joints, clean and lubricate threads.
Step 2: Join rods using pipe wrenches, and apply at least 400 ft-lb (540 Nm) torque to tighten snugly. It is not
necessary to tighten joints to a higher torque.
Step 3: Attach rod recycler adapter to the first drill rod and tighten snugly.
Step 4: Follow “Lockout Procedure - With Remote Lockout,” page 30-11, or “Lockout Procedure - Without
Remote Lockout System,” page 30-13.
Step 5: Attach rod recycler adapter to swivel.
NOTE: Some swivels, such as a double-eye swivel, can be improperly aligned with the reamer. If swivel is not
straight in-line with the reamer, it might not swivel as intended. Instead it could turn like a crank, causing the
product to turn and whip. Before starting rotation of the drill string, it is very important to position the reamer and
product or trailing pipe so that the swivel is extended to be straight in-line with the reamer before pulling in.
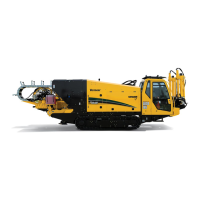
WARNING: Never attach a pipe wrench or tool and apply force from a
machine such as a backhoe to tighten or break a connection. If the wrench
slips off the bucket, the wrench could rotate or be thrown and strike you.
Death or serious injury may result.
WARNING: Product or trailing drill rod can turn or whip. Death or serious injury could occur if you
are struck by a wrench, entangled, or struck by whipping pipe or product. Ensure swivel is straight in-
line with reamer before pulling back.
 Loading...