30-22 Overview D7x11 Series II Navigator Directional Drill
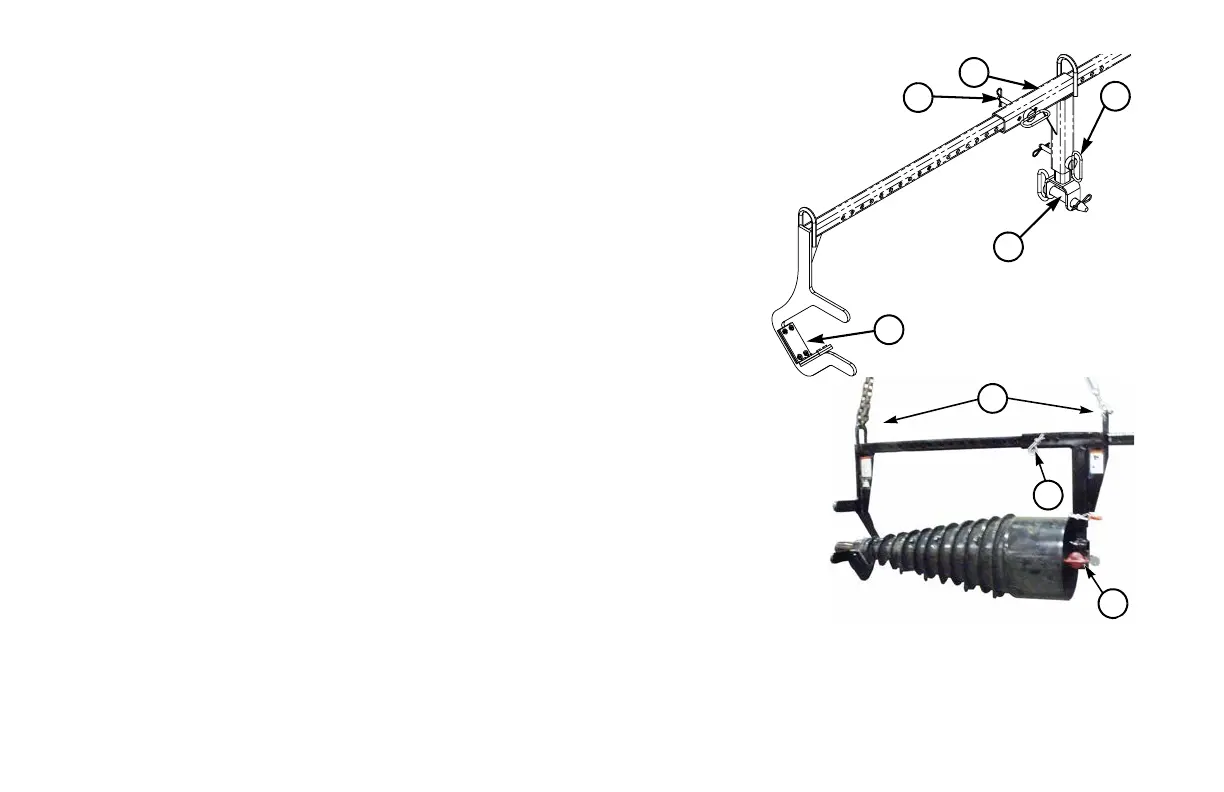
Reamer Carrier Components
The reamer carrier has a sliding frame (1) for adjustment to fit various size reamers
and drill tools. Remove hairpin and pin (2) to adjust slide.
The pin end (3) of the reamer carrier, located at bottom of sliding frame, connects to
reamer and can be exchanged with a variety of reamer types by removing pin (4).
These include swivels and a variety of threaded connections.
At the opposite end of carrier, the reamer connector rests in a cradle with
replaceable wear pads (5).
Reamer Carrier - Install/Remove
NOTE: Using the reamer carrier requires a minimum of two persons, one to attach and
guide reamer carrier, and one to operate the lifting device. It is recommended that two
persons work together to install the reamer carrier onto the reamer.
To install reamer carrier:
Step 1: Remove hairpin (1) and pin. Remove sliding frame from end of reamer carrier.
Step 2: Remove pin (2). Attach back side (often swivel end) of reamer to connector and
reinsert pin. Ensure reamer carrier connector is correct for reamer being used.
Refer to “Reamer Carrier Styles,” page 30-21.
Step 3: Slide frame bar into sliding frame. Adjust slide frame so cradle fits underneath
reamer as shown.
Step 4: When cradle is positioned securely beneath connector end of reamer, install pin and hairpin (1).
4
3
2
5
1
3
1
2
 Loading...