55-8 Supplemental Operations D7x11 Series II Navigator Directional Drill
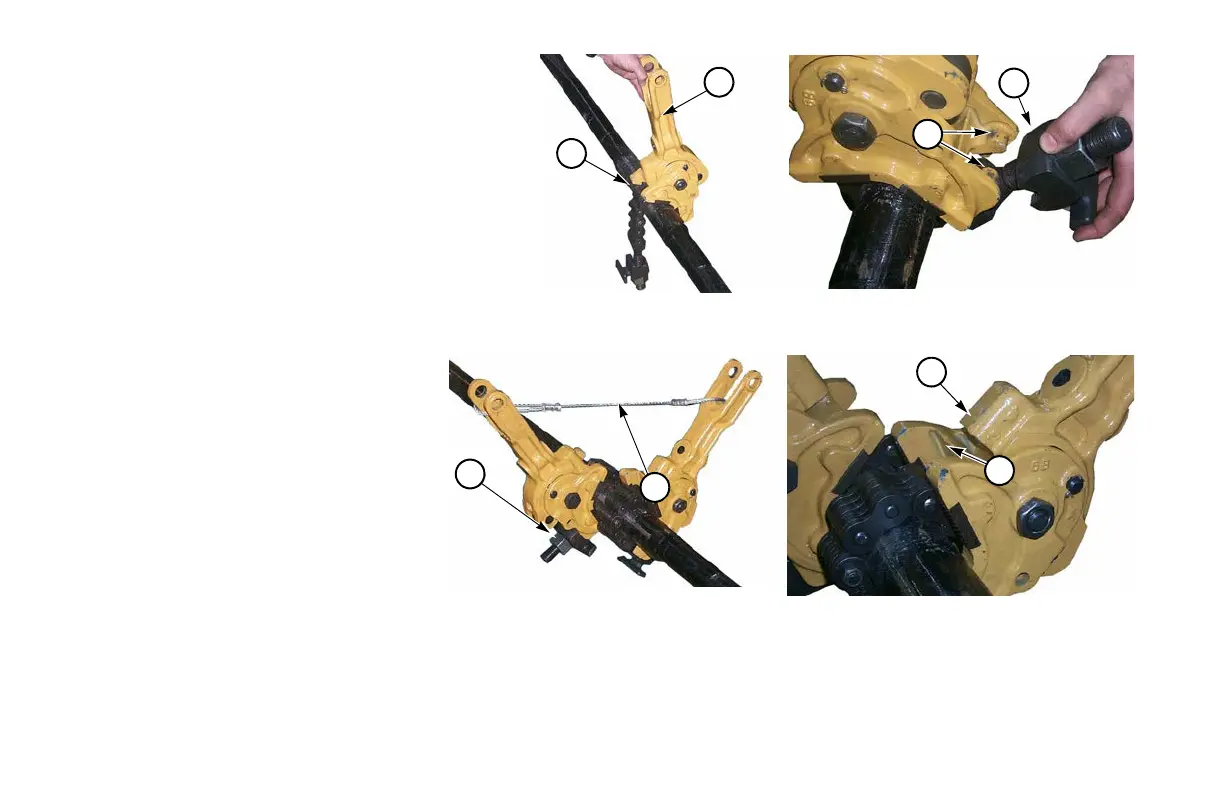
Step 2: Position tong (3) on drill rod.
NOTE: Position tongs one on each side of joint in either
makeup or breakout position.
Step 3: Wrap chain (4) over top of drill rod.
Step 4: With tong head on top of drill rod, wrap chain
under drill rod and connect chain hook (5)
onto tong head (6).
NOTE: If chain is too short or too long, refer to “Portable
Breakout System Tong Chain - Adjust,” page 55-14, for
information on shortening or lengthening chain.
Step 5: Repeat Steps 2–4 to install other tong.
Step 6: Install limit cable (7) on tong
handles.
NOTE: Limit cable prevents tongs from
rotating farther than cylinder can reach.
IMPORTANT: In order for the cylinder to
properly fit between the clevises, the cable
loops must be put on opposite clevis legs of
the two tongs, as shown.
Step 7: Hand-tighten adjustment nuts (8).
Step 8: Slightly lift up on tong head and
pull back on handle while hand-
tightening adjustment nut so that
handle knob (9) is well off head
rest (10).
4
3
5
6
7
8
9
10
 Loading...