Maintenance
89
Mai nte nan ce i nte r-
vals
Before starting any maintenance work, carry out the following steps:
> Empty the bale chamber.
> Cl ean the implement before the repair w ork.
> Switch off the AutoPlus-Pilotbox.
> No work must be performed on the implemen t when it is operating.
> Switch off the tractor's PTO shaft.
> Switch off the tractor engine and remove the ignition key.
> Cl ean the implement wi t h compressed air.
A
t
t
h
e
s
t
a
r
t
o
f
t
h
e
s
e
a
s
o
n
A
f
t
e
r
t
h
e
f
i
r
s
t
2
5
0
b
a
l
e
s
A
f
t
e
r
5
0
0
b
a
l
e
s
E
v
e
r
y
5
0
0
b
a
l
e
s
o
r
d
a
i
l
y
E
v
e
r
y
5
0
o
p
e
r
a
t
i
n
g
h
o
u
r
s
o
r
e
v
e
r
y
3
,
0
0
0
b
a
l
e
s
E
v
e
r
y
1
0
,
0
0
0
b
a
l
e
s
G
r
e
a
s
e
O
i
l
,
I
n
s
p
e
c
t
i
o
n
R
e
p
l
a
c
e
C
l
e
a
n
S
h
a
r
p
e
n
P
a
g
e
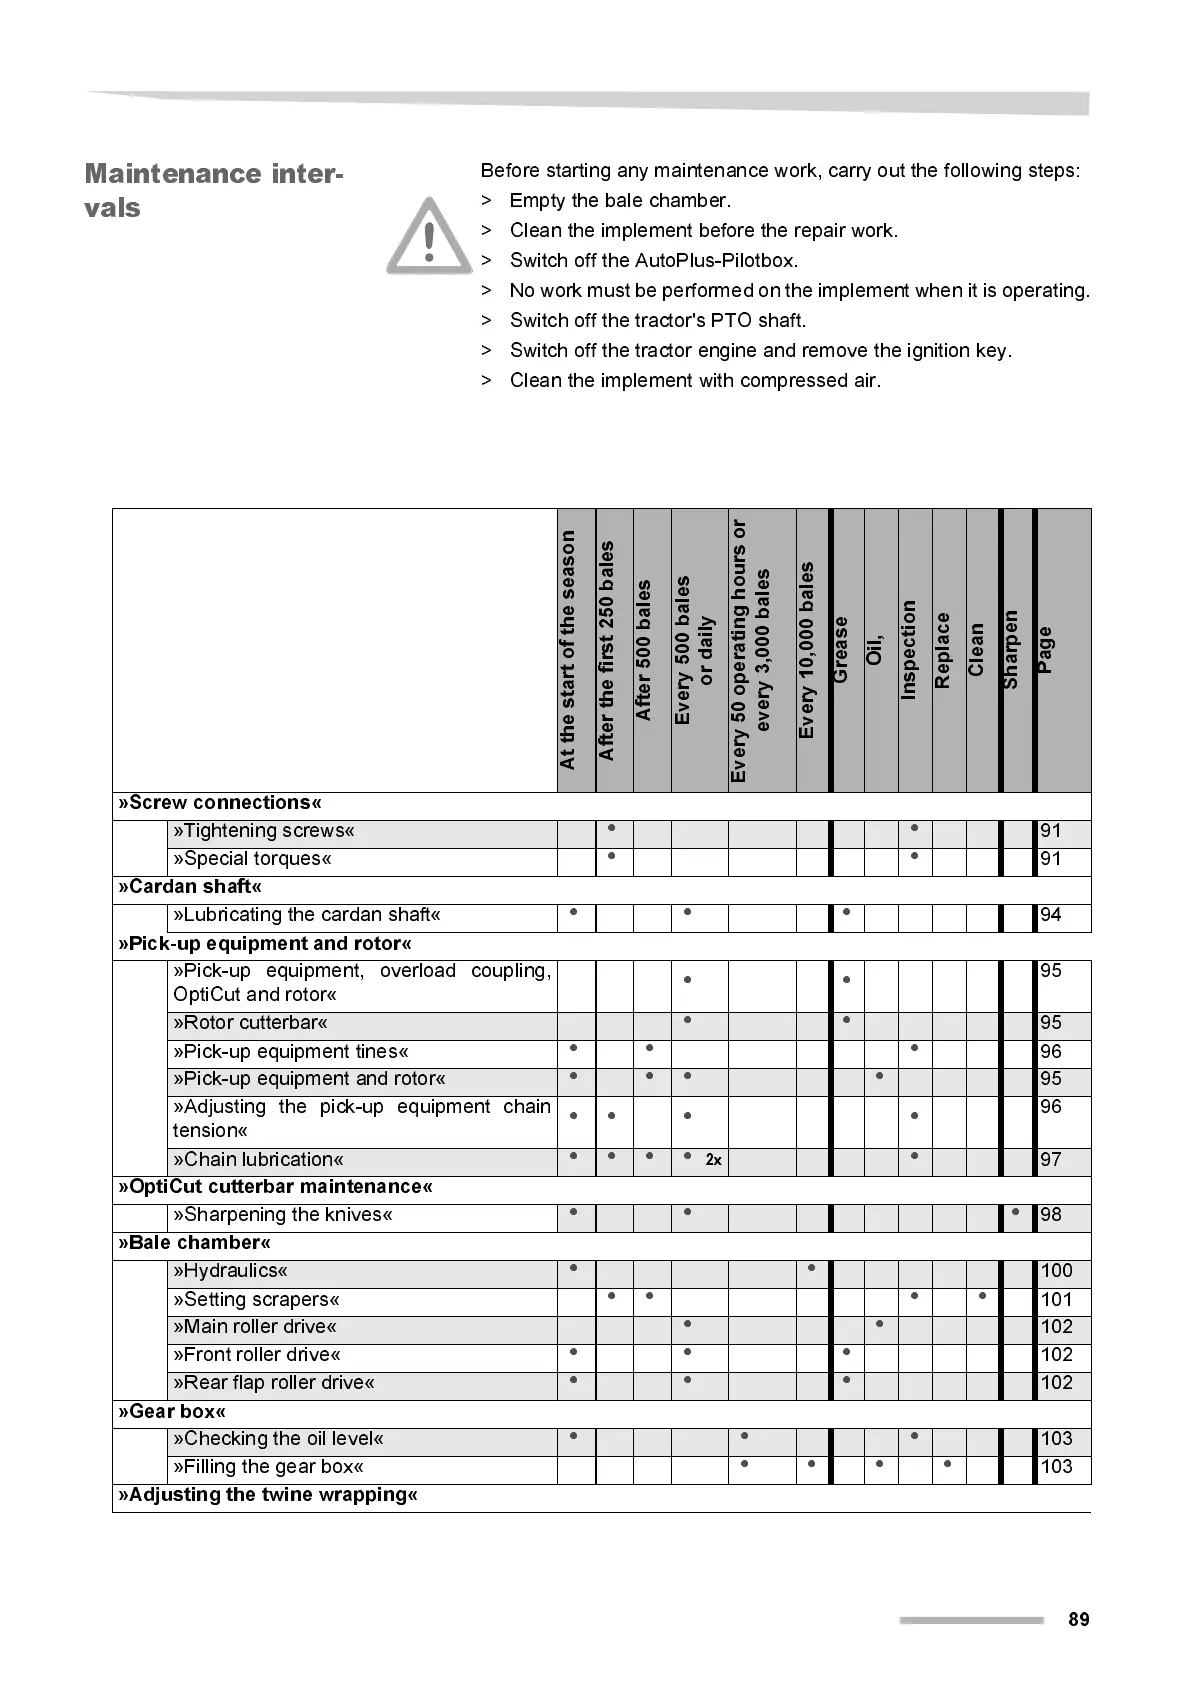
»Screw connections«
»Tightening screws«
• •
91
»Special torques«
••
91
»Cardan shaft«
»Lubricating the cardan shaft«
•• •
94
»Pick-up equipment and rotor«
»Pick-up equipment, overload coupling,
OptiCut and rotor«
••
95
»Rotor cutterbar«
• •
95
»Pi ck-up equipment tines«
•• •
96
»Pi ck-up equipment and rotor«
• • • •
95
»Adjusting the pick-up equipment chain
tension«
•• • •
96
»Chai n lubricati on«
• • • •
2x
•
97
»OptiCut cutterbar maintenance«
»Sharpeni ng the knives«
• • •
98
»Bale chamber«
»Hydraulics«
• •
100
»Setti ng scrapers«
•• • •
101
»Main roller drive«
• •
102
»Front roller drive«
•• •
102
»Rear flap roller drive«
• • •
102
»Gear box«
»Checking the oil l evel«
• • •
103
»Filling the gear box«
••••
103
»Adjusting the twine wrapping«