SERVICING AND INSPECTION
217
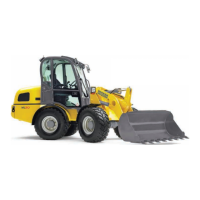
WL50
Disconnecting and connecting the battery / changing the battery
Removing the battery:
Stop the loader on a horizontal surface and set the park-
1.
ing brake.
Lower the loader lift arms and attachment to the ground
2.
or work surface.
Stop the engine.3.
Before disconnecting the battery, switch off all electrical
4.
controls (and the battery disconnect switch) and remove
the starting key.
WARNING
Personal injury hazards.
Do not open the engine enclosure or attempt to tilt
the operator cab/platform if the engine is running.
Follow the instructions in Section 10.7.1, pages
164-168, for opening the engine enclosure and
tilting the cab.
Always follow the correct sequence when discon-
necting the battery.
– Disconnecting:
First the negative pole and then the positive pole.
– Connecting:
First the positive pole and then the negative pole.
Open the engine enclosure
5.
(Ref. section 10.7.1, page
164).
Loosen the negative battery cable clamp and remove the
6.
clamp from the post. Position the cable so it is not touch-
ing the machine. Wrap an insulating material around the
conducting part of the cable clamp to eliminate the risk
of electrical shock (Fig. 103).
Remove the protective cover to gain access to the cable
7.
clamp bolt. Loosen the positive battery cable clamp and
remove the clamp from the post. Position the cable so
it is not touching the machine. Wrap an insulating ma-
terial around the conducting part of the cable clamp to
eliminate the risk of electrical shock (Fig. 103).
Remove the battery support retaining bolts.8.
Remove the battery with the lifting aid incorporated in
9.
the battery identied as item 3, Fig 103. If the battery
does not have an integral lifting aid, use a special strap
that ts over each pole and provides a means to remove
the battery.
Install the battery following the steps in the reverse order.