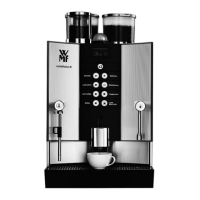
Cleaning and care
© WMF800 / 900 / 1000S / 1000proS Edition 07/2014 - KMT
T3-2
3/4 Manual milk foamer cleaning (milk system)
All surfaces coming into contact with milk must be thoroughly cleaned at least
once per day for hygiene reasons! The milk intake hose should be replaced at
regular intervals.
All parts of the milk system must be cleaned thoroughly at least once aweek.
Proceed as follows:
Remove the grounds container and water tank from the coffee machine
Remove the hose from the milk container and the hose guide
Operate the release on the back of the All-in-One spout
Pull the All-in-One spout downward
Remove the milk hose from the All-in-One spout
Remove the milk nozzle from the milk hose
Unscrew the air intake pipe (not for 1000proS)
Unscrew air intake cap from the air intake pipe (not for 1000proS)
Press the All-in-One spout on asolid surface. The top and bottom parts loosen and
can then be separated
Stir one measuring cap of WMFmilk system cleaner into 200ml of water in
acontainer
Place all parts of the milk system in the cleaning solution for 5hours or overnight
Then rinse all parts thoroughly with running warm water
Screw air intake cap onto the air intake pipe (not for 1000proS)
Screw the air intake pipe back in (not for 1000proS)
Insert the milk nozzle into the milk hose
Replace the milk hose on the All-in-One spout
Push the All-in-One spout from below and engage the latch
Push All-in-One spout all the way down
Insert the milk hose into the guide
Additional recommendations:
in any case but particularly with low flow or when using milk that is not refrigerated,
an intermediate cleansing should be performed after 4to 6hours of operating time.
3/5 Cleaning the exterior and interior of the coffee machine
Prior to front panel cleaning, switch off the coffee machine using the ON/OFF
button. The interior of the coffee machine (the brewer, brewer compartment, drip
tray, grounds container) and the water tank are easily accessible for cleaning. When
cleaning the interior, make sure that no contamination (ground coffee) gets into the
water tank coupling!
3/6 Cleaning the water tank, grounds container, drip tray,
beanhopper
Before bean hopper cleaning, switch off the coffee machine and disconnect it from
the power system.
Never clean the grounds container, water tank and drip tray in adishwasher and
never use any cleaner additives.
The water tank and the grounds container can easily be removed from the coffee
machine. When removing the grounds container, make sure that the milk hose is
not in front of the grounds container. Remove the grounds container and the water
tank, empty them and rinse them under running water. Clean the grounds container
thoroughly and let it dry. Then place it back into the coffee machine.
Remove the the drip tray with the drip tray grid, empty it and rinse it with water. Place
the drip tray and drip tray grid.
Wipe out the bean hopper with adry, lint-free cloth.