July 2019
2-7
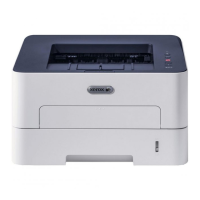
Xerox® B210 Service Manual
07-130
Status Indicator RAPs
Initial Release
07-130 Paper Jam in Tray 1 RAP
BSD-ON:BSD 1
A paper jam has occurred in Tray 1.
Initial Actions
• Remove jammed paper from Tray 1 area. Refer to Section 7: Troubleshooting, in the
Xero
x® B210 User Guide for detailed instructions on clearing paper jams.
• Clear the paper path of any debris or obstructions.
• Ensure the loaded paper is within machine specifications. Refer to Section 6 General Pro-
cedures for product specifications.
Procedure
Remove Tray 1 and ensure that guides are set correctly. The paper is loaded correctly in
the tray.
YN
Align the paper in Tray 1 then reinsert the tray.
Check the position of the jammed sheet. The lead edge reached the Retard Roll.
YN
Check for 3.3 VDC on the Feed Sensor PWB. The voltage is present at the connector
o
n the Feed Sensor PWB.
YN
Check for 3.3 VDC on the Main PWB. The voltage is present on the Main PWB.
YN
Verify all voltages are present between the HVPS PWS and the Main PWB.
The voltages between the HVPS PWB and the Main PWB are present.
YN
• Install a new HVPS PWB, PL 4.
1 Item 2.
• Install a new Main PWB, PL 1.1 Item 7.
Install a new Feed Sensor PWB, PL 4.4 Item 20.
Install a new Feed Sensor PWB, PL 4.
4 Item 20.
Install a new Feed Sensor PWB, PL 4.
4 Item 20. The clutch engages.
YN
Check for 24 VDC on the Paper Feed PWB. The voltage is present at the con-
nector on the Paper Feed PWB.
YN
Check all voltages are present between the HVPS PWB and the Main PWB.
The voltages between the HVPS PWB and the Main PWB are present
YN
• Install a new HVPS PWB, PL 4.
1 Item 2.
• Install a new Main PWB, PL 1.1 Item 7.
Install a new Feed Sensor PWB, PL 4.4 Item 20.
Install a new Feed Clutch, PL 4.
1 Item 5.
Perform SCP Final Actions.
Remove any jammed paper. Check the following for wear or damage and install new compo-
nents as required:
• Paper Feed Roll Assembly, PL
4.5 Item 11.
• Paper Drive Roll, PL 4.5 Item 9.
A
A
B
B
C
C

 Loading...


