Theory of Operation
Phaser® 3500 Laser Printer Service Manual
8-12
Paper Size Control
The paper size selection for Tray 2 and Tray 3 is set by moving the paper guide in the tray.
This in turn sets the plastic “fingers” on the side of the paper tray to a specific postion.The
position of the “fingers” activates the correct combination of the three paper size switches,
located in each paper tray slot, for the selected paper size. Additionally, the back of the tray
must be pulled down in order to select the two largest sizes; US Folio and Legal. Not all sizes
can be used in both trays. See Media and Tray Specifications on page 6-9 for a complete
listing of the media types for each tray. Additional media types can be used in Tray 1 (MPT).
After inserting the media in Tray 1, use the Control Panel controls to select the media type.
Paper Pick Auto-Select
The default paper pick selection at power ON is Tray 2, Auto-Select ON is also default. If the
default tray is empty, the printer will automatically switch to any other tray that contains paper
unless Auto-Select is set to OFF.
Toner Control
Print Cartridge installation and Toner Level are detected by the Print Cartridge Interconnect
Board and the associated signals are supplied to the Main Board. The CRUM not only detects
cartridge presence, it also determines whether it is a genuine Xerox cartridge. When the toner
remaining falls to 15%, the printer displays a low toner message on the Control Panel display.
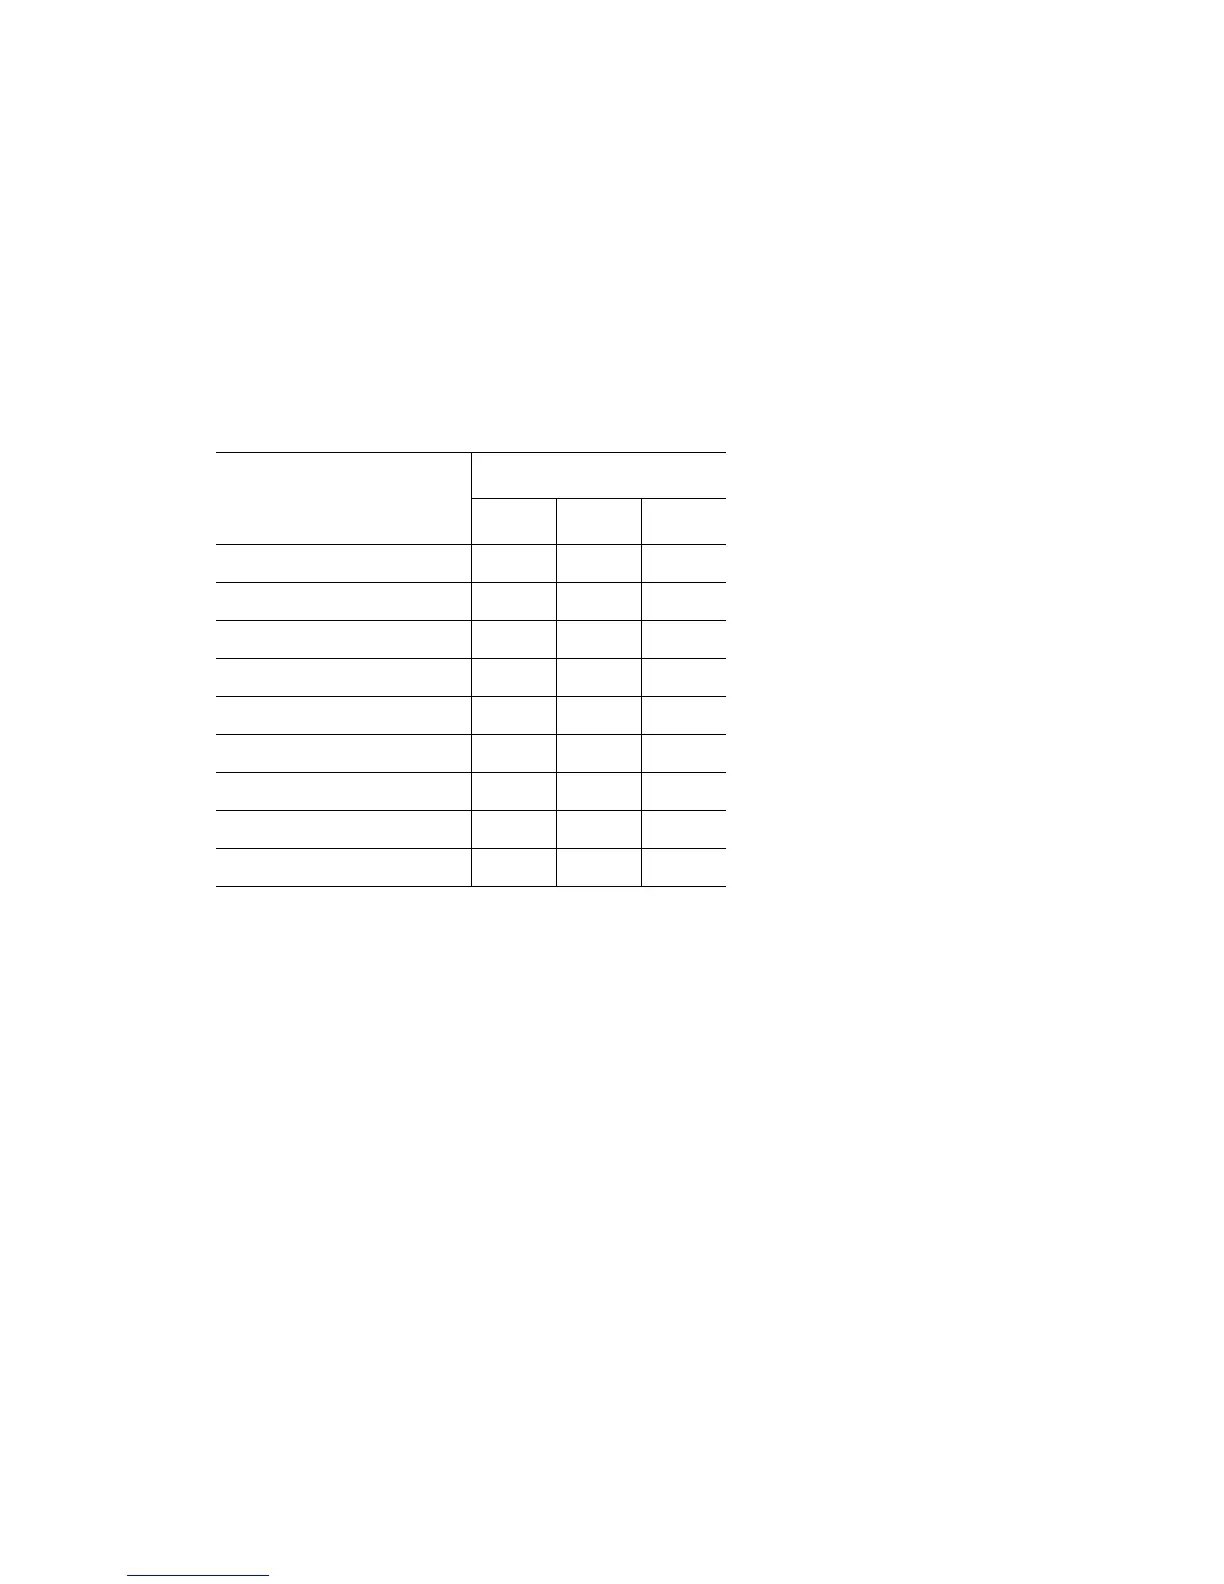
Paper Size Switches are identified as SW1, SW2, and SW3
Paper Size
Paper Size Switch
SW1 SW2 SW3
LEGAL 14" ON ON OFF
US FOLIO (LEGAL 13”) OFF OFF OFF
A4 OFF ON ON
LETTER ON OFF OFF
EXECUTIVE OFF ON OFF
B5 ON OFF OFF
B5, JIS-B5 OFF OFF ON
A5 ON ON ON
No Tray OFF OFF OFF
 Loading...


