08/2012
3-25
WorkCentre 5021/5019
3.4
Image Quality
Initial Issue
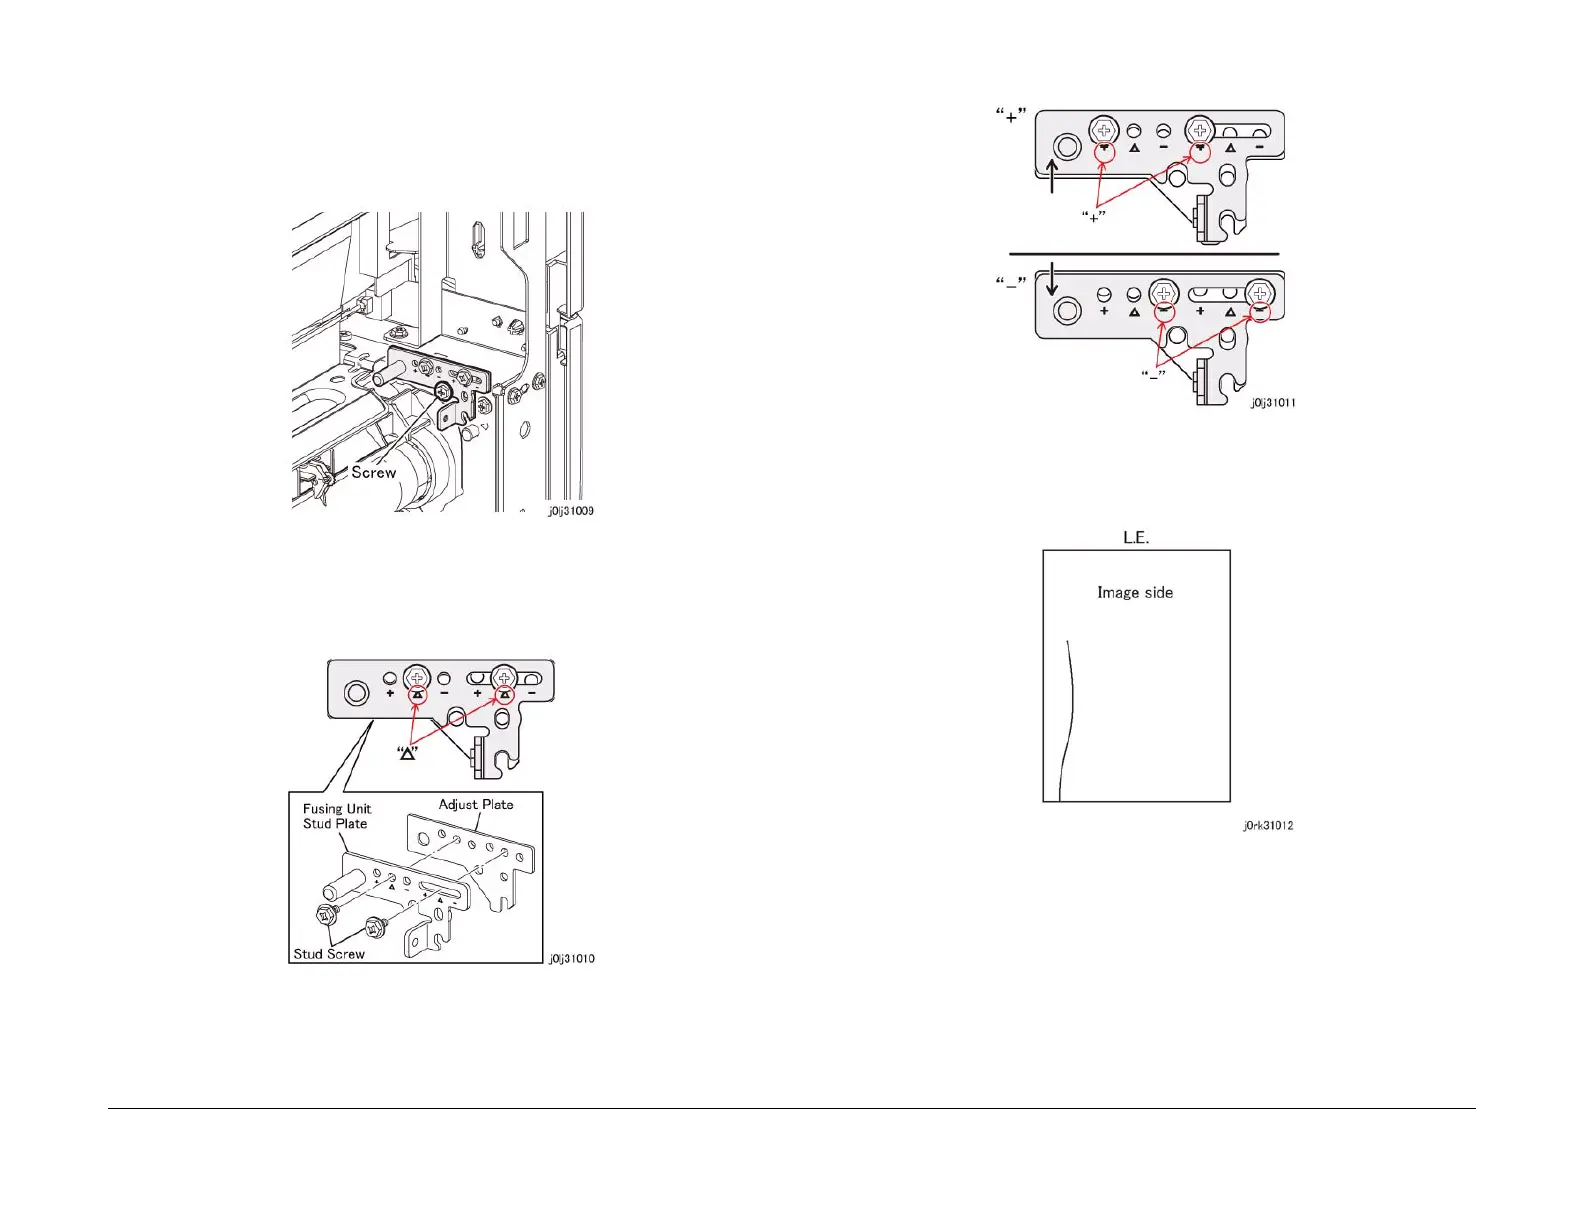
3.4 Fusing Unit Paper Wrinkle Alignment Adjustment
[Procedure]
1. Installation/removal of Adjustment Bracket
(1) Remove the Fusing Unit.
(2) Remove the front screw of the Adjustment Bracket at the front.
Figure 1 j0lj31009
2. Assembly of Adjustment Bracket
(1) Parts Configuration
• At shipment (+/- 0 mm): Triangle mark
Figure 2 j0lj31010
(2) Depending on the case, assemble the Fusing Unit Stud Plate and the Adjust Plate
such that the surface with the triangle marks ( +, -) is at the top.
• Plus (+0.5 mm) state: '+' mark
Minus (-0.5 mm) state: '-' mark
Figure 3 j0lj31011
3. Adjustment Method
(1) If the wrinkle is at the front, use '-'.
Figure 4 j0rk31012
(2) If the wrinkle is at the rear, use '+'.