Hardware Installation Manual ADPRO
®
FastTrace™ 2 Series
24 21790_05
If the cables connections are different, proceed as follows:
1. Change the cable connections as described in the table.
2. Adjust the boot order in the BIOS. To do so, follow the steps below.
3. Switch off the power supply to the server.
4. Connect a monitor/screen and keyboard to the server.
5. Switch on the power supply and press F2 to enter BIOS mode.
6. Choose Boot, and then choose Boot Drive Order.
The screen displays the current boot order.
7. Put the D.O.M. (= Device on Module; its name is different from the disk names) at the top of the list.
Use the + and – keys to move the D.O.M. in the list. Press Enter to confirm.
8. Choose Exit, and then choose Exit & Save Changes. Choose Yes to confirm.
The server continues booting. If booting is successful, the Xtralis start window appears.
3.8 Adding Hard Disks with a MiTAC PH10LU Motherboard
To add one or more hard disks with a MiTAC PH10LU motherboard, proceed as follows:
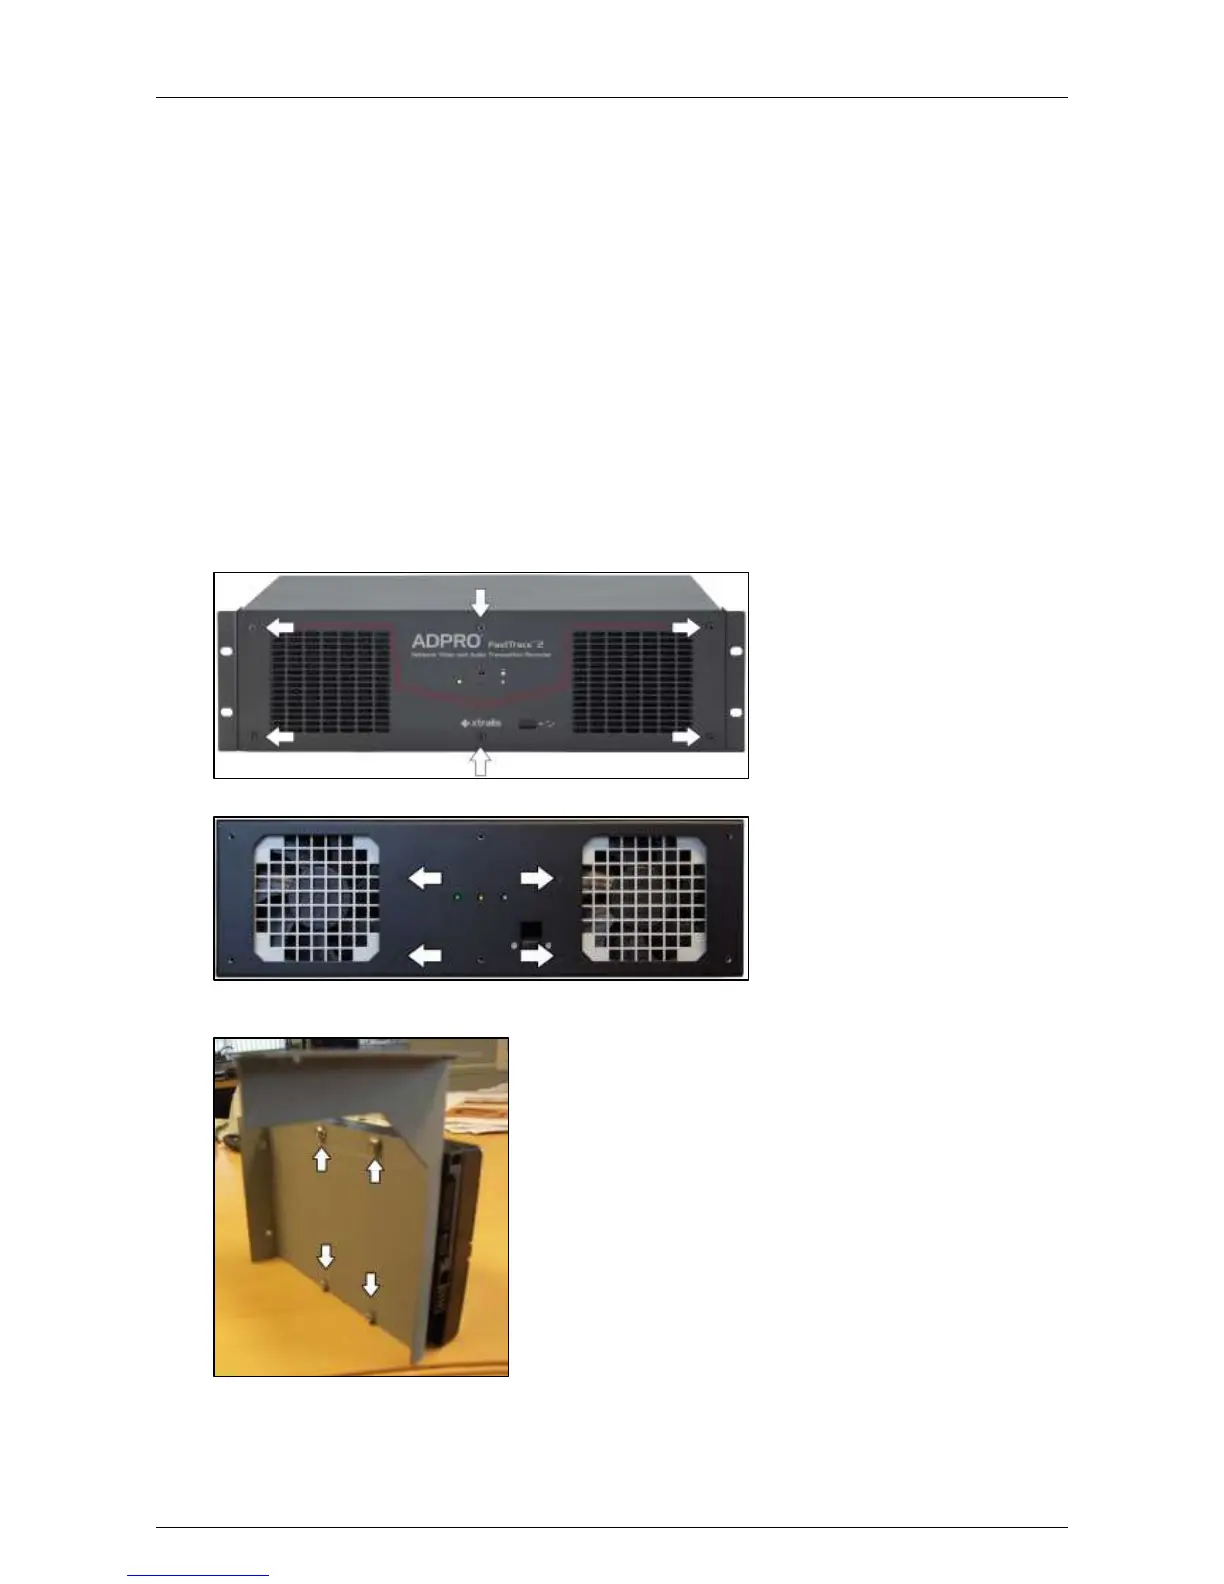
1. Switch off the power supply and remove the lid. Then remove the front plate.
You can now see the mounting holes for the disk bays:
2. Fix the second disk to the support #1729121* with the screws #17434080 or #17434060 and dented
washers M4 #17720050.
 Loading...