EasyManuals Logo

Yealink SIP-T48G Administrator's Guide

Yealink SIP-T48G
898 pages
To Next Page IconTo Next Page
To Previous Page IconTo Previous Page
Page #655 background imageLoading...
Page #655 background image
Configuring Advanced Features
635
5. Click Confirm to accept the change.
A dialog box pops up to prompt that settings will take effect after a reboot.
6. Click OK to reboot the phone.
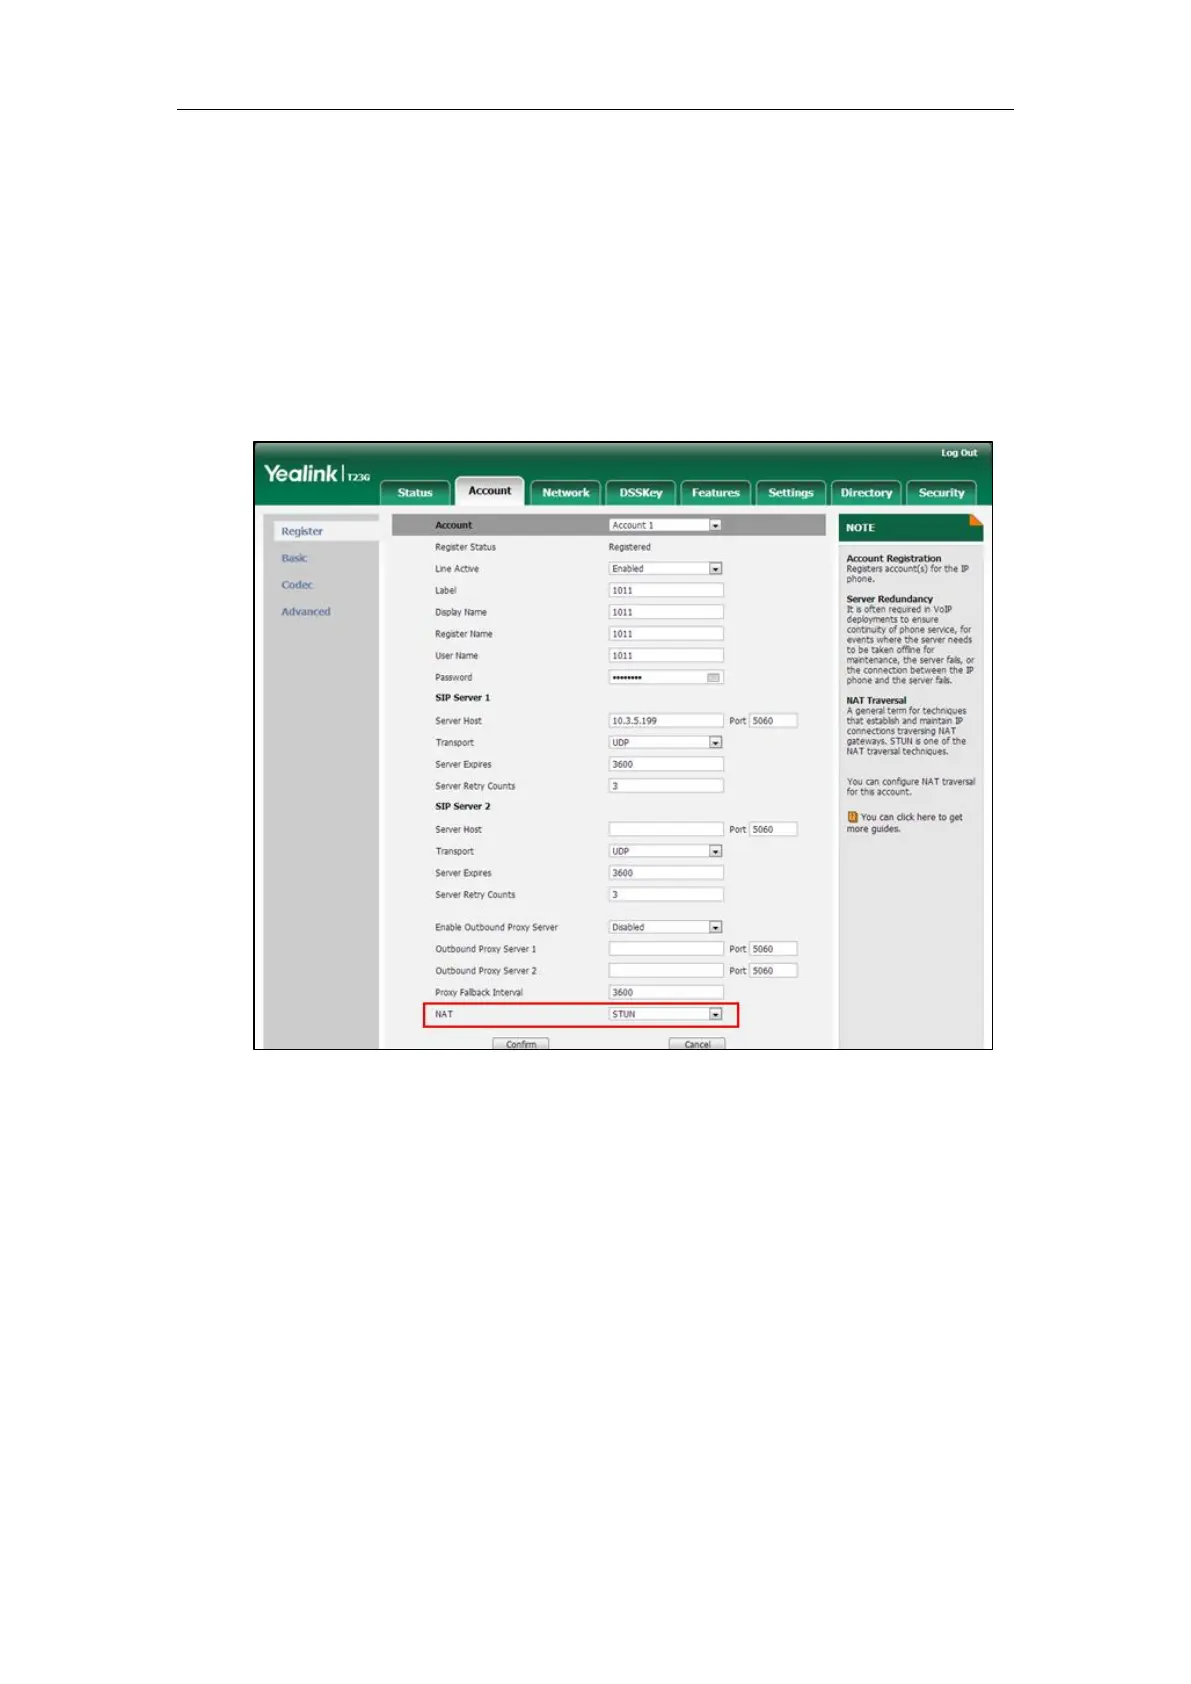
To configure NAT traversal for account via web user interface:
1. Click on Account->Register.
2. Select the desired account from the pull-down list of Account.
3. Select STUN from the pull-down list of NAT.
4. Click Confirm to accept the change.
To configure local SIP port and TLS SIP port via web user interface:
1. Click on Settings->SIP.
2. Enter the desired local SIP port in the Local SIP Port field.

Table of Contents

Other manuals for Yealink SIP-T48G

Questions and Answers:

Question and Answer IconNeed help?

Do you have a question about the Yealink SIP-T48G and is the answer not in the manual?

Yealink SIP-T48G Specifications

General IconGeneral
Expansion module supportYes
Handset typeWired handset
Product typeIP Phone
Product colorBlack
Volume control-
Display diagonal7 \
Display resolution800 x 480 pixels
Lines quantity- lines
Phonebook capacity1000 entries
Number of VoIP accounts6
AC adapter input voltage100 - 240 V
Number of handles included1 pc(s)
Weight and Dimensions IconWeight and Dimensions
Width266 mm
Height185 mm

Related product manuals