OPERATION
Axio Examiner Illumination and contrast procedures Carl Zeiss
M60-2-0003 e 05/2012 59
(3) Setting of a transmitted-light bright field
according to KÖHLER
− The Axio Examiner has been put into
operation properly (see chapter 3).
− The transmitted-light illumination is switched
on at the external power supply unit
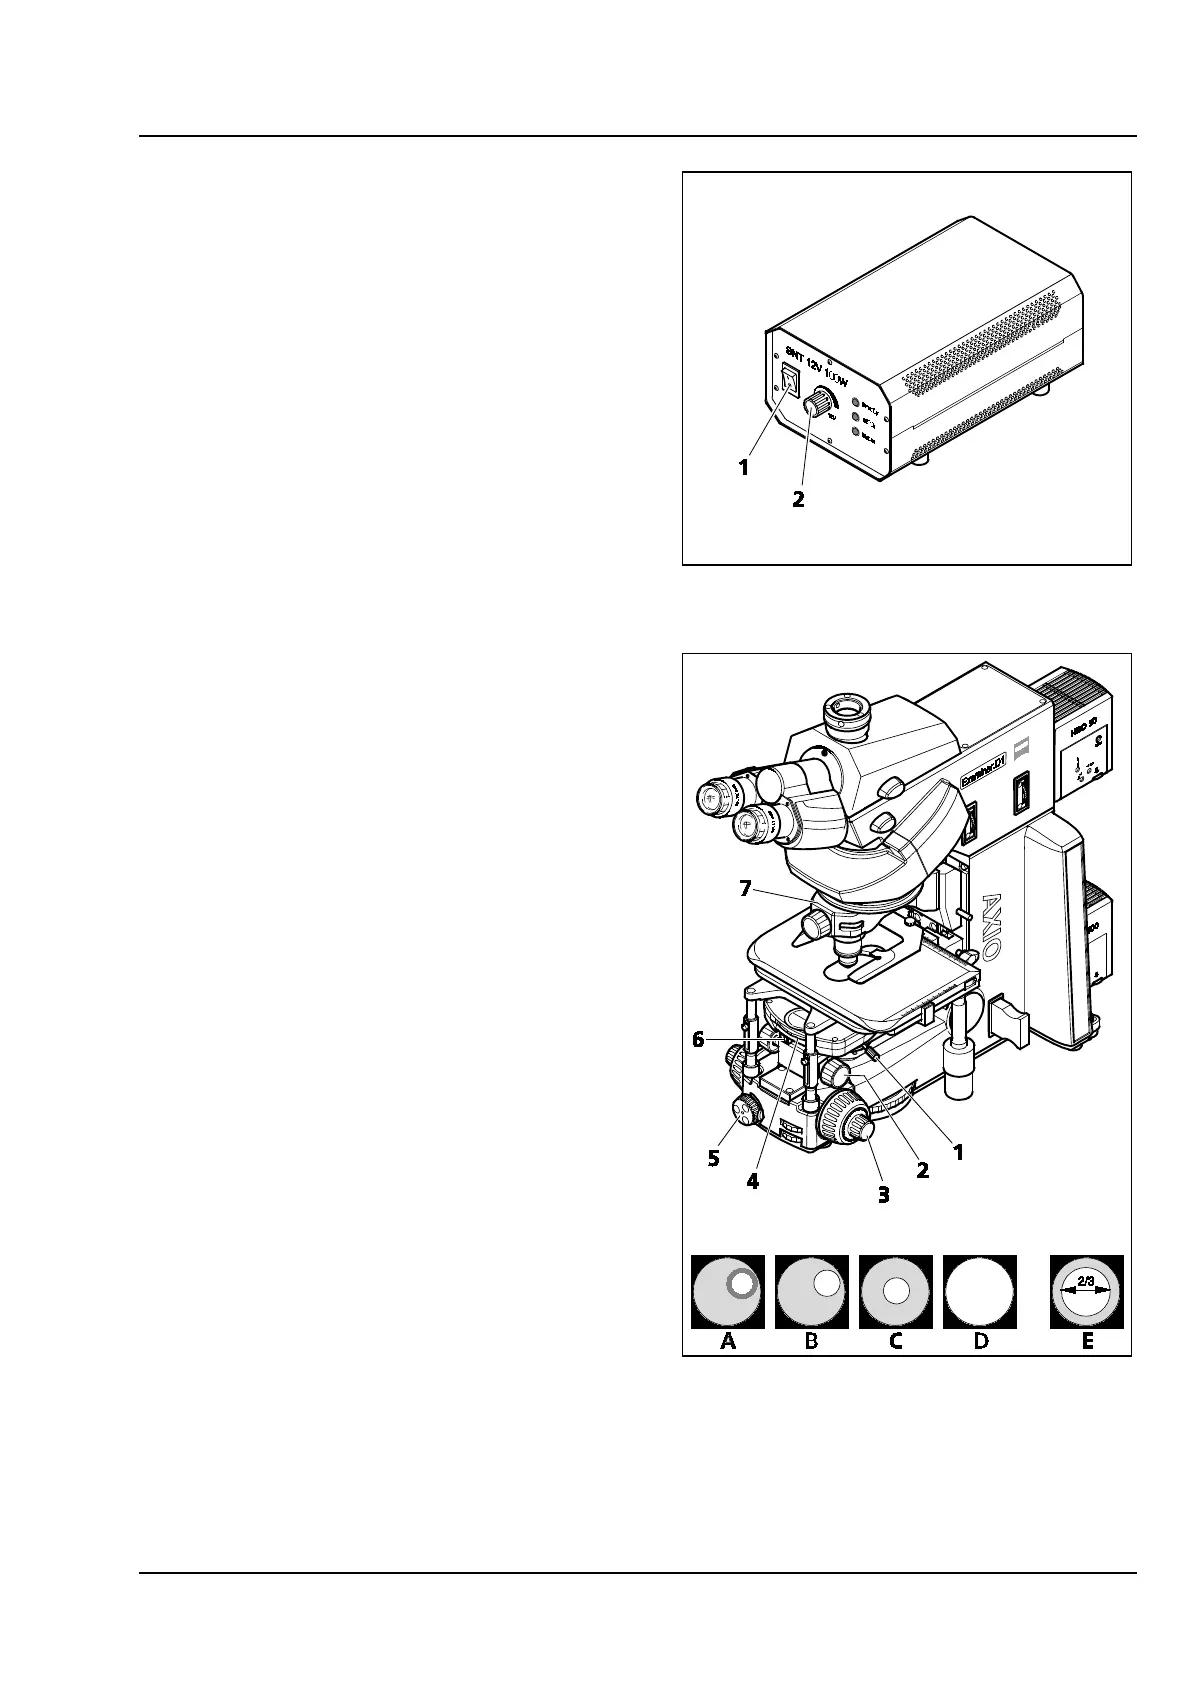
(Figure 4-1/1).
• Set image brightness using the light intensity
controller (Figure 4-1/2) at the external power
supply unit.
• Place a high-contrast specimen in the universal
mounting frame on the mechanical stage.
• Swing the front lens at the condenser in
position (for objectives ≥ 10x), and set the
condenser to the upper stop using the pinion
knob for height adjustment (Figure 4-2/2). The
stop must be set to ensure that the specimen
will not be lifted out of position by the
condenser.
• Switch the revolving disk of the condenser
(where existing) using the knurled ring
(Figure 4-2/4) to the H position for the bright
field.
• Swing the 10x objective in position at the
objective mount or objective nosepiece
(Figure 4-2/7), and focus on the specimen using
the pinion knob (Figure 4-2/3).
• Close the luminous-field diaphragm
(Figure 4-2/5) until the luminous-field
diaphragm also becomes visible in the visual
field (even if out of focus) (Figure 4-2/A).
• Lower the condenser using the pinion knob for
height adjustment until the bright field stop rim
appears sufficiently in focus (Figure 4-2/B).
• Center the luminous-field diaphragm using
both centering screws (Figure 4-2/1) at the
condenser carrier (Figure 4-2/C), and then open
it until the stop rim just disappears from the
visual field (Figure 4-2/D).
Figure 4-1 HAL 100 external power supply unit
Figure 4-2 Microscope settings on the Axio
Examiner in the transmitted-light
bright field