3. Disconnect the trackball from the trackball cable (on the UI side of the cable) and leave the
other end connected to the Trackball. Pull the cable free so that the top-right screw is visible.
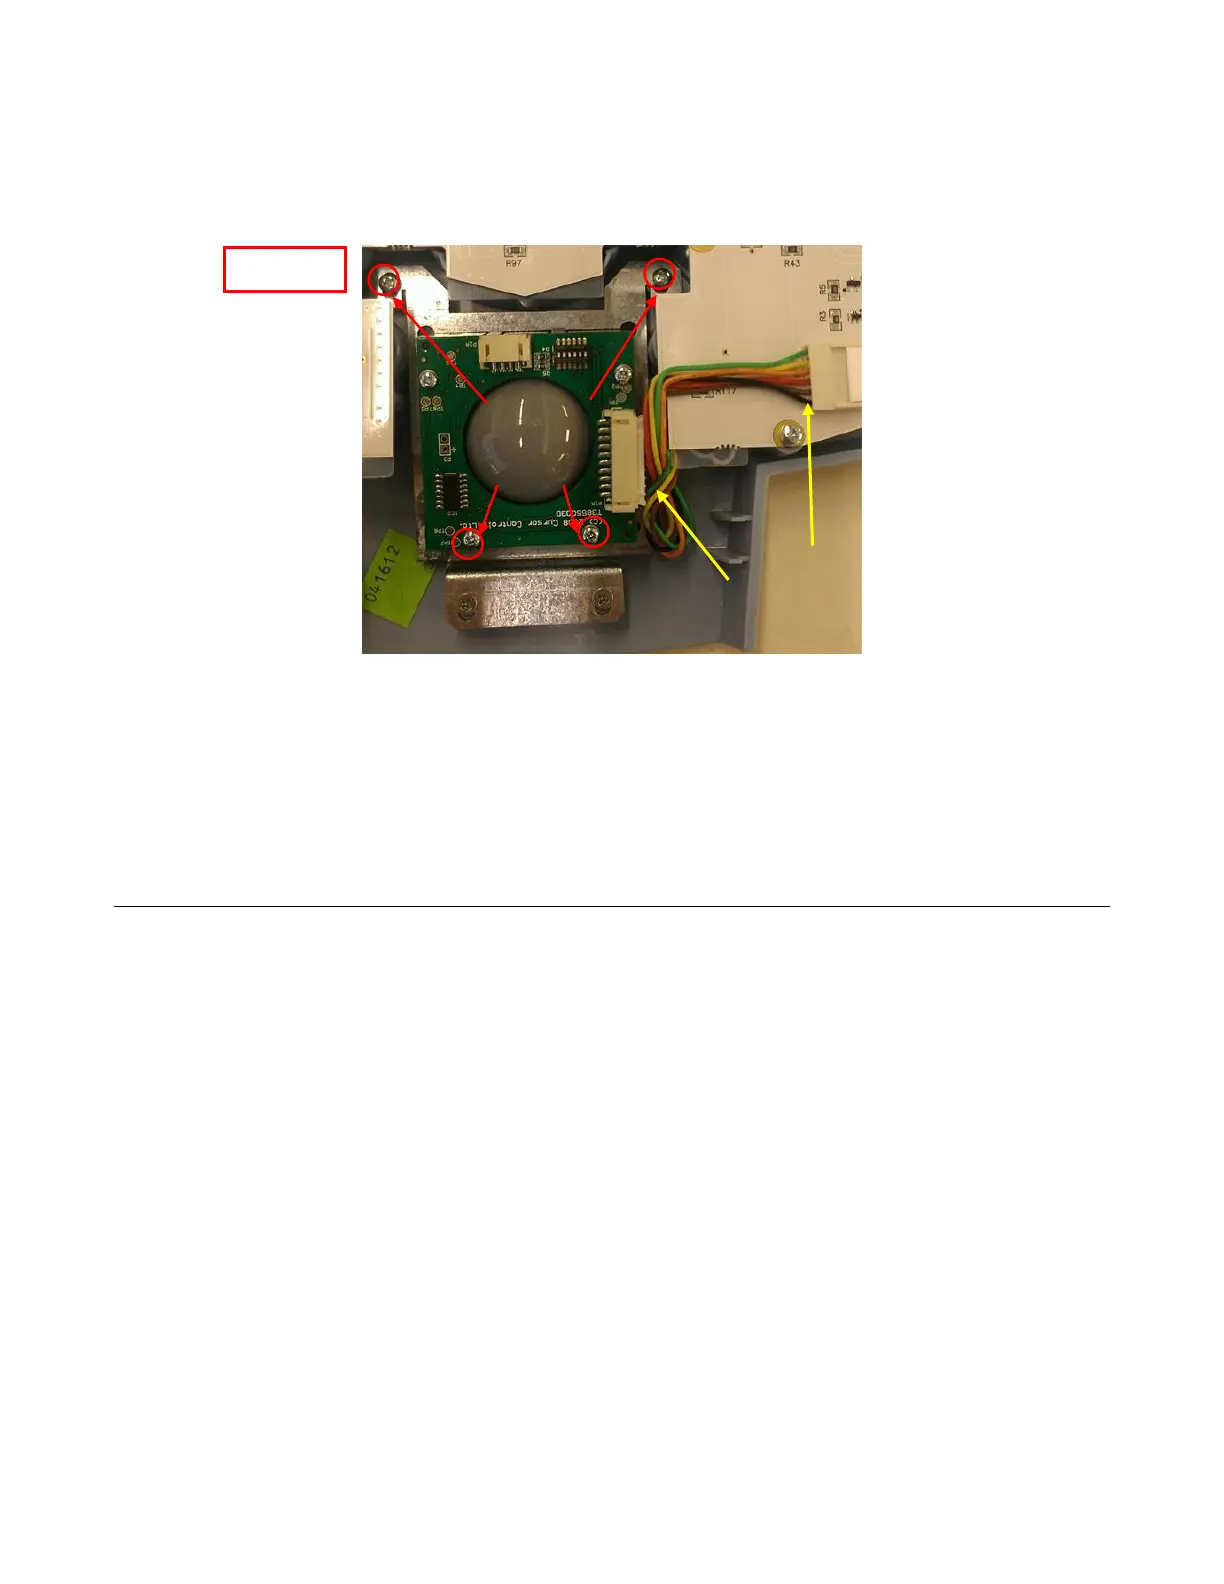
(for connector location - See Figure 3)
4. Remove the four (4) Phillips screws that retain the Trackball (See Figure 3)
5. Pull the trackball straight up and remove (do not lose the spacers for each of the trackball
bracket screws – 4 total)
6. Reinstall in the reverse order, taking care not to lose the trackball bracket spacers (these can be
adhered to the bracket if necessary to ease replacement)
7. Reinstall the User Interface assembly in reverse order of the removal steps listed above and
proceed to System Verification.