“DICOM” Configuration Procedure - Menus
NOTE: Refer to the “Survey Form” (on the previous pages), for detailed information of all the values that
are offered in the z.one
pro
menus, for selection within the various fields, in each of the following
configuration screens.
SITE SPECIFIC ”LOCATION” CONFIGURATION
The “Location” option supports cases where a User has a need to physically move their system from one
facility (location) to another on a regular basis. This function addresses cases where this movement
includes connecting to a unique network at each location, for sending to DICOM devices, and those network
connections consist of different IP addresses and/or target DICOM devices.
The “Location” feature allows for simultaneously having multiple configurations saved on the system, and
the ability to quickly toggle between those settings by merely changing “Locations” in the menu. The
parameters that are saved as a unique “Location” using this feature are as listed below:
- System Setup->Display->Institution page settings (Hospital Name)
- System Setup->Archive->Network page settings (IP Address, Gateway, Netmask)
- System Setup->Archive->DICOM->General page settings (AE Title, etc)
- System Setup->Archive->DICOM->Worklist page settings (Enabled server selection)
- System Setup->Archive->Store/Print page settings for devices using Print/Store buttons
- System Setup->Archive->Serial Port page settings (Calc report data via USB port)
1. To setup a new “Location”, first go to the setup pages listed above, and configure all of the settings (IP
Addresses, AE Titles, etc) applicable to the new site location.
2. Once all the Network/DICOM/Store-Print settings have been entered in these other menus, perform the
following steps to capture those settings as a new “Location”.
--------------------------------------------------------------------------------------------------------------------
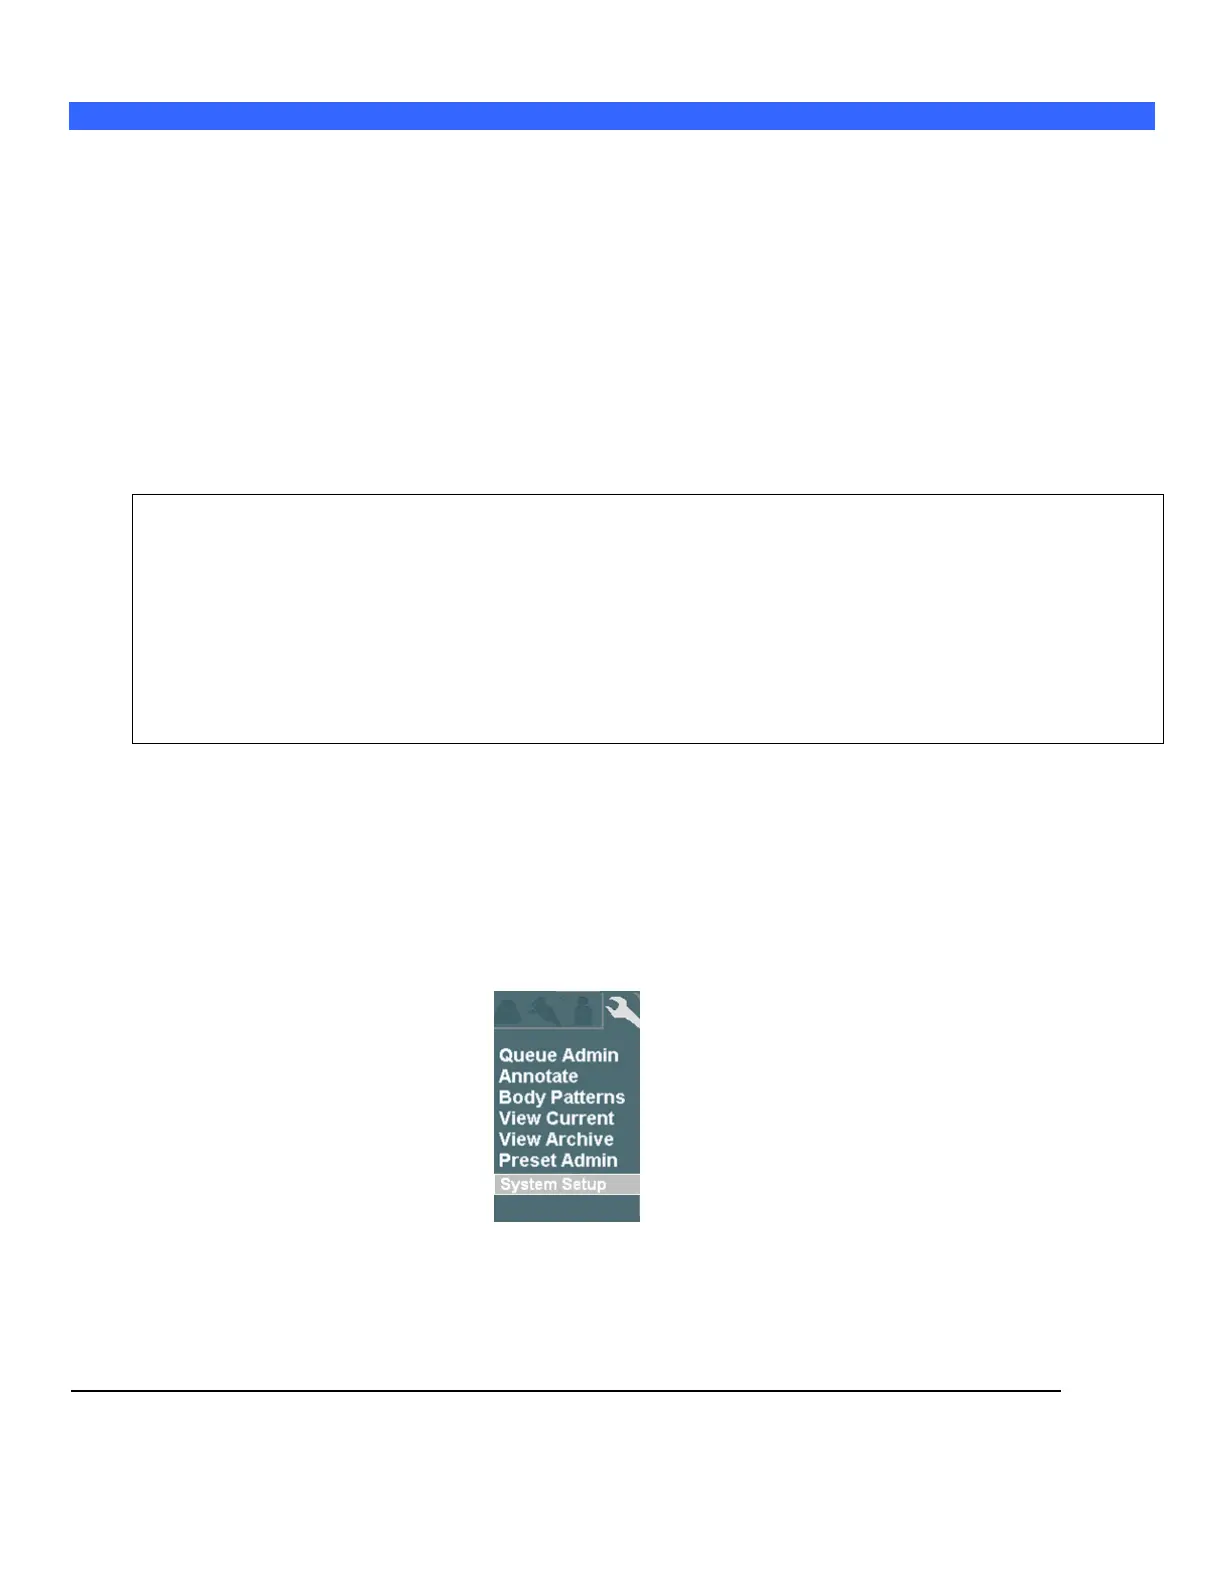
3. Use the Setup button and trackball to advance menu screen to select TOOLS menu
TOOLS Menu