Installation and Maintenance Manual - Aastra 5000 AMT/PTD/PBX/0058/4/6/EN
Maintenance 01/2011 Page 449
• Check that the expansion
ribbon cable has been
fitted (AXS/AXS12/
AXS6).
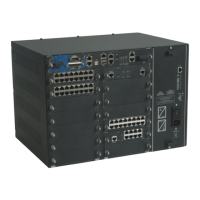
This operation concerns only the AXS/AXS12/AXS6 iPBX.
• Check that the expansion ribbon cable connecting the CPU card
to the expansion cable connector is connected.
• Install the expansion
cards.
Install the expansion cards from the old cabinet in the new cabinet.
AXL and AXS/AXS12/AXS6 iPBXs
• Slide the card along the card guides until it clicks into place.
• Lock the card in place using the 1/4 turn locks (see Figure 4.1 ).
• Install the cables exactly
like in the old cabinet.
• At the back of the RUCV card
• On the front panel of the expansion cards
• connect the expansion cabinet to the main cabinet using the
connection cable.
• Do not forget to wire the protective ground.
Attention : In the case of an AXS/AXS12/AXS62 cabinet,
do not connect the mains cable. The cabinet
must first be closed.
• Fit the new cabinet.
• Connect the mains cable
(once the cabinet is
closed if it is an AXS/
AXS12/AXS6 iPBX).
• Connect one end of the mains cable to the power supply module
of the expansion cabinet (AXL) or directly to the AXS/AXS12/
AXS6 cabinet and the other end to a grounded mains power
point.
Attention : The iPBX must be powered off when installing
the mains cable.
Never connect network lines while the mains
power cable is unplugged.
• Power on the iPBX. • Before powering on the cabinet, check that the following tasks
have been performed:
- all line connections are installed,
- all equipment has been connected to a grounded power point.
• Power on the iPBX:
- power on the expansion cabinet then the main cabinet.
- “I/O” switch on the power supply module set to “I”.
• Check the status of the indicators (see Sections 4.6 to check that
the functional statuses provided by the indicators are correct).
Table 23:
OPERATION DETAILS OF THE OPERATION / COMMENTS