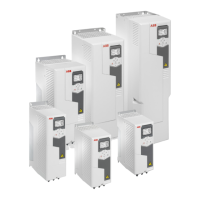
■ Electrical installation
WARNING!
Obey the instructions in chapter Safety instructions. If you ignore them, injury or
death, or damage to the equipment can occur. If you are not a qualified electrician,
do not do electrical work.
Make sure that the drive is disconnected from the input power during
installation. If the drive is already connected to the input power, wait for
5 minutes after disconnecting the input power.
Necessary tools and instructions
• Screwdriver and a set of suitable bits
• Cabling tools
Terminal designations
For more detailed information on the connectors, see section Technical data (page 264).
Analog inputs
DescriptionMarking
Analog input positive signalAI3+80
Analog input negative signalAI3-81
Cable shield connection (routed directly to output SCR)SCR82
Analog input positive signalAI4+83
Analog input negative signalAI4-84
Cable shield connection (routed directly to output SCR)SCR85
Analog outputs
DescriptionMarking
Analog output signalAO386
Analog ground potentialAGND87
Cable shield connection (routed directly to output SCR)SCR88
Analog output signalAO389
Analog ground potentialAGND90
Cable shield connection (routed directly to output SCR)SCR91
General cabling instructions
Obey the instructions given in chapter Planning the electrical installation.
Wiring
Connect the external control cables to the applicable module terminals. Ground the outer
shield of the cables 360 degrees under a grounding clamp on the grounding shelf of the
control cables.
Note:
Do not connect both ends of the cable shields directly to ground.
Analog input connection example
Optional I/O extension modules 261
 Loading...